Примечание.
Для доступа к этой странице требуется авторизация. Вы можете попробовать войти или изменить каталоги.
Для доступа к этой странице требуется авторизация. Вы можете попробовать изменить каталоги.
Это важно
Начиная с 1 мая 2025 г. Azure AD B2C больше не будет доступен для приобретения для новых клиентов. Дополнительные сведения см. в разделе "Вопросы и ответы".
Прежде чем начать, используйте селектор типа политики в верхней части этой страницы, чтобы выбрать тип политики, которую вы настроите. Azure Active Directory B2C предлагает два метода определения способа взаимодействия пользователей с вашими приложениями: с помощью предопределенных потоков пользователей или полностью настраиваемых пользовательских политик. Действия, которые необходимо выполнить, отличаются для каждого метода.
Фирменная символика и настройка пользовательского интерфейса, отображаемого azure Active Directory B2C (Azure AD B2C) для клиентов, помогает обеспечить простой пользовательский интерфейс в приложении. Эти возможности включают регистрацию, вход, редактирование профиля и сброс паролей. В этой статье вы настраиваете страницы Azure AD B2C с помощью шаблона страниц и фирменной символики компании.
Подсказка
Чтобы настроить другие аспекты страниц пользовательского потока за пределами шаблона страницы, логотипа баннера, фонового изображения или цвета фона, узнайте, как настроить пользовательский интерфейс с помощью ШАБЛОНА HTML.
Предпосылки
- Создайте поток пользователя, чтобы пользователи могли зарегистрироваться и входить в ваше приложение.
- Зарегистрируйте веб-приложение.
- Выполните действия, описанные в статье "Начало работы с настраиваемыми политиками в Active Directory B2C". В этом руководстве описано, как обновить пользовательские файлы политики для использования конфигурации клиента Azure AD B2C.
- Зарегистрируйте веб-приложение.
Обзор
Azure AD B2C предоставляет несколько встроенных шаблонов, которые можно выбрать, чтобы предоставить пользователям страницы профессионального вида. Эти шаблоны страниц также могут служить отправной точкой для собственной настройки с помощью функции фирменной символики компании .
Примечание.
Поддерживаемые браузеры для классического шаблона включают текущие и предыдущие версии Internet Explorer, Microsoft Edge, Google Chrome, Mozilla Firefox и Safari. Шаблоны Ocean Blue и Slate Gray могут иметь ограниченную поддержку более старых версий браузера, таких как Internet Explorer 11 и 10; рекомендуется протестировать приложение с помощью браузеров, которые вы планируете поддерживать.
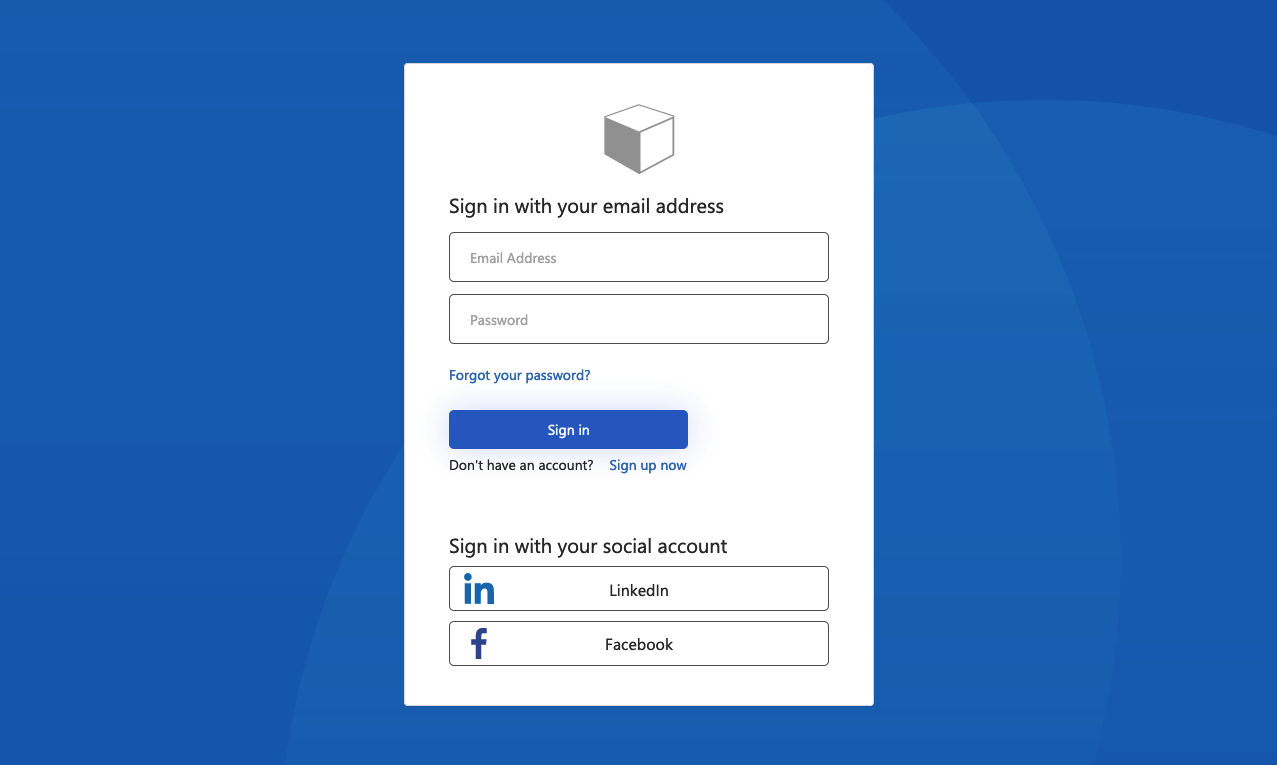
Океан Блю
Пример шаблона Ocean Blue, отображаемого на странице регистрации и входа:
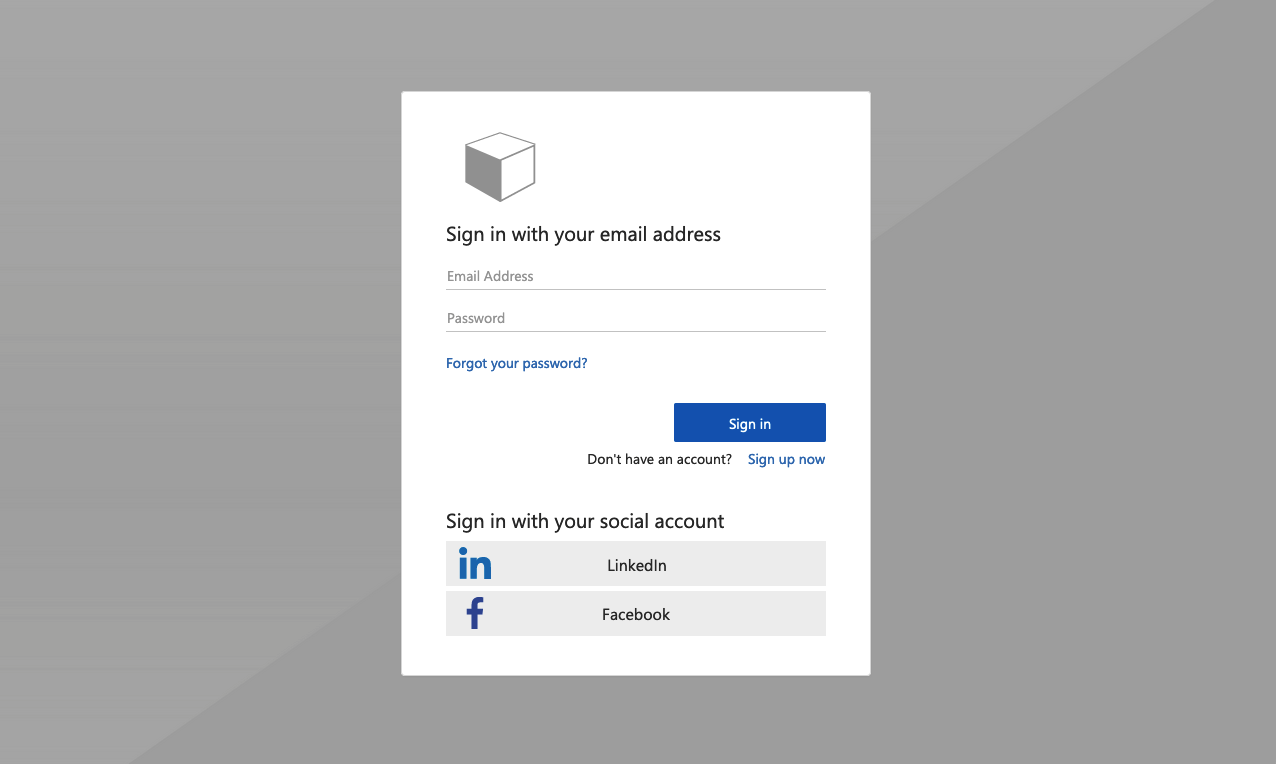
Сланцевый серый
Пример шаблона Slate Gray, отображаемого на странице входа в систему:
Классическое
Пример классического шаблона, отображаемого на странице входа в систему:

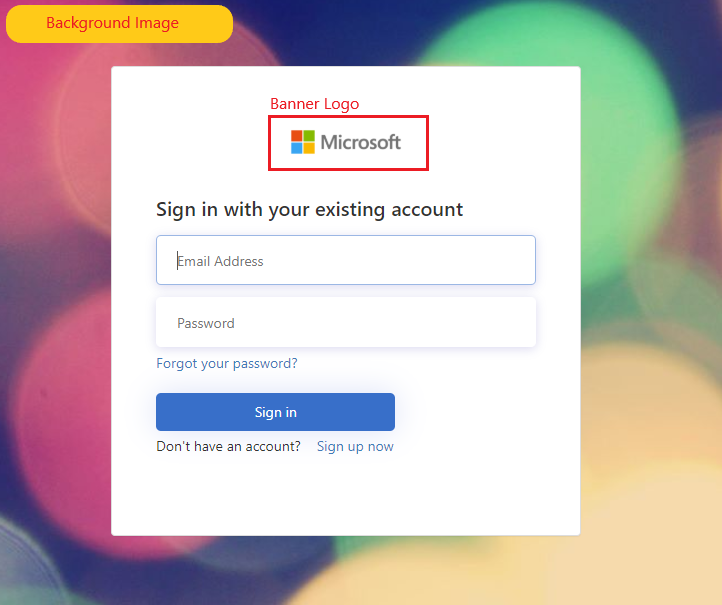
Фирменная символика компании
Вы можете настроить страницы Azure AD B2C с логотипом баннера, изображением фона и цветом фона с помощью фирменной символики компании Microsoft Entra ID. Фирменная символика компании включает регистрацию, вход, редактирование профиля и сброс паролей.
В следующем примере показана страница регистрации и входа с пользовательским логотипом, фоновым изображением с помощью шаблона Ocean Blue:
Выбор шаблона страницы
- Войдите на портал Azure.
- Если у вас есть доступ к нескольким клиентам, щелкните значок Настройки в верхнем меню, чтобы переключиться на клиент Azure AD B2C из меню Каталоги и подписки.
- В портале Azure найдите и выберите Azure AD B2C.
- Выберите потоки пользователей.
- Выберите поток пользователя, который требуется настроить.
- В разделе "Настройка" в меню слева выберите макеты страницы и выберите шаблон.
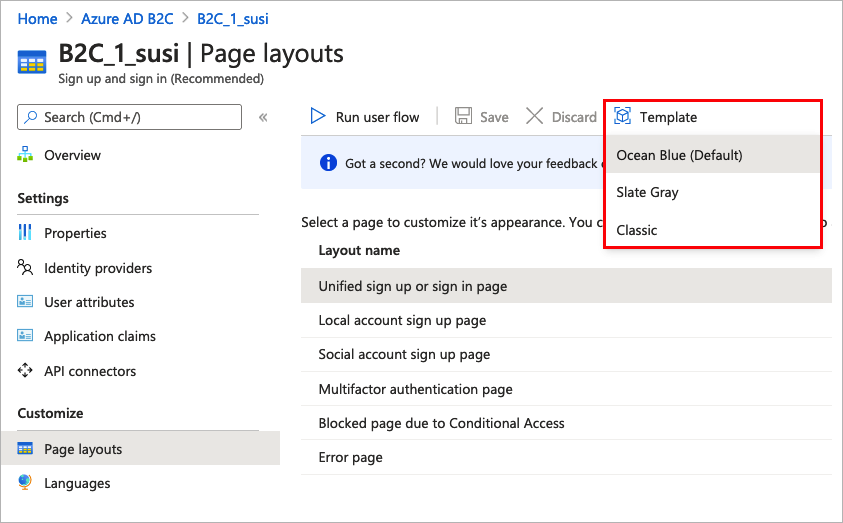
При выборе шаблона выбранный шаблон применяется ко всем страницам в потоке пользователя. Универсальный код ресурса (URI) для каждой страницы отображается в поле URI настраиваемой страницы .
Чтобы выбрать шаблон страницы, задайте LoadUri элемент определений контента. В следующем примере показаны идентификаторы определения контента и соответствующие LoadUri.
Океанский синий:
<ContentDefinitions>
  <ContentDefinition Id="api.error">
    <LoadUri>~/tenant/templates/AzureBlue/exception.cshtml</LoadUri>
  </ContentDefinition>
  <ContentDefinition Id="api.idpselections">
    <LoadUri>~/tenant/templates/AzureBlue/idpSelector.cshtml</LoadUri>
  </ContentDefinition>
  <ContentDefinition Id="api.idpselections.signup">
    <LoadUri>~/tenant/templates/AzureBlue/idpSelector.cshtml</LoadUri>
  </ContentDefinition>
  <ContentDefinition Id="api.signuporsignin">
    <LoadUri>~/tenant/templates/AzureBlue/unified.cshtml</LoadUri>
  </ContentDefinition>
  <ContentDefinition Id="api.selfasserted">
    <LoadUri>~/tenant/templates/AzureBlue/selfAsserted.cshtml</LoadUri>
  </ContentDefinition>
  <ContentDefinition Id="api.selfasserted.profileupdate">
    <LoadUri>~/tenant/templates/AzureBlue/selfAsserted.cshtml</LoadUri>
  </ContentDefinition>
  <ContentDefinition Id="api.localaccountsignup">
    <LoadUri>~/tenant/templates/AzureBlue/selfAsserted.cshtml</LoadUri>
  </ContentDefinition>
  <ContentDefinition Id="api.localaccountpasswordreset">
    <LoadUri>~/tenant/templates/AzureBlue/selfAsserted.cshtml</LoadUri>
  </ContentDefinition>
  <ContentDefinition Id="api.phonefactor">
    <LoadUri>~/tenant/templates/AzureBlue/multifactor-1.0.0.cshtml</LoadUri>
  </ContentDefinition>
</ContentDefinitions>
Грифельно-серый
<ContentDefinitions>
  <ContentDefinition Id="api.error">
    <LoadUri>~/tenant/templates/MSA/exception.cshtml</LoadUri>
  </ContentDefinition>
  <ContentDefinition Id="api.idpselections">
    <LoadUri>~/tenant/templates/MSA/idpSelector.cshtml</LoadUri>
  </ContentDefinition>
  <ContentDefinition Id="api.idpselections.signup">
    <LoadUri>~/tenant/templates/MSA/idpSelector.cshtml</LoadUri>
  </ContentDefinition>
  <ContentDefinition Id="api.signuporsignin">
    <LoadUri>~/tenant/templates/MSA/unified.cshtml</LoadUri>
  </ContentDefinition>
  <ContentDefinition Id="api.selfasserted">
    <LoadUri>~/tenant/templates/MSA/selfAsserted.cshtml</LoadUri>
  </ContentDefinition>
  <ContentDefinition Id="api.selfasserted.profileupdate">
    <LoadUri>~/tenant/templates/MSA/selfAsserted.cshtml</LoadUri>
  </ContentDefinition>
  <ContentDefinition Id="api.localaccountsignup">
    <LoadUri>~/tenant/templates/MSA/selfAsserted.cshtml</LoadUri>
  </ContentDefinition>
  <ContentDefinition Id="api.localaccountpasswordreset">
    <LoadUri>~/tenant/templates/MSA/selfAsserted.cshtml</LoadUri>
  </ContentDefinition>
  <ContentDefinition Id="api.phonefactor">
    <LoadUri>~/tenant/templates/MSA/multifactor-1.0.0.cshtml</LoadUri>
  </ContentDefinition>
</ContentDefinitions>
Классический:
<ContentDefinitions>
  <ContentDefinition Id="api.error">
    <LoadUri>~/tenant/default/exception.cshtml</LoadUri>
  </ContentDefinition>
  <ContentDefinition Id="api.idpselections">
    <LoadUri>~/tenant/default/idpSelector.cshtml</LoadUri>
  </ContentDefinition>
  <ContentDefinition Id="api.idpselections.signup">
    <LoadUri>~/tenant/default/idpSelector.cshtml</LoadUri>
  </ContentDefinition>
  <ContentDefinition Id="api.signuporsignin">
    <LoadUri>~/tenant/default/unified.cshtml</LoadUri>
  </ContentDefinition>
  <ContentDefinition Id="api.selfasserted">
    <LoadUri>~/tenant/default/selfAsserted.cshtml</LoadUri>
  </ContentDefinition>
  <ContentDefinition Id="api.selfasserted.profileupdate">
    <LoadUri>~/tenant/default/selfAsserted.cshtml</LoadUri>
  </ContentDefinition>
  <ContentDefinition Id="api.localaccountsignup">
    <LoadUri>~/tenant/default/selfAsserted.cshtml</LoadUri>
  </ContentDefinition>
  <ContentDefinition Id="api.localaccountpasswordreset">
    <LoadUri>~/tenant/default/selfAsserted.cshtml</LoadUri>
  </ContentDefinition>
  <ContentDefinition Id="api.phonefactor">
    <LoadUri>~/tenant/default/multifactor-1.0.0.cshtml</LoadUri>
  </ContentDefinition>
</ContentDefinitions>
Настройка фирменной символики компании
Чтобы настроить страницы потока пользователей, сначала настройте фирменную символику компании в идентификаторе Microsoft Entra ID, а затем включите его в потоках пользователей в Azure AD B2C.
Начните с установки логотипа баннера, фонового изображения и цвета фона в разделе Фирменный стиль компании.
- Войдите на портал Azure.
- Если у вас есть доступ к нескольким клиентам, щелкните значок Настройки в верхнем меню, чтобы переключиться на клиент Azure AD B2C из меню Каталоги и подписки.
- В портале Azure найдите и выберите Azure AD B2C.
- В разделе Управление выберите пункт Фирменная символика.
- Выполните действия, описанные на странице входа в Microsoft Entra в разделе "Добавление фирменной символики" вашей организации.
Помните об этом при настройке фирменной символики компании в Azure AD B2C:
- Фирменная символика компании в Azure AD B2C в настоящее время ограничена фоновым изображением, логотипом баннера и настройкой цвета фона . Другие свойства в области фирменной символики компании, например дополнительные параметры, не поддерживаются.
- На страницах потока пользователя цвет фона отображается перед загрузкой фонового изображения. Мы рекомендуем выбрать цвет фона, который тесно соответствует цветам в фоновом изображении для более плавной загрузки.
- Логотип баннера отображается в электронных письмах подтверждения, отправленных пользователям при запуске потока регистрации.
Включение фирменной символики компании на страницах потока пользователей
После настройки фирменной символики компании включите его в потоках пользователей.
- В меню слева на портале Azure выберите Azure AD B2C.
- В разделе "Политики" выберите потоки пользователей (политики).
- Выберите поток пользователя, для которого вы хотите включить фирменную символику компании. Фирменная символика компании не поддерживается для стандартного входа и стандартного редактирования типов потоков пользователей профиля.
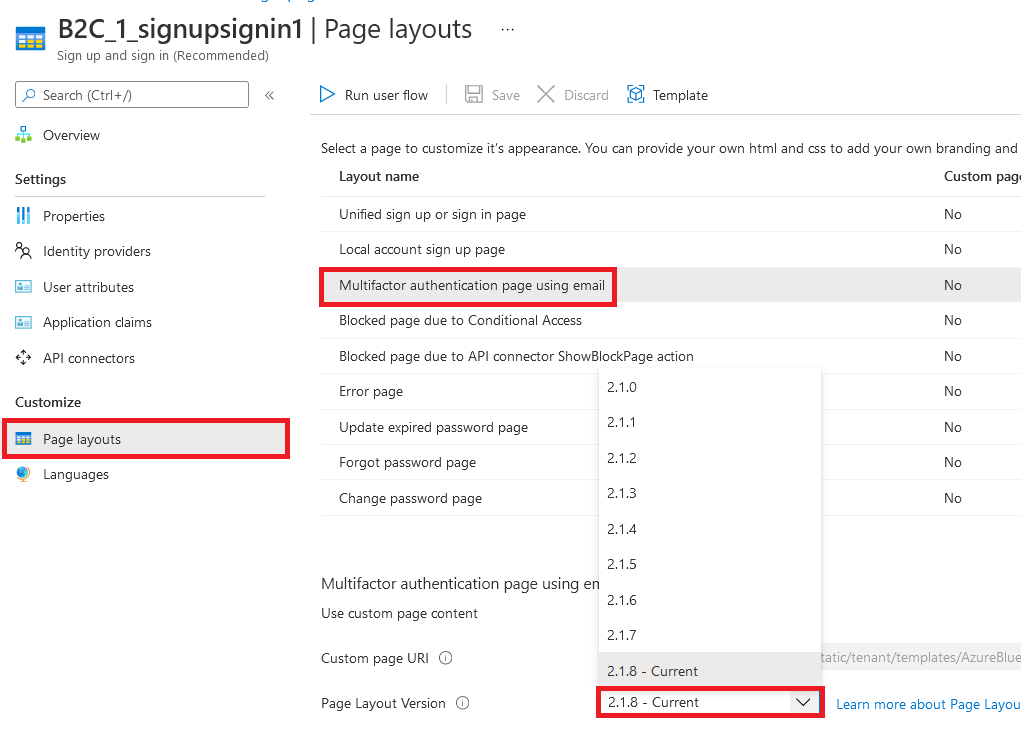
- В разделе "Настройка" выберите макеты страниц и выберите нужную страницу. Например, выберите страницу единой регистрации или входа.
- Для версии макета страницы (предварительная версия) выберите версию1.2.0 или более поздней.
- Выберите Сохранить.
Если вы хотите брендировать все страницы в потоке пользователя, задайте версию макета страницы для каждого макета страницы в потоке пользователя.
Включение фирменной символики компании на страницах пользовательской политики
После настройки фирменной символики компании включите ее в пользовательской политике. Настройте версию макета страницы с версией страницы contract для всех определений содержимого в пользовательской политике. Формат значения должен содержать слово contract: urn:com:microsoft:aad:b2c:elements:contract:page-name:version. Чтобы задать макет страницы в пользовательских политиках, использующих старое значение DataUri. Узнайте, как перейти на макет страницы с версией страницы для получения дополнительной информации.
В следующем примере показаны определения контента с соответствующим контрактом страницы и шаблоном страницы Ocean Blue :
<ContentDefinitions>
  <ContentDefinition Id="api.error">
    <LoadUri>~/tenant/templates/AzureBlue/exception.cshtml</LoadUri>
    <DataUri>urn:com:microsoft:aad:b2c:elements:contract:globalexception:1.2.0</DataUri>
  </ContentDefinition>
  <ContentDefinition Id="api.idpselections">
    <LoadUri>~/tenant/templates/AzureBlue/idpSelector.cshtml</LoadUri>
    <DataUri>urn:com:microsoft:aad:b2c:elements:contract:providerselection:1.2.0</DataUri>
  </ContentDefinition>
  <ContentDefinition Id="api.idpselections.signup">
    <LoadUri>~/tenant/templates/AzureBlue/idpSelector.cshtml</LoadUri>
    <DataUri>urn:com:microsoft:aad:b2c:elements:contract:providerselection:1.2.0</DataUri>
  </ContentDefinition>
  <ContentDefinition Id="api.signuporsignin">
    <LoadUri>~/tenant/templates/AzureBlue/unified.cshtml</LoadUri>
    <DataUri>urn:com:microsoft:aad:b2c:elements:contract:unifiedssp:1.2.0</DataUri>
  </ContentDefinition>
  <ContentDefinition Id="api.selfasserted">
    <LoadUri>~/tenant/templates/AzureBlue/selfAsserted.cshtml</LoadUri>
    <DataUri>urn:com:microsoft:aad:b2c:elements:contract:selfasserted:1.2.0</DataUri>
  </ContentDefinition>
  <ContentDefinition Id="api.selfasserted.profileupdate">
     <LoadUri>~/tenant/templates/AzureBlue/selfAsserted.cshtml</LoadUri>
    <DataUri>urn:com:microsoft:aad:b2c:elements:contract:selfasserted:1.2.0</DataUri>
  </ContentDefinition>
  <ContentDefinition Id="api.localaccountsignup">
     <LoadUri>~/tenant/templates/AzureBlue/selfAsserted.cshtml</LoadUri>
    <DataUri>urn:com:microsoft:aad:b2c:elements:contract:selfasserted:1.2.0</DataUri>
  </ContentDefinition>
  <ContentDefinition Id="api.localaccountpasswordreset">
     <LoadUri>~/tenant/templates/AzureBlue/selfAsserted.cshtml</LoadUri>
    <DataUri>urn:com:microsoft:aad:b2c:elements:contract:selfasserted:1.2.0</DataUri>
  </ContentDefinition>
  <ContentDefinition Id="api.phonefactor">
    <LoadUri>~/tenant/templates/AzureBlue/multifactor-1.0.0.cshtml</LoadUri>
    <DataUri>urn:com:microsoft:aad:b2c:elements:contract:multifactor:1.2.0</DataUri>
  </ContentDefinition>
</ContentDefinitions>
Переупорядочение полей входных данных в форме регистрации
Чтобы изменить порядок полей ввода на странице регистрации для формы локальных учетных записей, выполните следующие действия.
- Войдите на портал Azure.
- Если у вас есть доступ к нескольким клиентам, щелкните значок Настройки в верхнем меню, чтобы переключиться на клиент Azure AD B2C из меню Каталоги и подписки.
- В портале Azure найдите и выберите Azure AD B2C.
- В меню слева выберите потоки пользователей.
- Выберите пользовательский поток (только для локальных учетных записей), для которого вы хотите изменить порядок полей ввода.
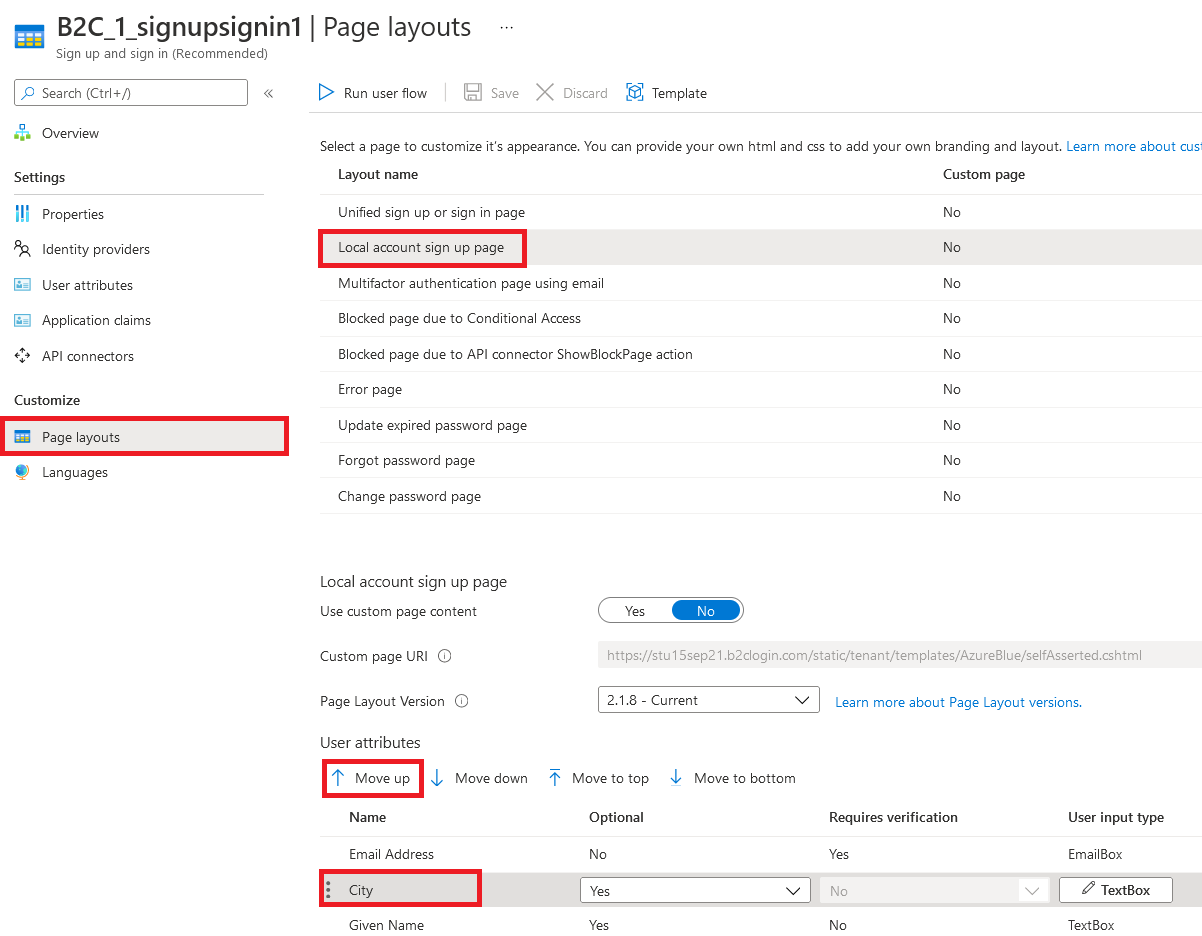
- В меню слева выберите макеты страниц
- В таблице выберите строку страница регистрации локальной учетной записи.
- В разделе "Атрибуты пользователя" выберите поле ввода, которое нужно изменить, и перетащите (вверх или вниз) и используйте элементы управления "Переместить вверх " или "Переместить вниз " для достижения требуемого порядка.
- В верхней части страницы щелкните Сохранить.
Связанный контент
Дополнительные сведения о настройке пользовательского интерфейса приложений см. в разделе "Настройка пользовательского интерфейса приложения" в Azure Active Directory B2C.