Note
Access to this page requires authorization. You can try signing in or changing directories.
Access to this page requires authorization. You can try changing directories.
Transform your Microsoft Lists or SharePoint data into a powerful mobile and web app in minutes with no coding required. This article shows you how to create a fully functional canvas app that connects directly to your existing lists, giving you and your team an intuitive way to view, edit, and manage data on any device.
You can also connect to on-premises SharePoint lists through a data gateway.
You can create an app by using a list in SharePoint or Lists in two ways:
- Sign in to Power Apps and then create an app by connecting to a list in SharePoint from Power Apps.
- Create an app directly from a list in SharePoint or Lists.
When you create the app, Power Apps Studio opens and shows an app with three screens:
- Browse screen: Scroll through all items in the list.
- Details screen: Show all information about a single item in the list.
- Edit screen: Create an item or update information about an existing item.
Watch this video to learn how to create a canvas app from a list.
Note
When you create or view a list in SharePoint, you're automatically redirected to Microsoft Lists. The list is always available in both Microsoft Lists and SharePoint. Learn more in What is a list in Microsoft 365?
Prerequisites
Use SharePoint and Power Apps with a subscription to Microsoft 365 and Microsoft Power Platform.
Create a list
Before you create an app from a list, create a list.
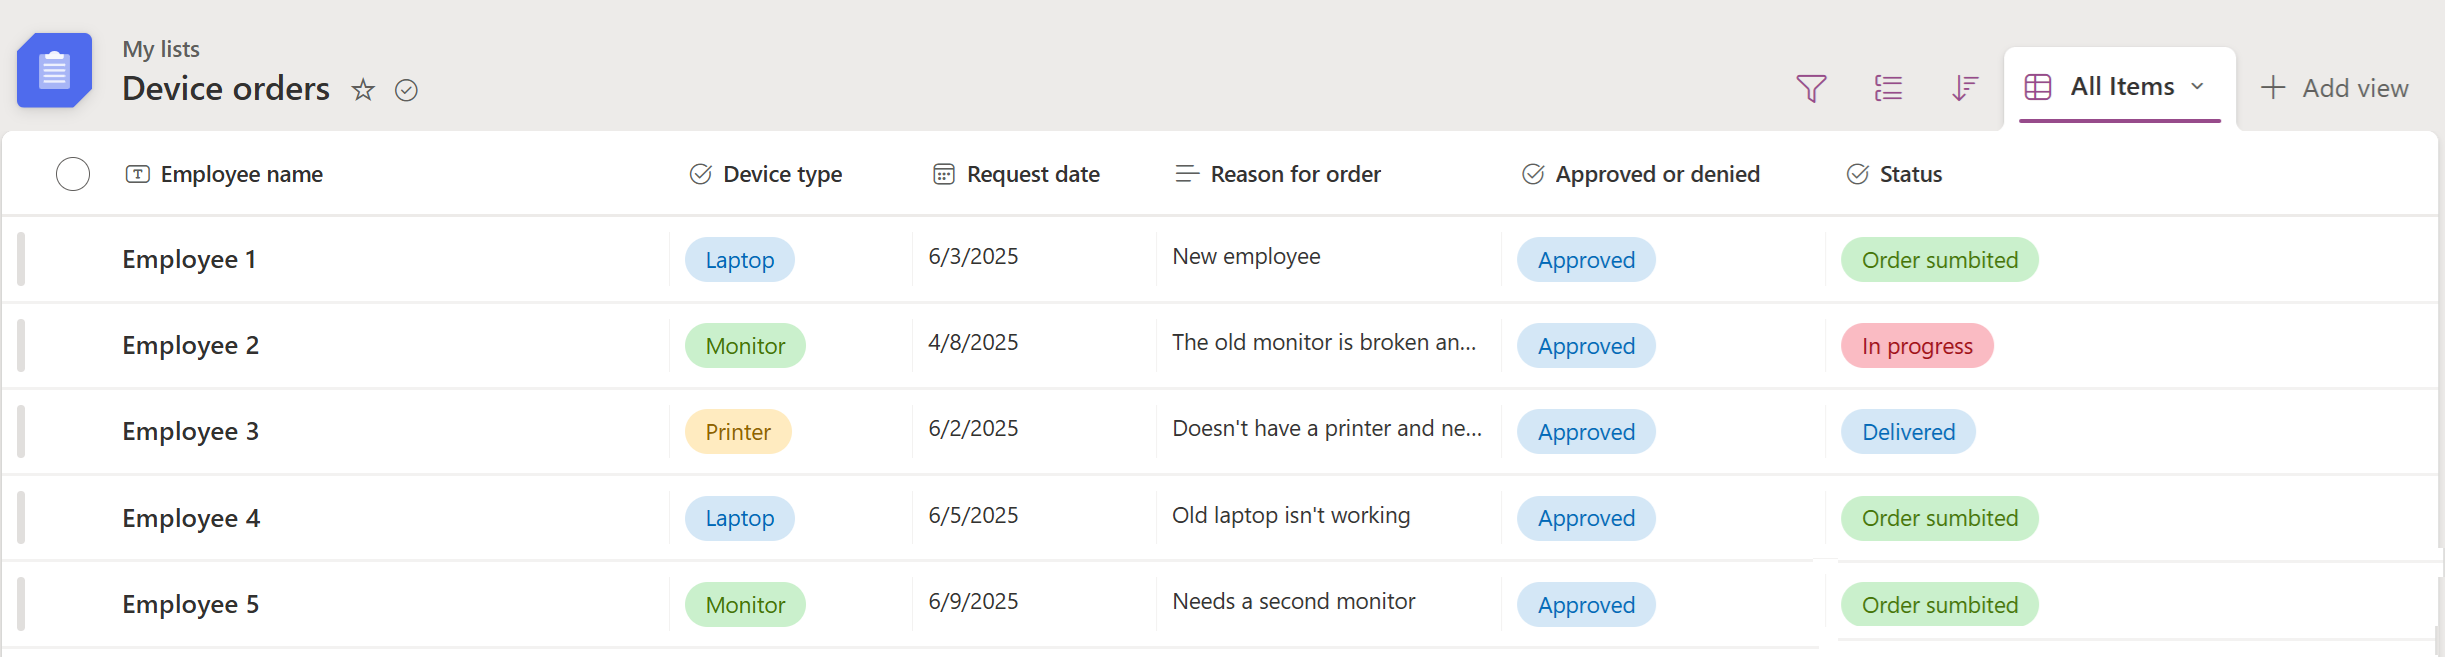
For this example, create a list to track device orders for your company. Include the following columns with sample data:
Employee name
Device type
Request date
Reason for the order
Approved or denied
Status

Use a list in SharePoint or Lists to create an app
Now, use the list that you created to build an app from the list.
Sign in to Power Apps.
From the home screen, select Start with data.
On the Create an app page, select SharePoint.
Enter the SharePoint URL, and then select Connect. Or, select a recent site.
Select a list or select the sample list you created earlier, and then select Create app.
The app opens in Power Apps Studio, where you design, build, and manage the app. For more information, see Understand Power Apps Studio.
Select the Preview the app icon to see how the app works.
Save and publish your app.
When you add or edit information in the app, the information in SharePoint or Lists also updates.
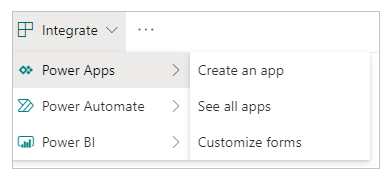
Create an app directly from a list in SharePoint or Lists
Before you create the app, make sure you create a list.
Sign in to SharePoint:
https://yourorganizationname.sharepoint.comOpen a list in either SharePoint or Lists. If you open the list from SharePoint, you're taken to Lists to view the list.
Select Integrate > Power Apps > Create an app.
Select the Preview the app icon to see how the app works.
Save and publish your app.
When you add or edit information in the app, the information in SharePoint or Lists also updates.
Manage your app
After you create an app, you can play, save, share, and publish it.
Learn more about these app actions in the Power Apps Studio interface.