Note
Access to this page requires authorization. You can try signing in or changing directories.
Access to this page requires authorization. You can try changing directories.
Configure your canvas app with formulas that not only calculate values and perform other tasks (as they do in Excel) but also respond to user input (as an app requires).
- In Excel, you build formulas that populate cells and create tables and charts.
- In Power Apps, you build similar formulas as you configure controls instead of cells. In addition, you build formulas that apply specifically to apps instead of spreadsheets.
Power Apps uses Power Fx, an open-source, low-code formula language based on Excel that you can use to express logic, data manipulation, and app behavior.
For example, you build a formula to determine how your app responds when users select a button, adjust a slider, or provide other input. These formulas might show a different screen, update a data source that's external to the app, or create a table that contains a subset of the data in an existing table.
You can use formulas for a wide variety of scenarios. For example, you can use your device's GPS, a map control, and a formula that uses Location.Latitude and Location.Longitude to display your current location. As you move, the map automatically tracks your location.
This article provides an overview of working with formulas. Browse the formula reference for more details and the complete list of functions, operators, and other building blocks you can use.
Prerequisites
- Sign up for Power Apps and sign in with your credentials.
- Learn how to configure a control in Power Apps.
Use Power Fx formula bar
The Power Fx formula bar at the top of Power Apps Studio is where you write and edit formulas for your app. It provides IntelliSense—autocomplete suggestions, syntax highlighting, and inline error messages—to help you build formulas faster and with fewer mistakes.
- Open your app for editing in Power Apps Studio.
- Select any control or screen in the canvas.
- In the property drop-down on the left side of the formula bar, select the property you want to set a formula for (for example, Text or OnSelect).
- Select the formula bar and start typing your formula. As you type, IntelliSense shows suggestions for functions and properties that match your input.
- Select a suggestion or continue typing until your formula is complete.
Tip
Use Copilot formula suggestions to generate or explain formulas using natural language. In the formula bar, select the Copilot icon (when available) and describe what you want the formula to do.
Show a value
In Excel, you can enter a specific piece of data, such as the number 42 or the phrase Hello World, by typing it into a cell. That cell shows the data exactly as you type it. In Power Apps, you can similarly specify a piece of data that doesn't change by setting the Text property of a label to the exact sequence of characters that you want, surrounded by double quotation marks.
Create a blank canvas app.
The formula bar sits at the top of the screen.

- Property list: Each control and screen has a set of properties. Use this list to select a specific property.
- Formula: The formula to be calculated for this property, made up of values, operators, and functions. As you type, IntelliSense helps you with recommendations for formula, syntax, and errors.
- Selected control: In the formula bar, you can see and edit properties for the selected control or for the screen if no controls are selected.
Add a Text control to the screen.
When you add a text label, the property list automatically shows the Text property, which drives what the control shows. By default, the value of this property is "Text".
Set the value of the Text property to "Hello World" by typing that string, surrounded by double quotes, into the formula bar:

The label reflects this new value as you type it. The screen might show yellow exclamation-point icons while you type. These icons indicate errors, but they go away when you finish entering a valid value. For example, a string without double quotation marks on both ends isn't valid.
In Excel, you can show a number, such as 42, by typing it into a cell or by typing a formula that resolves to that number, such as =SUM(30,12). In Power Apps, you can achieve the same effect by setting the Text property of a control, such as a label, to 42 or Sum(30,12). The cell and the label show that number regardless of what else changes in the worksheet or the app.
Note
In Power Apps, you don't precede a formula with an equals sign or a plus sign as you do in Excel. The formula bar treats anything you type there as a formula by default. You also don't surround a formula with double quotation marks ("), as you did earlier to specify a string of text.
In the Text property of the label, replace "Hello World" with Sum(1,2,3).
While you type, the formula bar helps you by showing the description and the expected arguments for this function. As with the final double quotation mark in "Hello World", the screen shows a red cross, showing an error, until you type the final parenthesis of this formula.

Completed formula with the final parenthesis added:


Change a value based on input
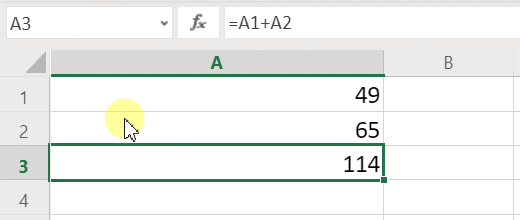
In Excel, you type =A1+A2 into a cell to show the sum of whatever values cells A1 and A2 contain. If either or both of those values change, the cell that contains the formula automatically shows the updated result.
In Power Apps, you can achieve a similar result by adding controls to a screen and setting their properties. This example shows a text label named Text1 and two Text input controls, named TextInput1 and TextInput2. Add a formula to the Text1 control so that when you enter a number into TextInput1 and TextInput2, the values are added together and displayed in Text1.

Regardless of what numbers you type in the text-input controls, the text label always shows the sum of those numbers because its Text property is set to this formula: TextInput1.Text + TextInput2.Text.
In Excel, you can use conditional-formatting formulas to show, for example, negative values in red. In Power Apps, you can use formulas to determine not only the primary value of a control but also properties such as color.
In this example, a formula for the Color property of the label automatically shows negative values in red. The If function should look familiar from Excel:
If( Value(Label1.Text) < 0, Color.Red, Color.Black )

Change a color based on user input
You can configure your app with formulas so that users can change your app's appearance or behavior. For example, you can create a filter to show only data that contains a string of text that the user specifies, or let users sort a set of data based on a certain column.
In this example, let users change the background color of the screen by adjusting sliders.
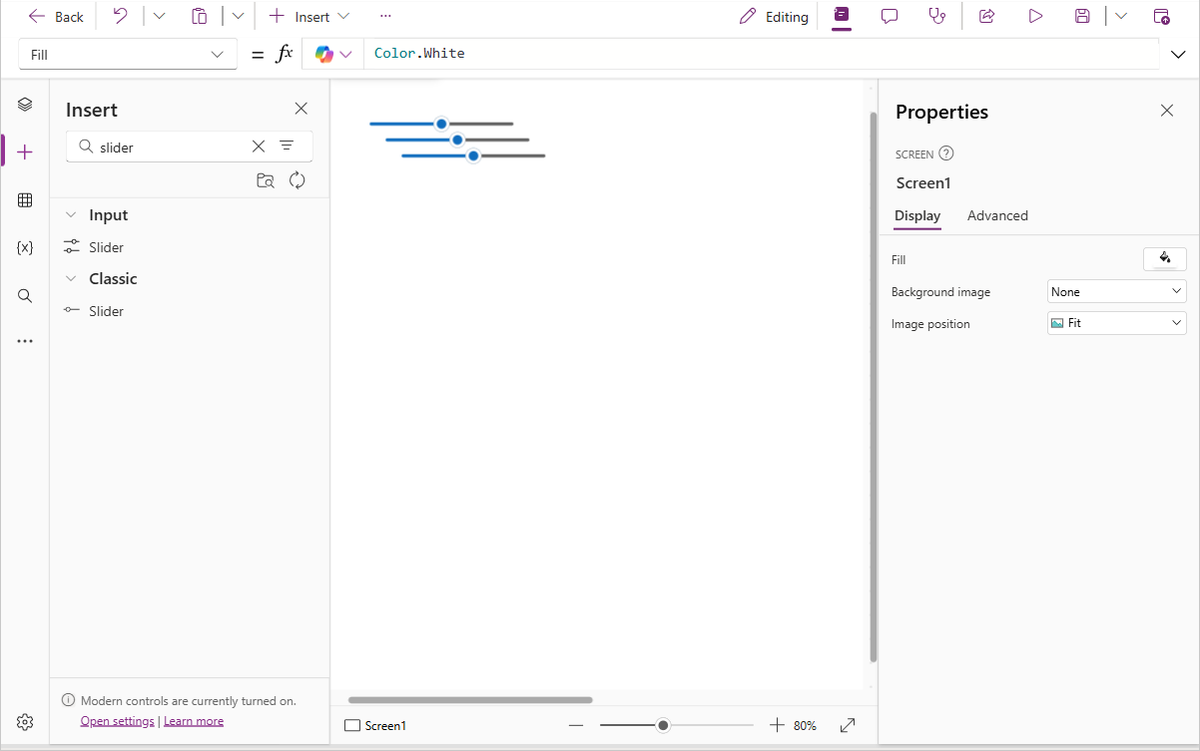
Remove the controls from the previous procedures, or create a blank app as you did previously, and add three slider controls to it. Search for Slider in the search box of the Insert pane, then select Slider to add a slider to the canvas. Repeat to add three sliders.
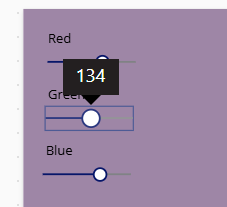
Arrange the sliders so they don't overlap, add three labels, and configure the labels to show Red, Green, and Blue text.
Set the Max property of each slider to 255 (the default is 100), which is the maximum value of a color component for the RGBA function.

Select the screen to deselect any control, and then set the screen's Fill property to this formula: RGBA( Slider1.Value, Slider2.Value, Slider3.Value, 1 ). Your screen turns dark gray, reflecting the sliders' current positions.
In the formula, you can access control properties by using the property selector. For example, Slider1.Value refers to the slider's Value property, which represents where the user placed the slider between the Min and Max values.
Select Preview (F5) and adjust the sliders to see how each one changes the background color of the screen.
As each slider changes, the RGBA formula is recalculated and the screen color updates immediately.


Manage app behavior
You can use formulas not only to perform calculations and change appearance, but also to take action. For example, you can set the OnSelect property of a button to a formula that includes the Navigate function. When a user selects that button, the screen that you specify in the formula appears.
You can use some functions, such as Navigate and Collect, only in behavior formulas. The formula reference calls out if a function can only be used in this context.
You can take more than one action in a behavior formula by separating functions with a semicolon (;). For example, you might update a context variable, push data to a data source, and then navigate to another screen—all in a single OnSelect formula.
Tip
If you're not sure which function to use for a behavior, try describing the action in plain language to Copilot in the formula bar. For example, type "navigate to Screen2 and collect the form data" and Copilot suggests the appropriate formula.
View a list of properties by category
The properties list shows properties alphabetically, but you can also view all the properties of a control organized by category. Select a control—for example, Text1—and then select the Advanced tab in the Properties pane to see a full categorized list of properties for that control.

You can edit formulas directly within this view. Use the property search box to quickly find and change a property's behavior or appearance.
Formula syntax
As you type a formula in the formula bar, different syntax elements appear in different colors to improve readability and help you understand long formulas. Here's the color code list in Power Apps.
