Note
Access to this page requires authorization. You can try signing in or changing directories.
Access to this page requires authorization. You can try changing directories.
You can import organizational data into Microsoft 365 with the SAP SuccessFactors connector. Here's how.
Prerequisites
Before you can set up a connection between SAP SuccessFactors and Microsoft 365, you'll need the following information about your SAP SuccessFactors environment from your SAP SuccessFactors Administrator.
For direct connections
- Company ID
- DataCenter URL
- User ID
- API key
- Completed steps within SAP SuccessFactors described below in Step 2
For connections via middleware
If you're hosting a Proxy API, we support client secret-based authentication. Ask your Proxy API owner to provide these credentials: Token URL; Proxy URL; ClientID; and Client Secret. These are used to fetch an access token to call the Proxy API.
The Proxy API should forward requests to your SAP SuccessFactors instance, accept OData requests such as $expand and $select, and return responses unchanged in structure.
Steps
1. Set up your SAP SuccessFactors connection
Applies to: Microsoft 365 Global Administrator
Start the import from the Data Connections page on the Organizational Data in Microsoft 365 page (Home > Setup > Migration and imports > Organizational Data in Microsoft 365 > Data Connections).
- You can also start the import by selecting Copilot on the left, then select Agents & connectors.
- Under Connectors, select Your connections.
- Select Add connection.
- At the bottom of the page, under People, and next to SAP SuccessFactors, select Add.
Select Get started (if this is the first time you're importing data), or New import (if you've already imported data).
On the Select connection type page, select Start SuccessFactors setup.
Select the apps and services with which you'd like to share data. By default, all public reserved attributes are shared across Microsoft 365 and Viva apps and services. Use this page to select apps with which to share application-specific and custom data. You can change your selections at any time within Settings. Under each app, select View app specific attributes to see a list of attributes that can be accepted by that app. You'll set attribute-specific access later. When you're done, at the bottom, select Next.

Choose how you'd like to connect to SAP SuccessFactors. You can connect directly using a certificate, or through a secure intermediary layer.

If you're connecting directly
On the Download your SAP SuccessFactors certificate page, select Download certificate. An X.509 certificate file will download called "publicKey.pem". Open the file in a text editor and copy its contents. Share this with the SAP SuccessFactors admin.
Read the acknowledgment note and select Next.
On the right, select Download default mapping to access a JSON mapping file, which includes the default attribute mapping for the apps with which you're sharing data. To customize how you map your data to each app's required attributes, you can edit the file. For custom mapping, you'll use this file in a later step.
If you're connecting through middleware
There's several types of information you'll need from your proxy API owner, such as Token URL, Proxy URL, Client ID, and Client Secret. Refer to the on-screen guidance for more details.
On the right, select Download default mapping to access a JSON mapping file, which includes the default attribute mapping for the apps with which you're sharing data. To customize how you map your data to each app's required attributes, you can edit the file. For custom mapping, you'll use this file in a later step.
Under Set up SAP SuccessFactors connection:
Enter a name for your connection.
If connecting directly, contact your SAP SuccessFactors admin to complete the steps in SAP SuccessFactors described below in Step 2. Enter the SAP SuccessFactors Company ID, DataCenter URL, User ID, and API key provided by the SAP SuccessFactors admin.
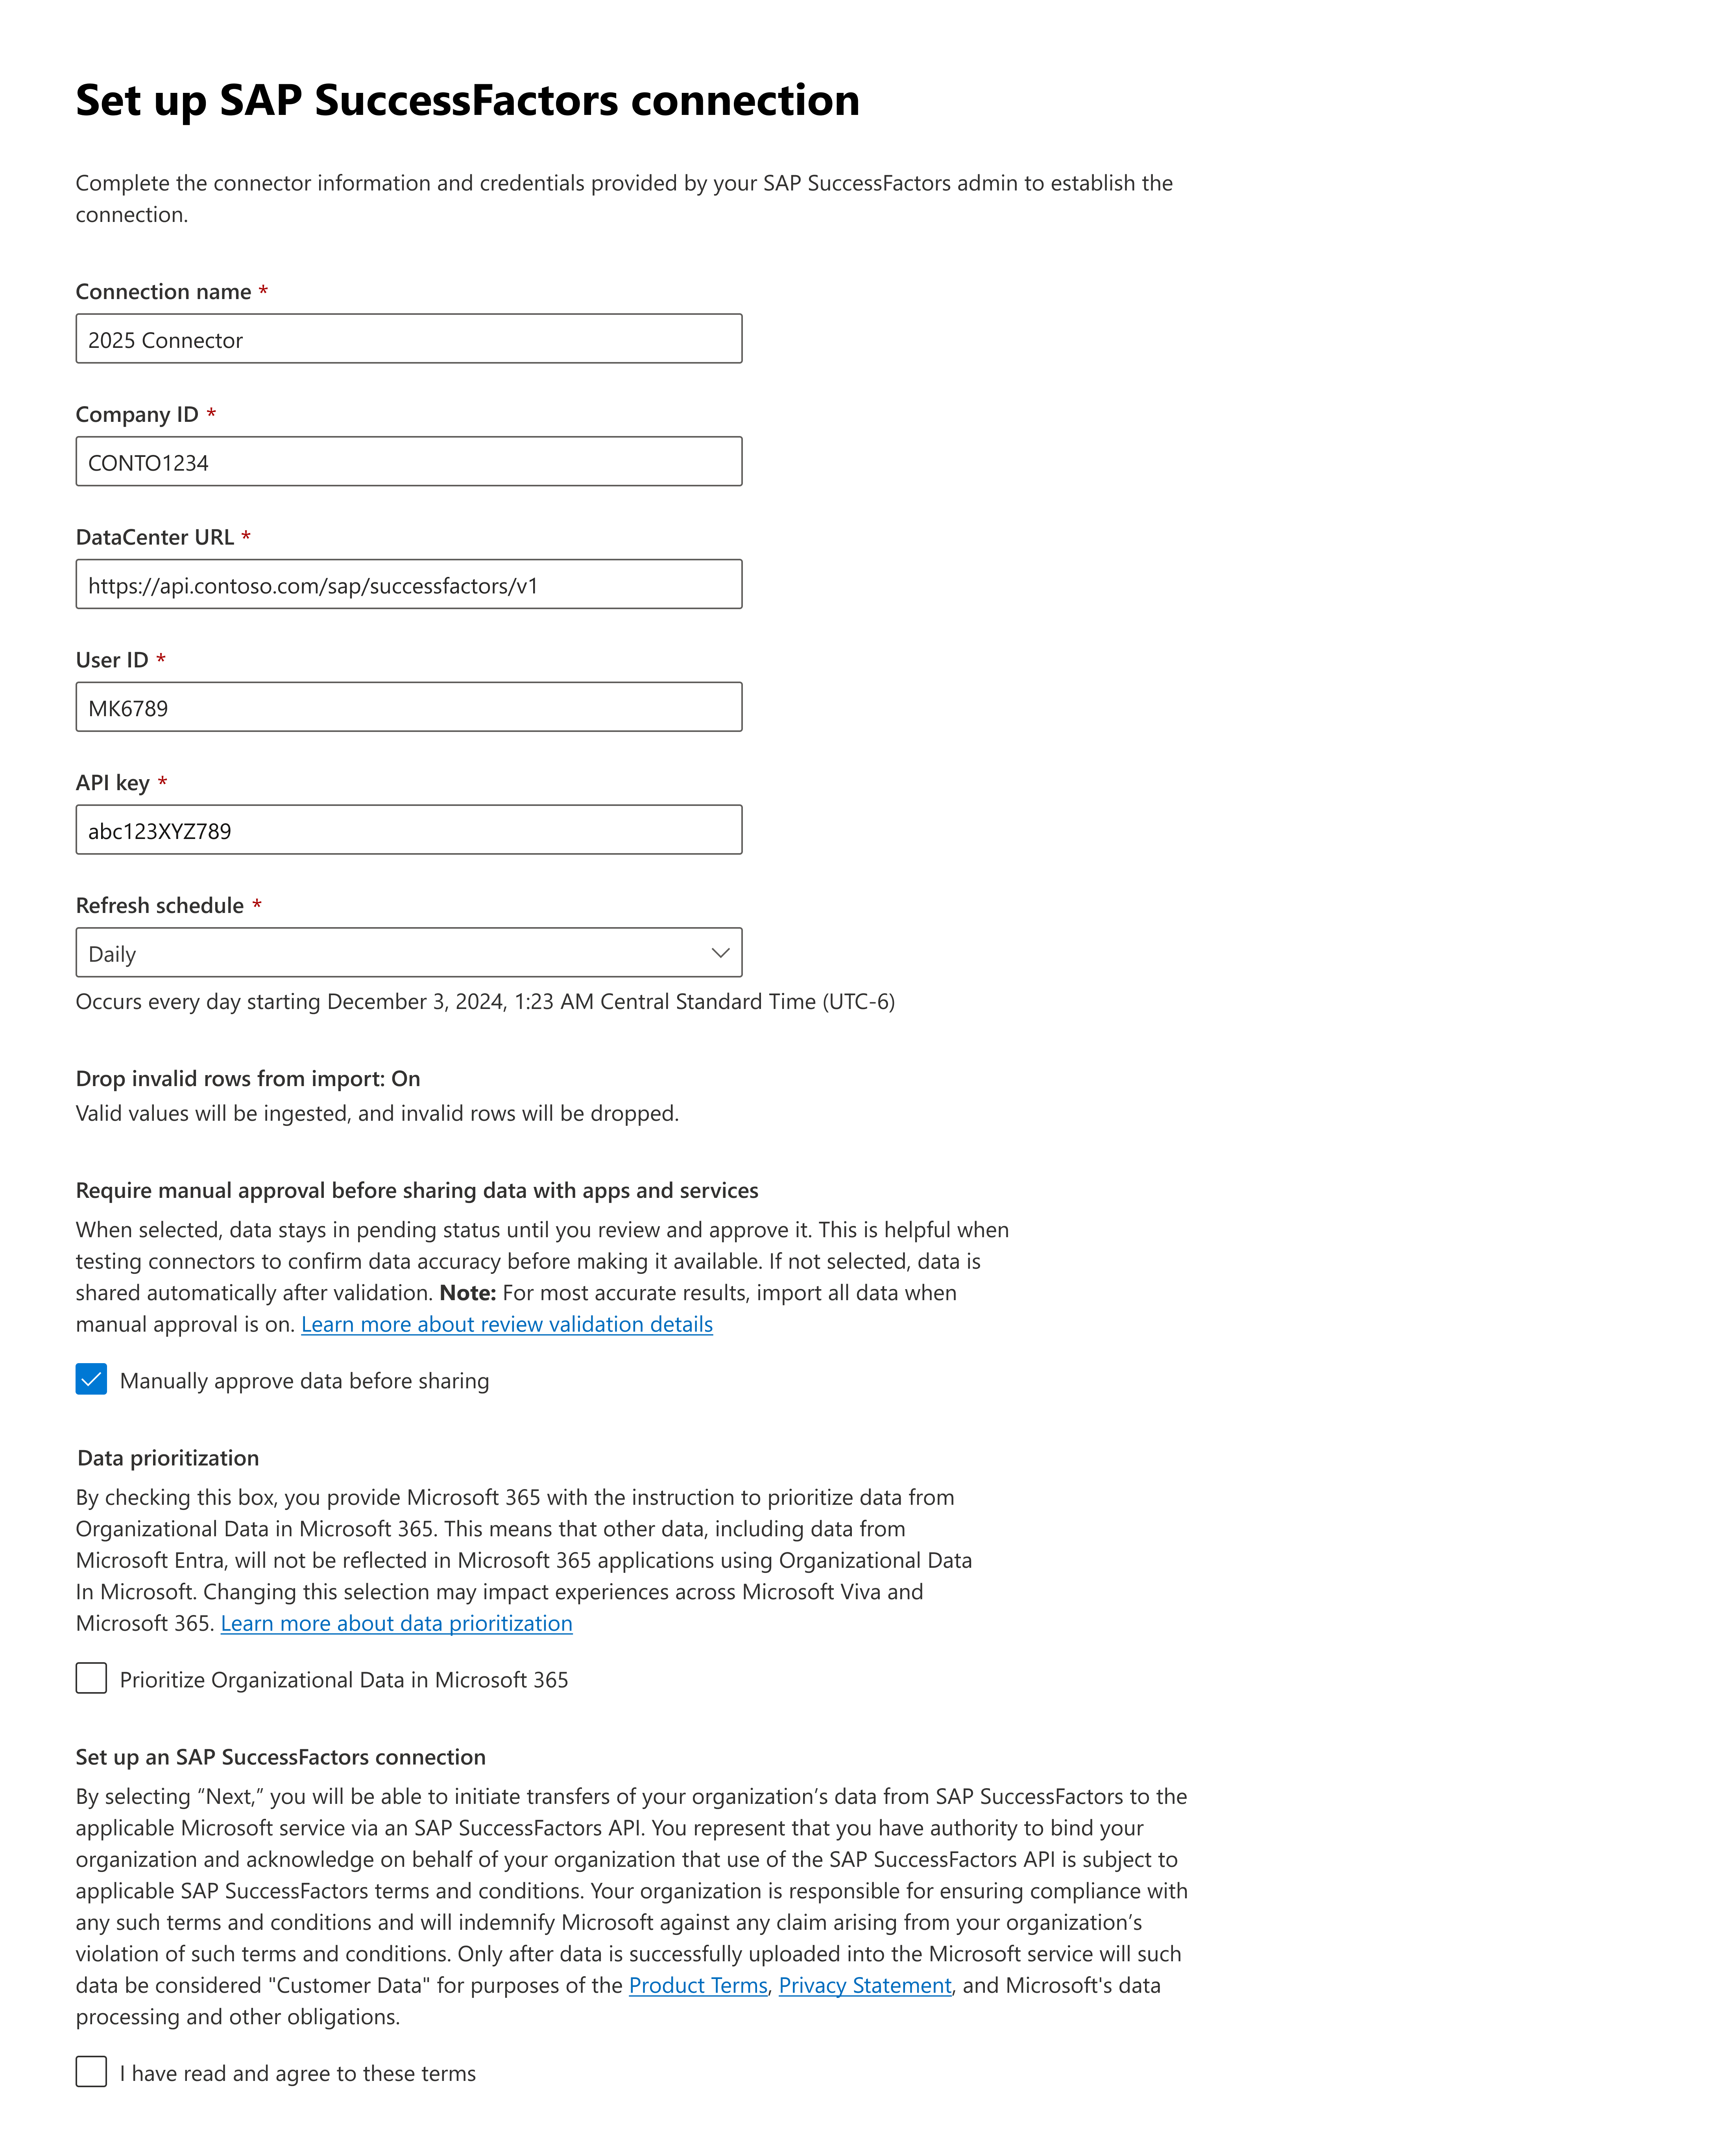
If connecting through middleware, contact your Proxy API owner to complete the steps below. Enter the Token URL, Proxy URL, ClientID, and Client Secret provided by your proxy API owner. These credentials are used to fetch an access token to call the Proxy API.

Select how frequently you want SAP SuccessFactors to send data to Microsoft 365: weekly or monthly.
If you'd like to review the details about the quality of your ingested data before making it available to downstream apps, select Manually approve data before sharing. Learn how.
If you want, select Prioritize Organizational Data in Microsoft 365. Learn more about this setting.
Confirm you agree to the terms of transferring your data using the SAP SuccessFactors API.
At the bottom of the page, select Validate credentials.
After your credentials are validated, map reserved attributes to the imported data. This means you'll match attributes from your SAP SuccessFactors data to their corresponding attributes for the apps with which you're sharing data. Any imported attributes that you don't match to reserved attributes are used as custom attributes and can't be renamed.
Select Download default mapping to access a JSON file with the list of reserved attributes and the recommended mapping. You can edit this file to customize the mapping. Once you've reviewed the file and made your edits (if any), at the bottom of the screen, select Browse to upload it.

On the next page, review your attribute mapping. To make changes, at the bottom of the screen select Back, and upload a new JSON mapping file with your edits. Otherwise, if everything looks correct, select Next, then on the next screen select Validate mapping.
If you sent any app-specific or custom data to any destination in Step 4, you'll choose which apps can access those attributes you mapped in Step 9. Learn more about how to map attributes to your chosen apps.
Review all the details, apps, and attribute mapping for the SAP SuccessFactors connection. If everything looks correct, select Confirm.
Note
If you set up periodic exports, your data will be validated for Viva and Microsoft 365 services requirements. Validation takes a few hours; however, it can take up to three days for your complete data upload to be available in the profile store. You can check the validation status on the Organizational data page in the Microsoft 365 admin center. When the validation is complete, a message lets you know that your data is in use and managed by Viva and Microsoft 365.
2. Steps within SAP SuccessFactors for direct connection
Applies to: SAP SuccessFactors Admin
Create/identify an API user to be used for OData API access. The UserId/Username of this user is required for future steps. This user is assigned permissions to access user data through the SAP SuccessFactors OData APIs.
Create an API Permissions Role
In the SAP SuccessFactors Admin Center, navigate to Manage Permission Roles, and select Create to create a new role.
Add a Role Name and Description for the new permission role. The name and description should indicate that the role is for API usage permissions.
In the Add Permissions section, on the left under Administrator Permissions, search for "Employee Central API." This role requires the Employee Central Foundation OData API (read-only) and Employee Central HRIS OData API (read-only) permissions.
Some permissions are required under the Employee Data section. This restricts which fields are ingested. Ensure the view column is selected for all the fields you want to share, such as User id, email, or manager. The relevant fields are listed under Standard Element on this page. A subset of these can be selected to start for testing, such as User id, email, and manager.
Note
The status and lastModified fields are required because they're used for filtering. These fields must always be included for the connector to work.
Once all the permissions are set up, select Next and then save the permission role.
Create an API Permissions Group for the assigned role. Navigate to Manage Permission Groups in the Microsoft 365 admin center and create a new group. Search for the user created in Step 1 and assign that user to the newly created group, for example:

Assign the Permission Role to the new Permission Group. In Manage Permission Roles, select Add Role Assignments to assign the created role to the group. Name the role assignment whatever you want, then on the Grant Access To page, select the group you created in Step 2c, for example:

Then, advance through the rest of the screens and select Save. You now have all the required permissions to create an OAuth token and fetch user data.
Register a new OAuth2 Client Application
- In the admin center, navigate to the Manage OAuth2 Client Applications page and select Register Client Application. Learn more.
- The Application Name can be anything but it must be unique, such as "Microsoft 365."
- Set the Application URL to any valid URL.
- Enable Bind to users and enter the User ID from Step 1 into the "User IDs" field. This ensures that only the created user is allowed to generate OAuth tokens.
- X.509 Certificate should contain the full public key copied in Step 2.
- After registering the client application, view it so you can copy the "API Key" for the next step.
- Save the following information and share it with the Microsoft 365 global admin to enter in the Microsoft 365 admin center:
- Company ID is your SAP SuccessFactors company ID
- DataCenter URL is your SAP SuccessFactors data center URL. See a list of SAP SuccessFactors API Servers.
- User ID is the user that has the required API permissions. If you enabled bind to user, that user's id must be used in the "User ID" field.
- A "Secret" or "SecretUri" is required depending on how you provide the API key.
How SAP SuccessFactors sends data to Microsoft 365
When you connect SAP SuccessFactors to Microsoft 365, SAP SuccessFactors sends a set of predefined source columns if using the default mapping file. These columns are mapped to fields in Microsoft 365. You can change these predefined fields by updating the mapping file.
Field mapping
The table below shows how SAP SuccessFactors fields correspond to Microsoft 365 fields in the default mapping file. Learn more about Microsoft 365 fields, including data type and formatting requirements.
| Attribute | SAP SuccessFactors Field |
|---|---|
| Microsoft_PersonEmail | personNav.emailNav.results[?(@.emailType == '8448')].emailAddress |
| Microsoft_ManagerEmail | jobInfoNav.results[?(@.effectiveLatestChange == true)].managerEmploymentNav.personNav.emailNav.results[?(@.emailType == '8448')].emailAddress |
| Microsoft_Organization (Department) | jobInfoNav.results[?(@.effectiveLatestChange == true)].departmentNav.name |
| Microsoft_Layer | No mapping from SAP SuccessFactors |
| Microsoft_LevelDesignation | jobInfoNav.results[?(@.effectiveLatestChange == true)].positionNav.jobLevel |
| Microsoft_JobDiscipline | jobInfoNav.results[?(@.effectiveLatestChange == true)].jobClassificationCountryNavUSA.cust_jobDiscipline Or EmpJob.results[?(@.endDate == null)].jobClassificationCountryNavUSA.cust_jobDiscipline |
| Microsoft_CompanyOfficeLocation | jobInfoNav.results[?(@.effectiveLatestChange == true)].locationNav.internalCode |
| Microsoft_CompanyOfficeCountryOrRegion | jobInfoNav.results[?(@.effectiveLatestChange == true)].locationNav.addressNavDEFLT.country |
| Microsoft_CompanyPostOfficeBox | No mapping from SAP SuccessFactors |
| Microsoft_CompanyOfficeStreet | jobInfoNav.results[?(@.effectiveLatestChange == true)].locationNav.addressNavDEFLT.address1 |
| Microsoft_CompanyOfficeCity | jobInfoNav.results[?(@.effectiveLatestChange == true)].locationNav.addressNavDEFLT.city |
| Microsoft_CompanyOfficeState | jobInfoNav.results[?(@.effectiveLatestChange == true)].locationNav.addressNavDEFLT.state |
| Microsoft_CompanyOfficePostalCode | jobInfoNav.results[?(@.effectiveLatestChange == true)].locationNav.addressNavDEFLT.zipCode |
| Microsoft_Company | jobInfoNav.results[?(@.effectiveLatestChange == true)].companyNav.name |
| Microsoft_CompanyCode | No mapping from SAP SuccessFactors |
| Microsoft_FirstName | personNav.personalInfoNav.results[0].firstName |
| Microsoft_LastName | personNav.personalInfoNav.results[0].lastName |
| Microsoft_DisplayName | personNav.personalInfoNav.results[0].displayName |
| Microsoft_JobTitle | jobInfoNav.results[?(@.effectiveLatestChange == true)].jobTitle |
| Microsoft_SecondaryJobTitle | No mapping from SAP SuccessFactors |
| Microsoft_UserSkillNames | No mapping from SAP SuccessFactors |
| Microsoft_EmploymentType | jobInfoNav.results[?(@.effectiveLatestChange == true)].employmentTypeNav.picklistLabels.results[?(@.locale == "en_US")].label |
| Microsoft_ManagerID | jobInfoNav.results[?(@.effectiveLatestChange == true)].managerEmploymentNav.personIdExternal |
| Microsoft_EmployeeID | personIdExternal |
| Microsoft_HireDate | startDate |
| Microsoft_CostCenter | jobInfoNav.results[?(@.effectiveLatestChange == true)].positionNav.costCenter |
| Microsoft_Division | jobInfoNav.results[?(@.effectiveLatestChange == true)].division |
| Microsoft_Phone | personNav.phoneNav.results[?(@.phoneType == '10605')].phoneNumber |
| Microsoft_EmploymentStatus | jobInfoNav.results[0].emplStatusNav.picklistLabels.results[?(@.locale == 'en_US')].label |