Custom data access in Viva Glint
Microsoft Viva Glint offers custom data access for users who support unique groups of employees in your organization. Users may need to have their default team access modified or are in a role so specific, access needs to be set at the user level. Use the guidance in this article to export, modify, and import custom data access. To make individual updates to users' custom data access, see: Custom User Role setup in Viva Glint.
Export custom access
Use the custom access export as a Viva Glint Admin to audit users' data access.
From the Glint Admin dashboard, select the Configuration symbol and then in Employees choose User Roles.
In the top right corner of the User Roles page, select Export.
In Export data dialog that appears, make selections in the following fields.
Programs: Select one survey program or choose Select All.
Roles: Select one User Role or choose Select All.
Focus Areas: Enable this setting to include Focus Area access only. Disable to include survey results access only.
Include Empty Data: Enable this setting to include users with no data access.
Include Inactive Data: Enable this setting to include active and inactive users.

Select Export after making selections.
A new dialog appears prompting you to rename and save the data to your device. By default, custom access files export to a compressed folder named: Untitled.zip.
Custom access file
The custom data access export includes the following information:
| Column | Description |
|---|---|
| user email | Populated with users' email addresses. |
| population | The first population shows as 1. Each new population increases in number for each user. |
| access type |
|
| other attributes | Other columns in the export are based on your organization's attributes and values that are used to grant custom access. |
Edit the access file
To prepare your exported custom access file for import to Advanced Configuration:
To retain leading zeros and data formats, use the Text Import Wizard to open files with a .csv extension.
Update the column labels in the exported file to the following columns:
Column Change to... user email manager reference population no change to column labeladd or remove insert this as a new columnpopulate with "ADD" or "REMOVE"access type survey uuid values or "GOAL" already included in export, depending on Focus Areas selection other attributes no changeTo grant new access, add new columns and values based on employee data imported to Glint.Note
To prevent upload errors, for attributes based on data uploaded to Glint make sure that column labels match your attribute setup exactly.
Tip
To confirm which survey program a survey uuid is connected to, go to Configuration and select Survey Programs. Choose a survey and note the ID at the end of the URL in your web browser. This value is the survey uuid that appears in the access type column in the custom access export.
Edit values in the population column. The first population that a user has access to should be changed from a 1 to a 0, with each new population increasing in number.
Population value Becomes... 1 0 2 1 3 2 To grant custom access for:
- Survey results:
- Populate the survey uuid column with the survey program's unique ID included in the access export file.
- To update a user's data access for all surveys that they have access to, leave the survey uuid column blank.
- Focus Areas:
- Populate the survey uuid column with "GOAL".
- Admin permissions:
- Populate the survey uuid column with "ADMIN".
- Survey results:
To grant custom access to manager or nonmanager hierarchy data, use this table as a guide.
Access Attributes to include in file Attribute values to include in file Another active manager's team Manager Level 1 Employee ID of the manager that another user should have access to Another inactive manager's team Fields for all manager levels in the inactive manager hierarchy
Export users from the survey cycle to get all levelsEmployee IDs of the managers in all levels
Export users from the survey cycle to get all IDsA manager's direct reports only Manager ID field, with the label from your attribute setup
Go to People and select Manage User Attributes in the Actions menu to view attribute labels.Manager IDs of each direct report, in separate rows A level in a nonmanager hierarchy Fields for all levels above and including the level the user should access Values for each level in each field Save your file in .csv format with a comma separator and UTF-8 encoding (Viva Glint accepts UTF-8 and UTF-8 with BOM encoding).
Example
An HR business partner, [email protected], oversees European Sales and Marketing teams for Contoso. To grant this user access to the right cut of data to view survey results, a Viva Glint Admin would fill in an access file with their location attribute Region = Europe and their hierarchy Team Level 1 = Marketing and Sales.

To apply the same custom access for creating Focus Areas, update the access type column for this user to "GOAL."

Important
Save your edited file as .csv with a comma separator and UTF-8 or UTF-8 with BOM encoding.
Upload custom access in Advanced Configuration
After exporting and preparing a file, go to Advanced Configuration to upload users' custom data access.
From the Glint Admin dashboard, select the Configuration symbol and then in Service Configuration, choose Advanced Configuration.
In the Advanced Configuration menu, select Uploads.
In the Upload type dropdown menu, select MANAGERS_UPLOAD.
Apply to: Ignore, this setting is for retroactive uploads only.
Incremental:
- Enable this setting to append access to users in your file.
- Disable this setting to overwrite all access for users in your file. Users not included in the file aren't impacted.
Use exact case from the file for First/Last name: Ignore, this setting doesn't apply to access uploads.
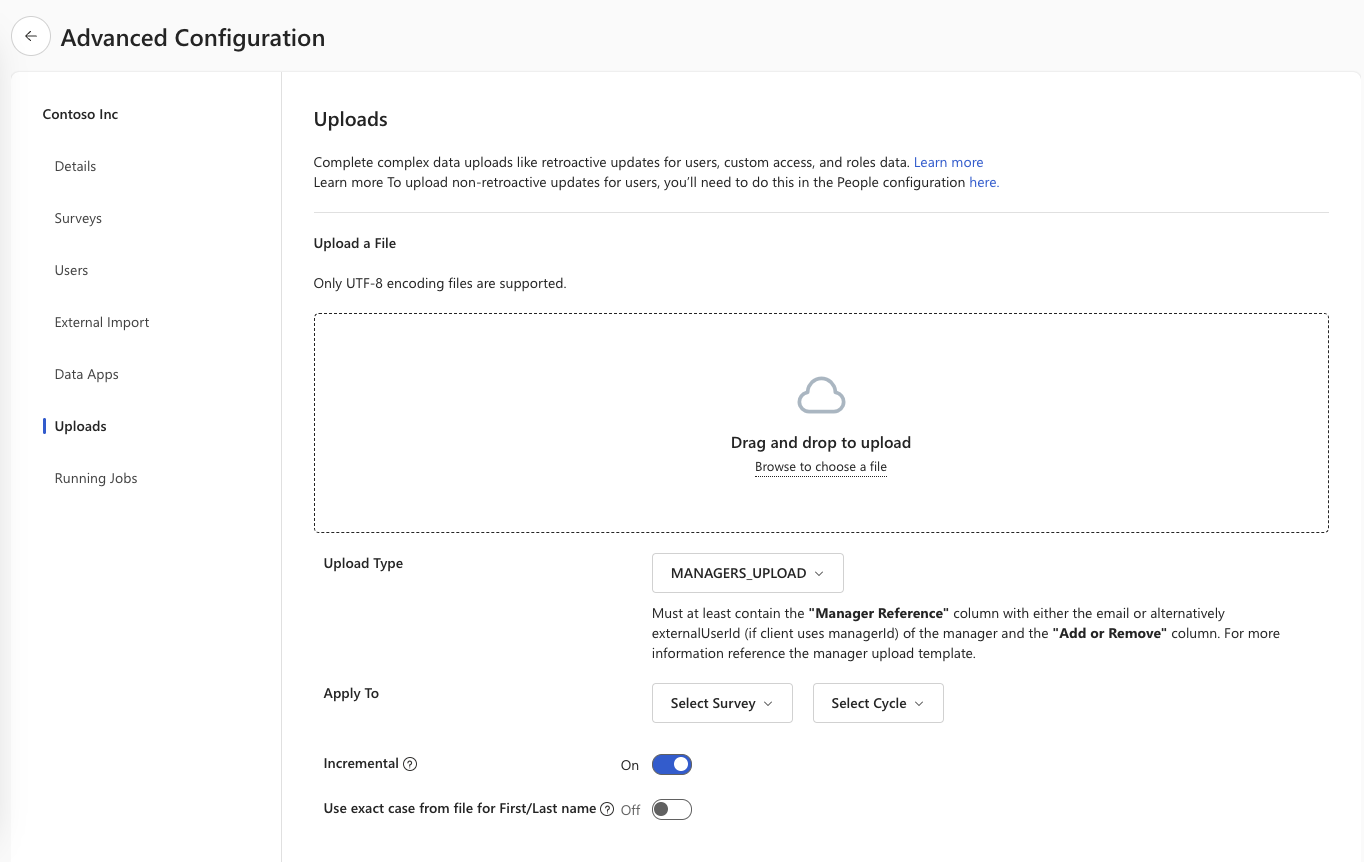
Drag and drop your .csv file or browse to choose it in the Drag and drop to upload section.
In the Upload Job Details page that appears, confirm that the Uploaded Lines Summary matches the changes in your file.
Select Apply Upload to Database to upload new values.
In the Load import file into database? dialog, select Yes.
Go to some users' profiles to confirm that customized access appears as expected.
Select the Configuration symbol, then in Employees, choose People.
Search for and select users to spot check.