Exercise - Build a Power Fx function and integrate with a Power Automate flow
In this exercise, you create a Power Fx function and call it from a Power Automate flow. You learn how to configure the function to accept input parameters from the flow, dynamically retrieve data from Dataverse tables, and return an output parameter back to the flow.
Scenario
In this scenario, you work for a travel booking company that wants to reward loyal customers. Instead of applying a discount in real time, you might choose to send it after a customer places an order or on a special occasion, such as a birthday or anniversary. Instead of handling this logic with Power Automate actions, you create a Power Fx function by using a Dataverse data source to evaluate the customer and order criteria and email the discount code to the customer.
Prepare your Dataverse tables
To prepare your Dataverse tables, follow these steps:
Return to your Discount Code table from the previous exercise. Go to the Tables section of Power Apps and select Discount Codes.
Add a column named Minimum Required with a currency data type. Your function requires that the submitted order meets a minimum requirement before the system validates the code and sends it to the customer.
Add a new row for your VIP discount code:
Discount Code Ref Exp Date Minimum Required Description VIP20 12/31/2025 100 20% off for VIPs Create a new table and rename it Customer.
Rename New column as Customer Name.
Add a column called Purchased YTD with a data type of decimal. Your function requires that your customer has spent at least 25,000.00 dollars before they can receive the VIP20 discount code.
Add a column called Paid on time with a choice data type and a yes/no format. Your function requires that the customer must have paid all invoices on time before they can receive the VIP20 discount code.
Add a column called Customer Number with a data type of single line of text and a format of text.
Add the following rows of data:
Customer Name Purchased YTD Paid on time Customer Number Adventure Works Cycles $20,000 Yes 1 Nod Publishers $5,000 Yes 2 Trey Research $100,000 No 3 Select Save and exit.
Create your function
To create your Power Fx function, follow these steps:
Open the Functions section of make.powerapps.com (you might need to find Functions in the More menu) and then ensure that you're in the same environment where you plan to create your flow.
Select + New function.
Enter the following properties:
- Display name - VIP Discount
- Description - This function evaluates customer criteria and the order to determine if it qualifies for the VIP20 20% discount.
- Table references - select Discount Codes and Customers
Add a New input parameter with the name OrderTotal and a decimal data type.
Add a New input parameter with the name CustomerNumber and a string data type.
Add a New output result with the name CodeStatus and a Boolean data type.
Enter the following Power Fx expression in the Formula field.
{CodeStatus:
With({CUST: LookUp(Customers,'Customer Number'= CustomerNumber)},
If(CUST.'Paid on time'=true And CUST.'Purchased YTD'+OrderTotal>25000 And OrderTotal>LookUp('Discount Codes','Discount Code Ref'="VIP20").'Minimum Required', true, false))}
This function retrieves the discount code from Dataverse and verifies that it hasn't expired and that the order total meets the minimum requirement. Then, it checks that the customer has purchased more than 25,000 dollars this year and that their invoices have been paid on time. If all conditions are met, the function returns true.
Select Save.
Test the function
To test the Power Fx function, follow these steps:
- Select the function that you created in the functions list and then select Test in the command bar in the upper part of the screen.
- Enter 6000 in the OrderTotal parameter field and 1 in the CustomerNumber parameter field.
- Select Play. The OData response in the Response field shows that the result of the function (CodeStatus) is true.
- Return to the Functions section and select your function. Select Copy code snippet in the command bar. Save it in a notepad or another easily accessible location. You need the code snippet later to invoke the function from the canvas app.
Create your Power Automate flow
To create your Power Automate flow, follow these steps:
Go to make.powerautomate.com and select Create > Instant cloud flow.
Enter VIP20 discount notification for the Flow name and then select Manually trigger a flow.
Select Create.
Add two inputs to your trigger:
- Number - Rename as OrderTotal
- Text - Rename as CustomerNumber
Add an action: Perform an unbound action (Dataverse).
Find/select your VIP Discount function from the Action Name dropdown menu (the name includes the prefix, then an underscore, and then VIPDiscount). Enter vip into the Action Name field to filter the dropdown menu results.
Select Show all to the right of the Advanced parameters option. In each field, select the corresponding dynamic content from the trigger.

Add a Condition step.
On the left side of the condition, add the output (dynamic content) from the Perform an unbound action step. It should say the name of the function, followed by /CodeStatus, your output parameter name.
On the right side of the condition, add the expression True().
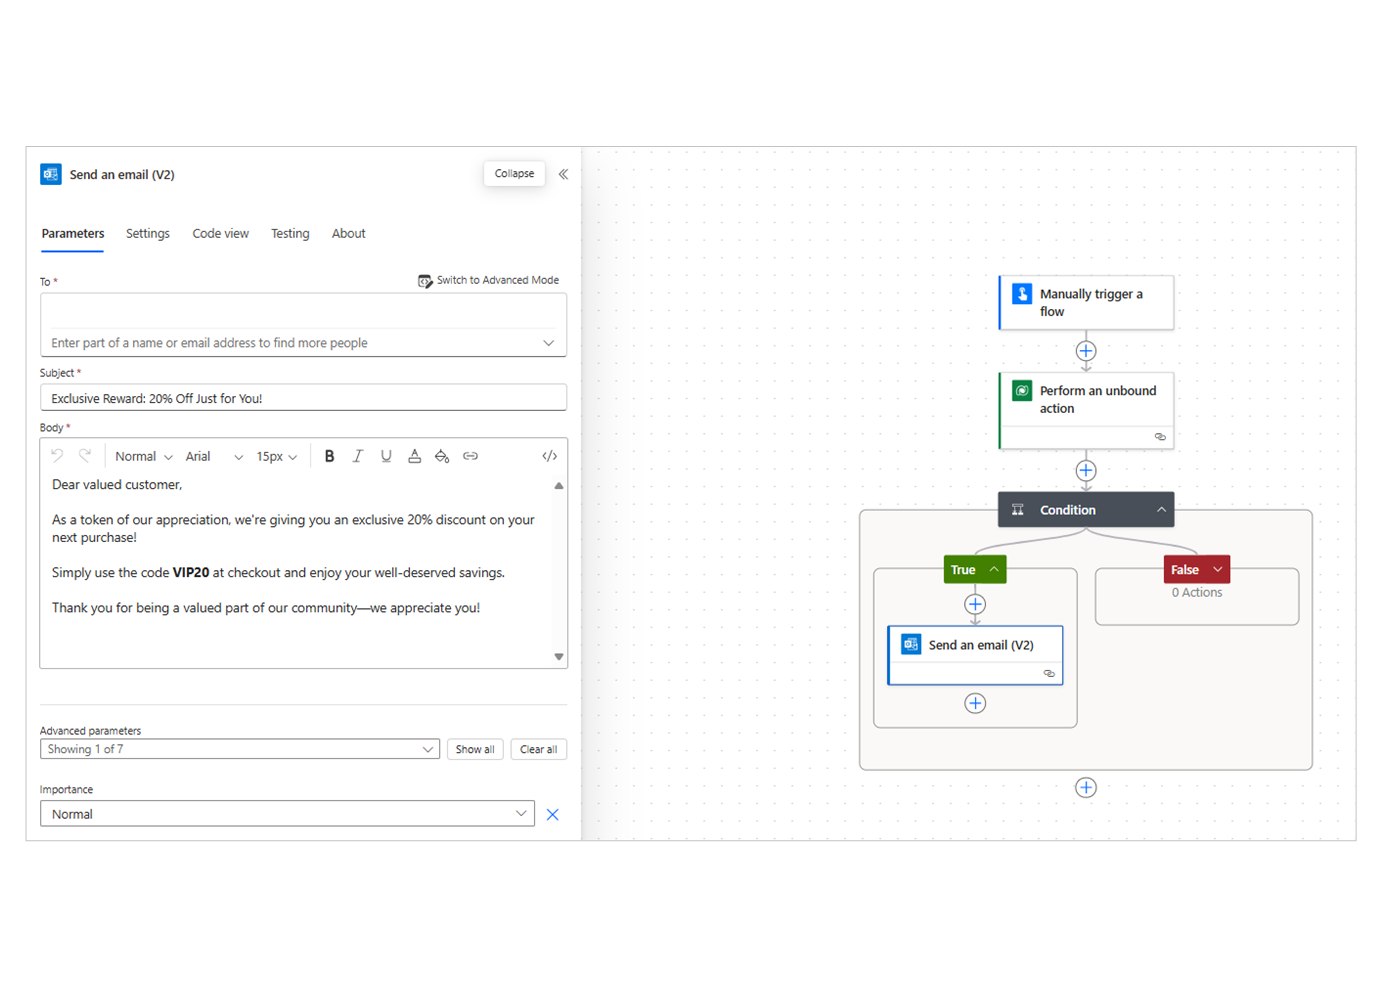
Inside the True path of the condition step, add the Outlook action Send an email (V2), and then include the following information:
 To: Enter your email address (Note: If this is a live notification, you would retrieve an email address from the customer's record)
 Subject: Exclusive Reward: 20% Off Just for You!
 Body:
 Dear valued customer,

 As a token of our appreciation, we're giving you an exclusive 20% discount on your next purchase!

 Simply use the code VIP20 at checkout and enjoy your well-deserved savings.

 Thank you for being a valued part of our community—we appreciate you!
Save your flow.


Test your flow
Your final task is to test your flow by following these steps:
- Select Test in the command bar and then select Manually > Test.
- Enter 6000 for OrderTotal, enter and 1 for CustomerNumber, and then select Run Flow. Select Done. You should receive the email notification containing the VIP20 code.
- You can test various inputs and observe that the flow sends the notification only when the defined criteria in your formula are met.
By completing this exercise, you learned how to configure a Power Automate flow to call a Power Fx function and process the results. You can adapt this approach for a wide range of business scenarios, which helps improve efficiency, accuracy, and consistency. With this new knowledge, you can streamline processes, reduce manual effort, and create more dynamic workflows.