Exercise - Build your serverless backend
In this exercise, we'll create your application's backend. You'll create an Azure Function that serves as the REST API generating on-demand shared access signatures so your users can upload images to your Blob Storage container. This exercise will guide you on how to create the Azure Function, install the required libraries, and write the code that generates on-demand SAS keys.
Create the Azure Function REST API
Open Visual Studio Code.
Create a project folder on your computer and name it
upload_image. In Visual Studio Code, select File > Open Folder, navigate to the folder you just created, and select Select Folder.Select Extensions on the left side of the window, then search for Azure Functions. Install the extension if necessary.
Next, we'll create an Azure Function. Press Ctrl + Shift + P on your keyboard to open the Command Palette.
Enter Azure Functions: Create New Project, then select the Azure Functions: Create New Project task in the window.
Select the upload_image folder.
Select JavaScript for the language.
Select Model V3.
Select HttpTrigger, then name the function credentials and select Anonymous for the authorization level.
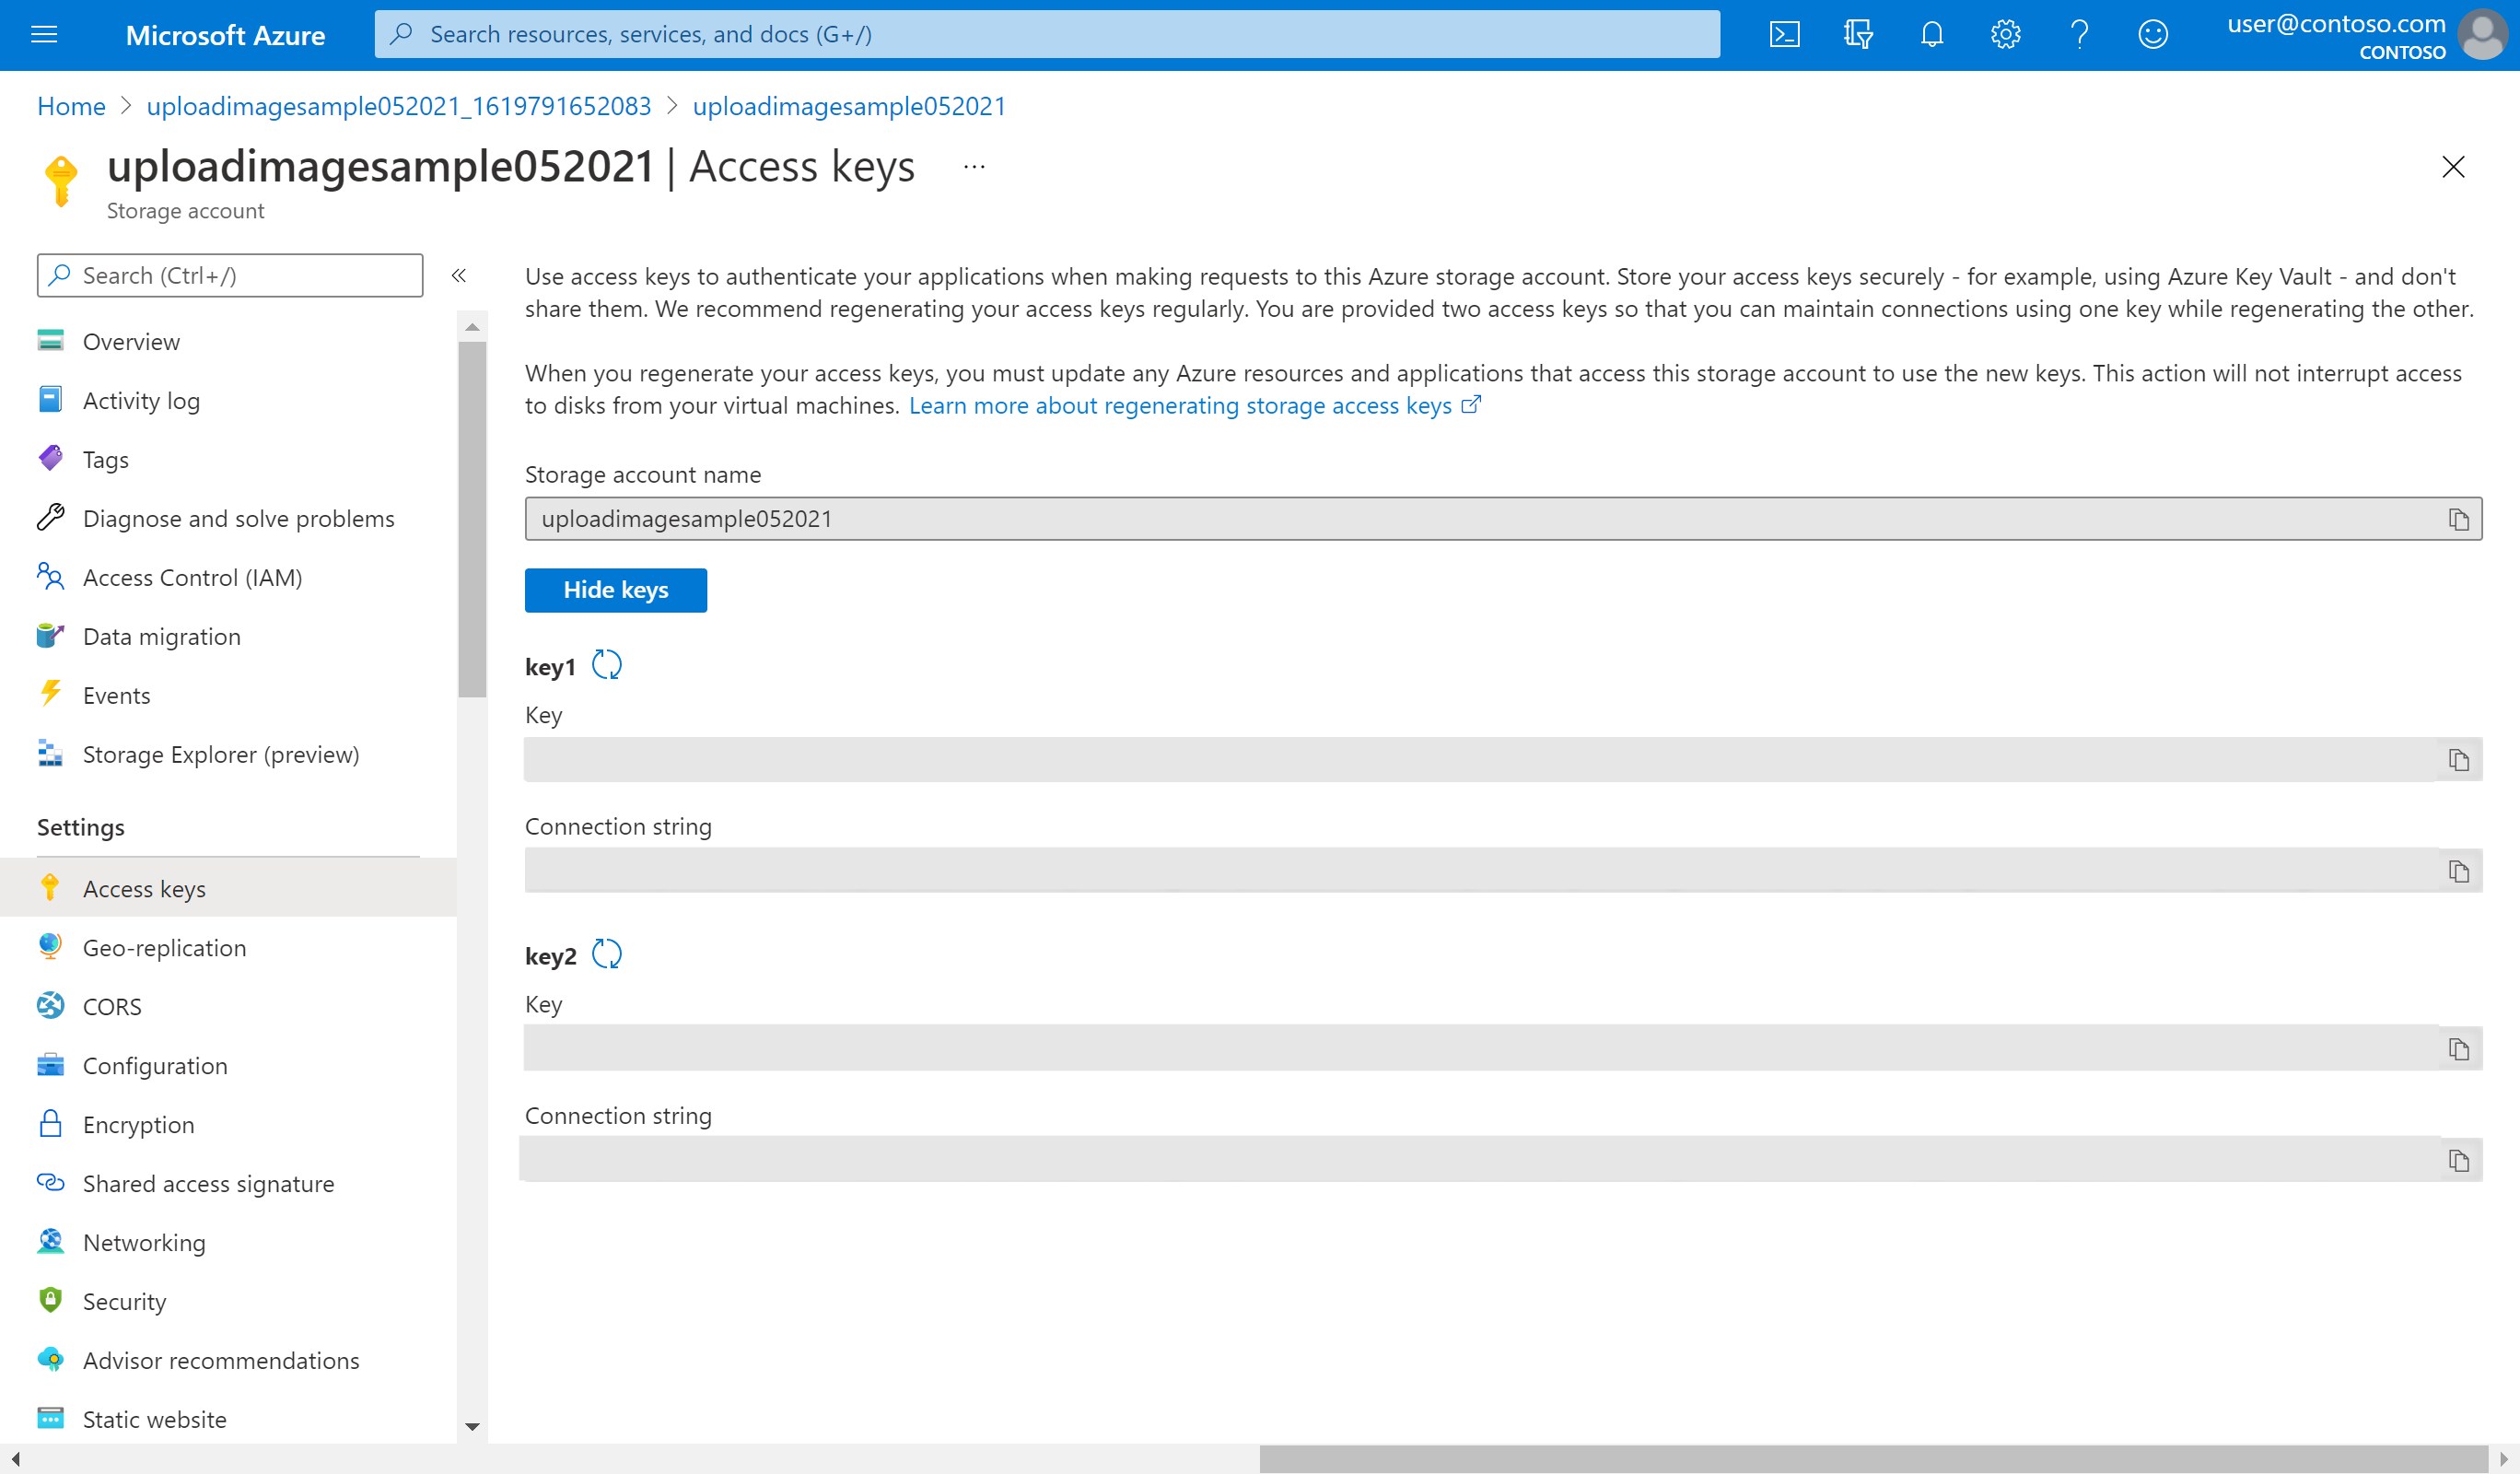
In the Azure portal, navigate to the storage account you created earlier.
Select Access keys under Security + networking on the left hand menu.
Select Show next to the first Connection string, then select the Copy icon to copy your storage account connection string.

Return to Visual Studio Code and add the connection string in the
AzureWebJobsStoragekey of your project'slocal.settings.json, then save the file.{ "IsEncrypted": false, "Values": { "AzureWebJobsStorage": "<YOUR_CONNECTION_STRING>", "FUNCTIONS_WORKER_RUNTIME": "node" } }Select Terminal > New Terminal. Select Bash as the terminal type in the drop-down at the top left. Use the following command to install the Azure SDK dependency used for generating the SAS token.
npm install @azure/storage-blob
Generating shared access signatures
Important
This code example uses a connection string to authorize access to your storage account. This configuration is for example purposes. Connection strings and account access keys should be used with caution in application code. If your account access key is lost or accidentally placed in an insecure location, your service may become vulnerable. Anyone who has the access key is able to authorize requests against the storage account, and effectively has access to all the data.
For optimal security, Microsoft recommends using managed identities for Azure resources to authorize requests against blob, queue, and table data, whenever possible. To learn more, see Authorize access to blobs using Microsoft Entra ID.
Open the
index.jsfile from yourcredentialsfolder and add the following function at the bottom:function generateSasToken(connectionString, container, permissions) { const { accountKey, accountName, url } = extractConnectionStringParts(connectionString); const sharedKeyCredential = new StorageSharedKeyCredential(accountName, accountKey.toString('base64')); var expiryDate = new Date(); expiryDate.setHours(expiryDate.getHours() + 2); const sasKey = generateBlobSASQueryParameters({ containerName: container, permissions: ContainerSASPermissions.parse(permissions), expiresOn: expiryDate, }, sharedKeyCredential); return { sasKey: sasKey.toString(), url: url }; }The function
generateSasTokentakes your Azure Blob Storage connection string, a container name, and a permissions string, and uses them to build the SAS token. AStorageSharedKeyCredentialis built based on your connection string. This credential will be used bygenerateBlobSASQueryParametersto generate the shared access signature that ensures the parameters sent during the image upload can be authenticated to your storage account credentials. Finally you provide aexpiresOnvalue of two hours. The shared access signature will expire in two hours to help prevent abuse, but also to ensure the user has enough time to upload their image.Create a file inside the
credentialsfolder and call itutils.js. Paste the content from this file into your file: utils.js. Save the file.In the
index.jsfile, require theextractConnectionStringPartsfunction in your code, which takes care of extracting theaccountKey,accountName, andurlfrom your storage account connection string.Your
requiresection should now look like this:const { StorageSharedKeyCredential, ContainerSASPermissions, generateBlobSASQueryParameters } = require("@azure/storage-blob"); const { extractConnectionStringParts } = require('./utils.js');Implement the serverless function entry point that will send the results from
generateSasTokento the client:module.exports = async function (context, req) { const permissions = 'c'; const container = 'images'; context.res = { body: generateSasToken(process.env.AzureWebJobsStorage, container, permissions) }; context.done(); };Your
index.jsshould look like the following once you've finished entering all the code:const { StorageSharedKeyCredential, ContainerSASPermissions, generateBlobSASQueryParameters } = require("@azure/storage-blob"); const { extractConnectionStringParts } = require('./utils.js'); module.exports = async function (context, req) { const permissions = 'c'; const container = 'images'; context.res = { body: generateSasToken(process.env.AzureWebJobsStorage, container, permissions) }; context.done(); }; function generateSasToken(connectionString, container, permissions) { const { accountKey, accountName, url } = extractConnectionStringParts(connectionString); const sharedKeyCredential = new StorageSharedKeyCredential(accountName, accountKey.toString('base64')); var expiryDate = new Date(); expiryDate.setHours(expiryDate.getHours() + 2); const sasKey = generateBlobSASQueryParameters({ containerName: container, permissions: ContainerSASPermissions.parse(permissions), expiresOn: expiryDate, }, sharedKeyCredential); return { sasKey: sasKey.toString(), url: url }; }
You've successfully created your serverless backend. The next step is to implement the frontend that will let you upload images to Azure Blob Storage.