Note
Access to this page requires authorization. You can try signing in or changing directories.
Access to this page requires authorization. You can try changing directories.
Use Microsoft Surface Enterprise Management Mode (SEMM) to manage Unified Extensible Firmware Interface (UEFI) settings on one or more Surface Hub devices.
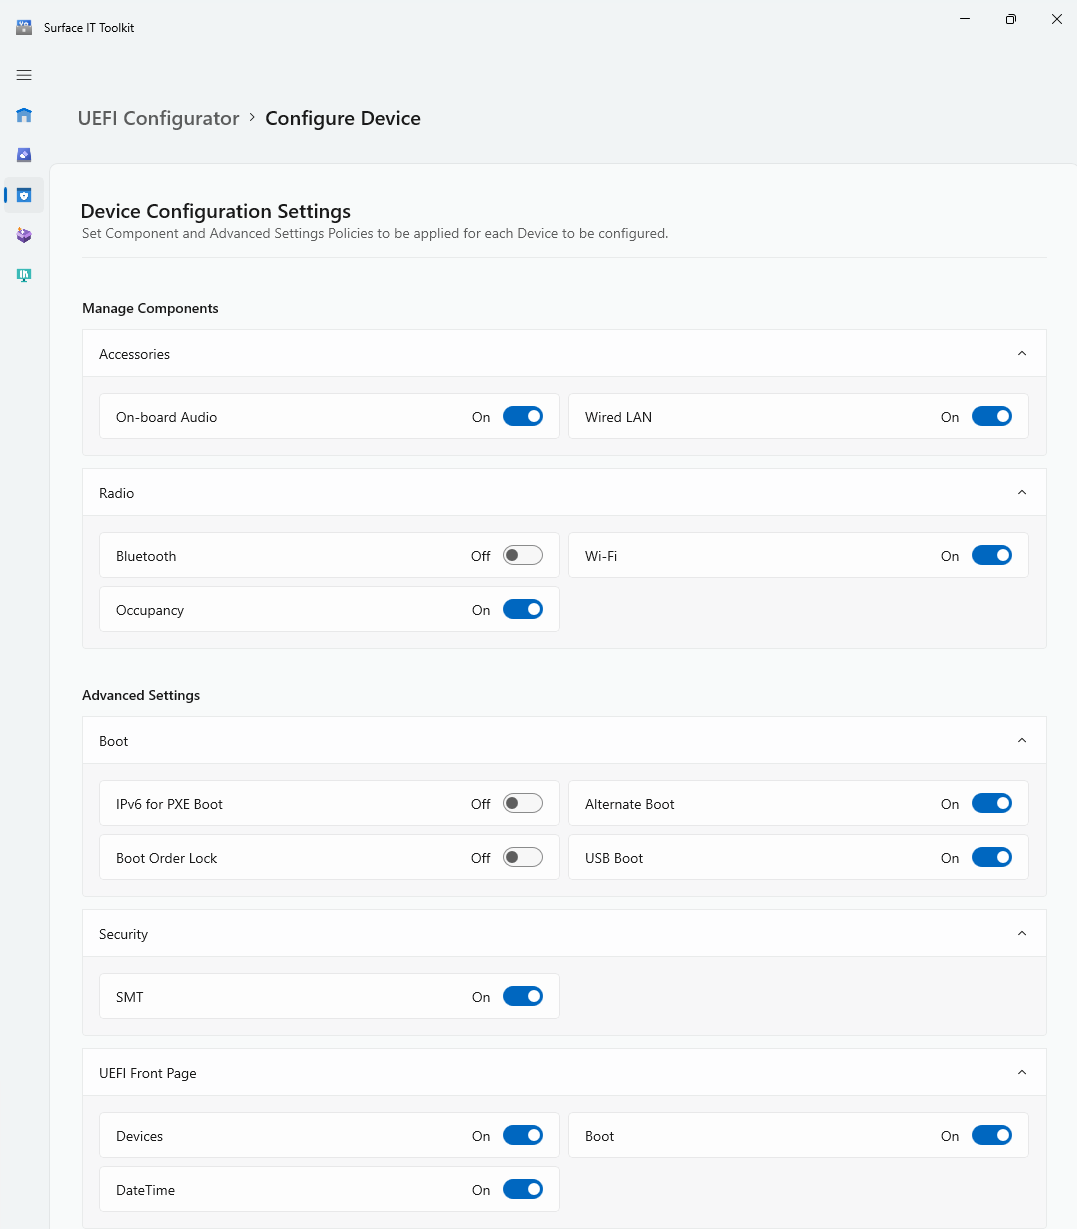
Manage components
SEMM allows you to control various hardware components on the Surface Hub, including:
- On-board Audio
- Wired LAN
- Bluetooth
- Wi-Fi
- Occupancy sensor
Advanced settings
With the Surface UEFI Configurator, included in the Surface IT Toolkit, you can enable or disable the following UEFI settings:
Security
- SMT (Simultaneous Multi-Threading)
Boot
- IPv6 for PXE Boot
- Alternate Boot
- Boot Order Lock
- USB Boot
UEFI Front Page
- Devices
- Boot
- Date/Time
- EnableOSMigration (Surface Hub 2S only)
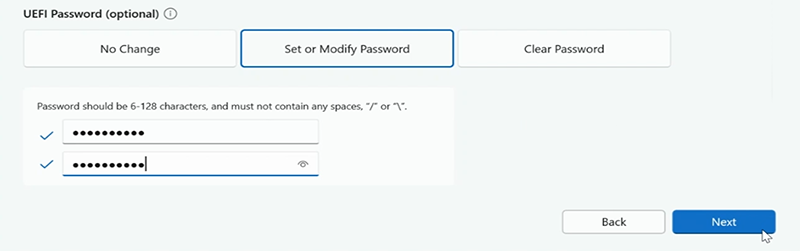
UEFI password
UEFI is an advanced firmware interface that replaces the traditional BIOS, offering improved security, faster boot times, and support for modern hardware. Setting a UEFI password adds an extra layer of protection by preventing unauthorized changes to the firmware settings. Be sure to set a strong password and store it securely.
Tip
For more information on the security implications of configuring SEMM settings, see Manage UEFI settings with SEMM and SEMM UEFI settings reference.
Download Surface IT Toolkit and Surface Hub 2S drivers and firmware
On a separate PC, follow these steps:
- Download the Surface IT Toolkit, which includes the Surface UEFI Configurator.
- Follow the installation instructions in Get started with Surface IT Toolkit.
Prepare the SEMM certificate
Before using the UEFI Configurator for the first time, you need to prepare a certificate to secure the SEMM package:
- Large enterprises: Generate certificates using your organization's security infrastructure.
- Medium-sized businesses: Consider obtaining certificates from trusted partner providers, especially if you lack dedicated IT security resources.
- Self-signed certificates: For smaller setups, you can generate a self-signed certificate using PowerShell. For details, see the Self-signed certificate guide and Surface Enterprise Management Mode certificate requirements.
Warning
To unenroll a device from SEMM and restore control over UEFI settings, you must have the SEMM certificate used to enroll the device. If this certificate is lost or corrupted, unenrollment will not be possible. Ensure you back up and protect your SEMM certificate.
Create a SEMM package
To create a SEMM package for Surface Hub, follow these steps using the Surface IT Toolkit on a separate PC:
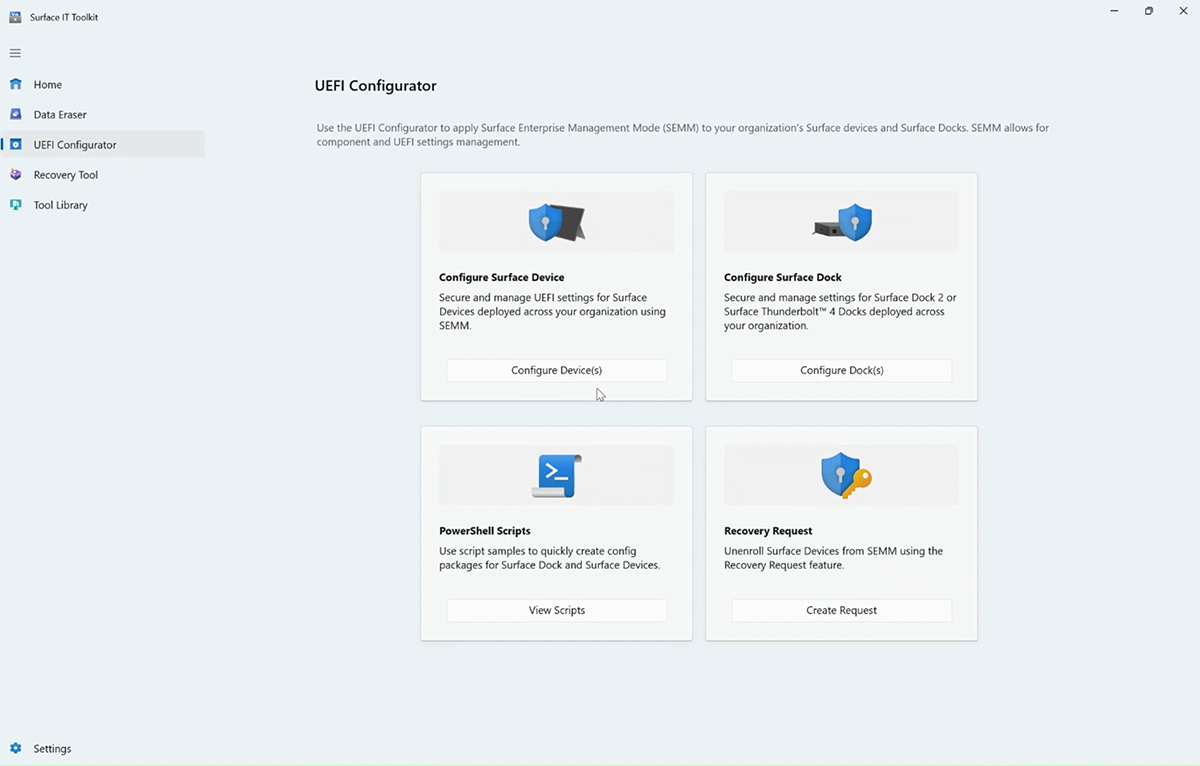
Open the Surface IT Toolkit, select UEFI Configurator, and then choose Configure devices.
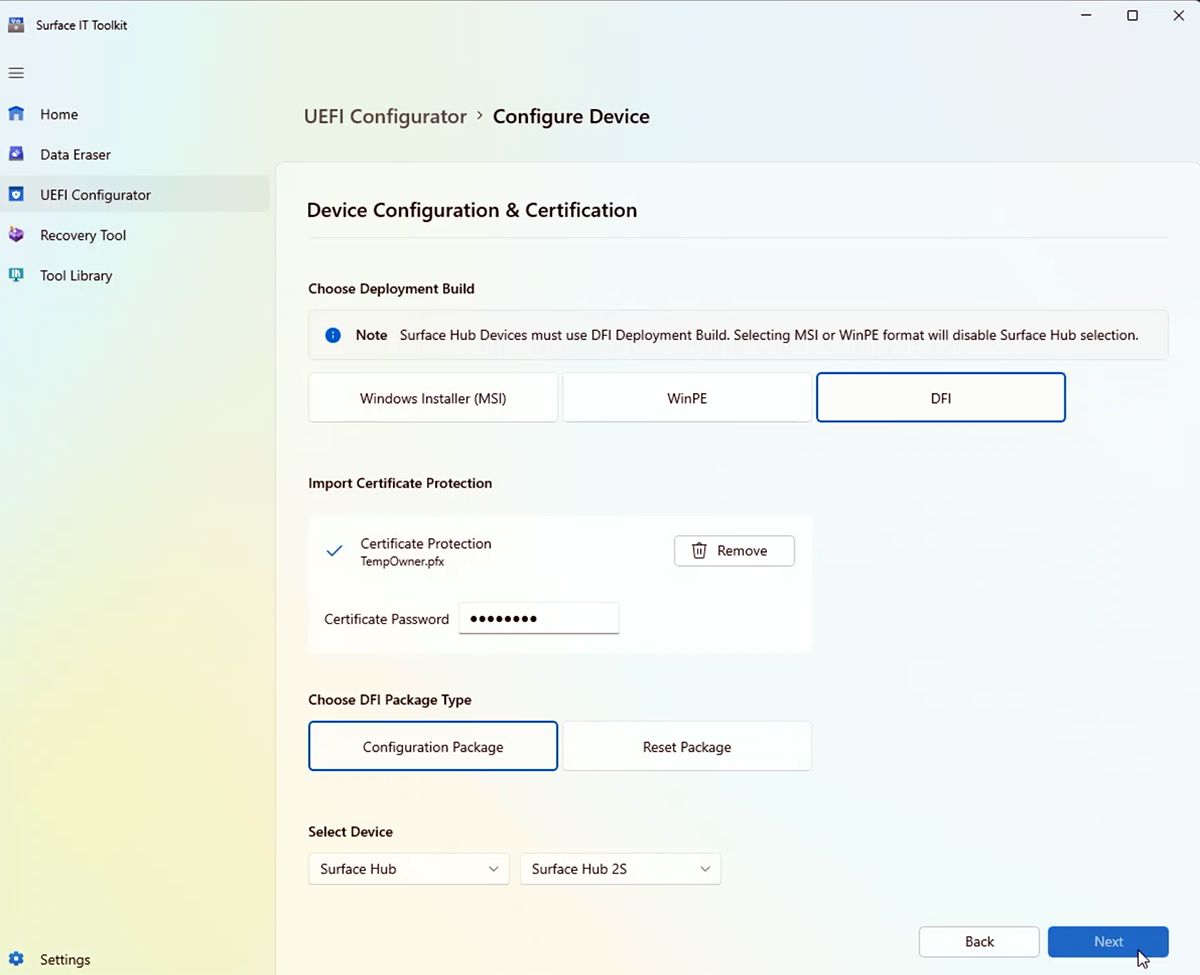
On the Device Configuration and Certification page, configure the following items, then select Next:
- Choose Deployment Build: Select DFI.
- Import Certificate Protection: Select Add, browse for your certificate (.pfx file), and enter the associated password.
- Choose DFI Package Type: Select Configuration Package.
- Select Device: Choose Surface Hub, then select Surface Hub 2S or Surface Hub 3.
Navigate to the Device Configuration Settings page:
- Toggle the appropriate settings on or off. For detailed guidance on each setting, refer to the SEMM UEFI settings reference.
- Under UEFI Password, select Set or Modify Password, then enter and confirm your password.
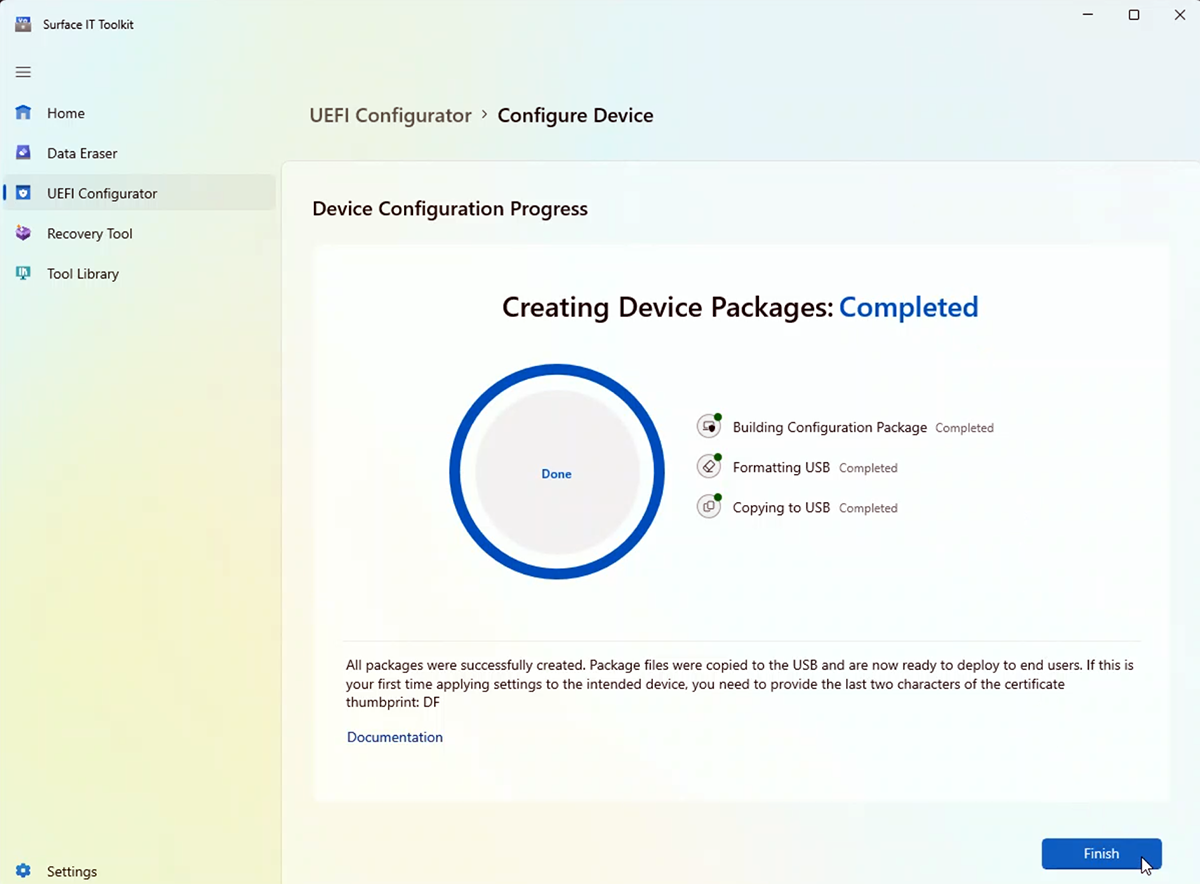
Insert a USB drive into your PC. The drive will be formatted, and all files on it will be erased. Select Create to build the SEMM package.
Upon completion, note the last two characters of the certificate thumbprint, then select Finish. Your SEMM package, named DfciUpdate.dfi, is now ready for use.
Apply the SEMM package to Surface Hub 2S or Surface Hub 3
To apply the SEMM package and enroll your Surface Hub into SEMM:
- Insert the USB drive with the SEMM package into the USB-A port on the Surface Hub.
- Turn off the Surface Hub.
- Press and hold the Volume up button, then press the Power button. Keep holding Volume up until the UEFI menu appears.