Note
Access to this page requires authorization. You can try signing in or changing directories.
Access to this page requires authorization. You can try changing directories.
Applies to:
SQL Server - Windows only
Azure SQL Managed Instance
This article covers how to configure a Master Data Services (MDS) database on a managed instance.
Preparation
To prepare, you need to create and configure an Azure SQL Managed Instance and configure your web application machine.
Create and configure the database
Create a managed instance with a virtual network. See Quickstart: Create a SQL Managed Instance for details.
Configure a Point-to-Site connection. See Configure a Point-to-Site connection to a VNet using native Azure certificate authentication: Azure portal for instructions.
Configure Microsoft Entra authentication with SQL Managed Instance. See Configure and manage Microsoft Entra authentication with SQL for details.
Configure web application machine
Install a Point-to-Site connection certificate and VPN to ensure that the machine can access the managed instance. Refer to Configure a Point-to-Site connection to a VNet using native Azure certificate authentication: Azure portal for instructions.
Install the following Roles and Features:
Roles:
- Internet Information Services
- Web Management Tools
- IIS Management Console
- World Wide Web Services
- Application Development
- .NET Extensibility 3.5
- .NET Extensibility 4.5
- ASP.NET 3.5
- ASP.NET 4.5
- ISAPI Extensions
- ISAPI Filters
- Common HTTP Features
- Default Document
- Directory Browsing
- HTTP Errors
- Static Content
- Health and Diagnostics
- HTTP Logging
- Request Monitor
- Performance
- Static Content Compression
- Security
- Request Filtering
- Windows Authentication
Note
Don't install WebDAV Publishing
Features:
- .NET Framework 3.5 (includes .NET 2.0 and 3.0)
- .NET Framework 4.5 Advanced Services
- ASP.NET 4.5
- WCF Services
- HTTP Activation (required)
- TCP Port Sharing
- Windows Process Activation Service
- Process Model
- .NET Environment
- Configuration APIs
- Dynamic Content Compression
Install and configure an MDS web application
Next, you install and configure Master Data Services.
Install SQL Server 2019
Use the SQL Server setup installation wizard or a command prompt to install Master Data Services.
Open
Setup.exe, and follow the steps in the installation wizard.Select Master Data Services on the Feature Selection page under Shared Features. This action installs:
- Master Data Services Configuration Manager
- Assemblies
- A Windows PowerShell snap-in
- Folders and files for web applications and services.
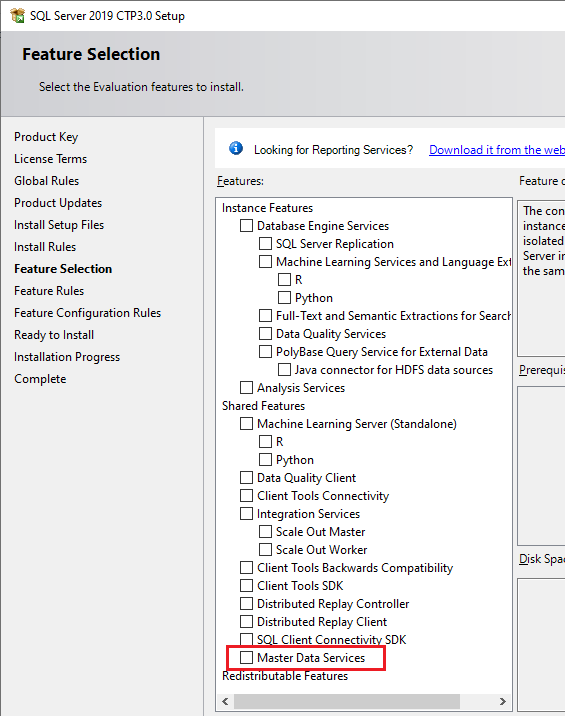
Set up the database and website
Connect the Azure Virtual Network to ensure that you can connect to the managed instance.
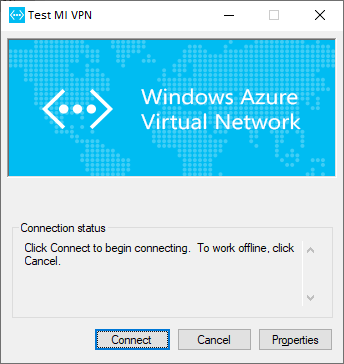
Open the Master Data Services Configuration Manager and then select Database Configuration in the left pane.
Select Create Database to open the Create Database Wizard. Select Next.
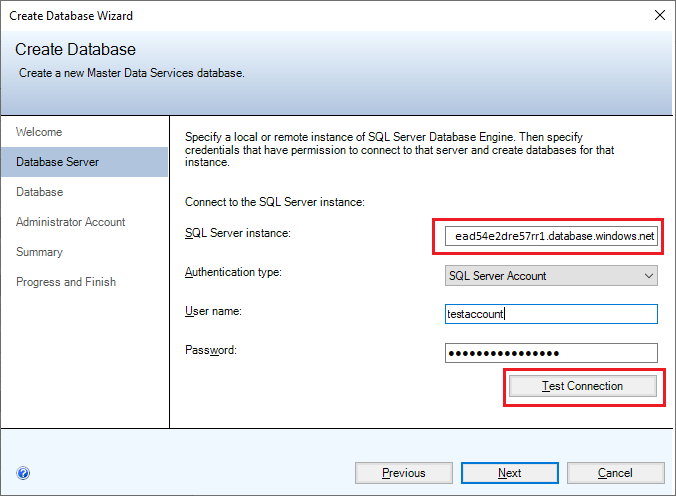
On the Database Server page, complete the SQL Server instance field, and then choose the Authentication type. Select Test Connection to confirm that you can use your credentials to connect to the database via the chosen authentication type. Select Next.
Note
- A SQL Server instance looks like
xxxxxxx.xxxxxxx.database.windows.net. - For a managed instance, choose from "SQL Server Account" and "Current User – Active Directory Integrated" authentication types.
- If you select Current User – Active Directory Integrated as the authentication type, the User name field is read-only and displays the currently signed-on Windows user account. If you are running SQL Server 2019 Master Data Services on an Azure Virtual Machine (VM), the User name field displays the VM name and the user name for the local administrator account on the VM.
Your authentication must contain the "sysadmin" rule for managed instances.
- A SQL Server instance looks like
Type a name in the Database name field. Optionally, to select a Windows collation, clear the SQL Server default collation check box and select one or more of the available options. For example, Case-sensitive. Select Next.
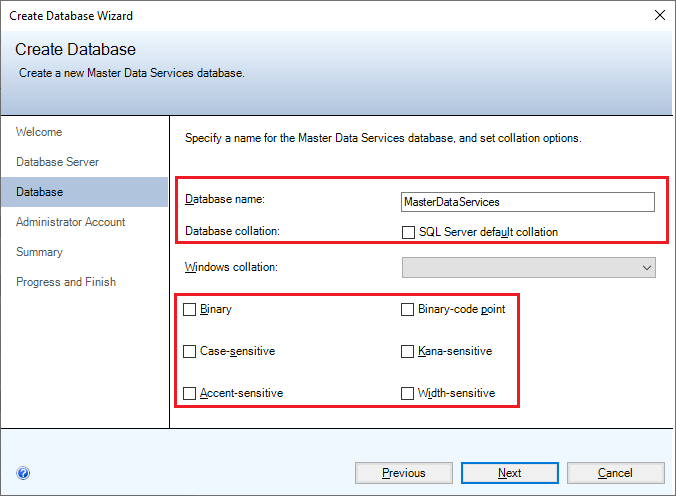
In the User name field, specify the Windows account of the default super user for Master Data Services. A super user has access to all functional areas and can add, delete, and update all models.
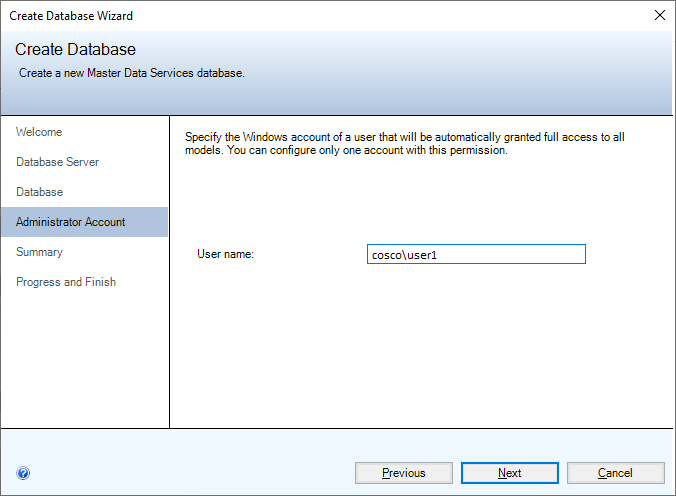
Select Next to view a summary of the settings for the Master Data Services database. Select Next again to create the database. You'll see the Progress and Finish page.
After the database is created and configured, select Finish.
For more information about the settings in the Create Database Wizard, see Create Database Wizard (Master Data Services Configuration Manager).
On the Database Configuration page in the Master Data Services Configuration Manager, choose Select Database.
Select Connect, choose the Master Data Services database and then select OK.
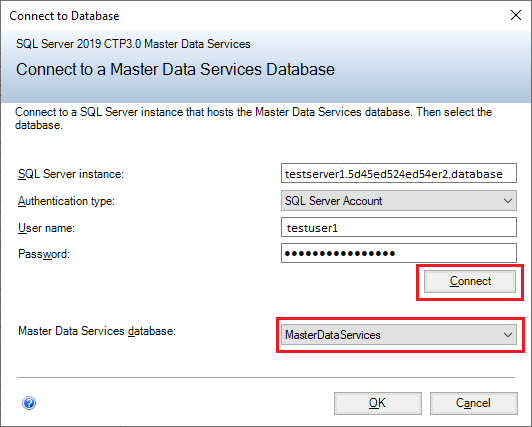
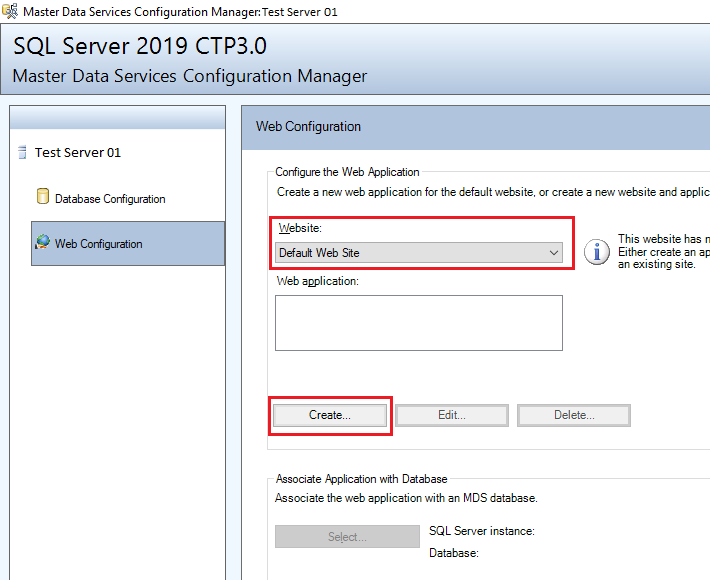
In Master Data Services Configuration Manager, select Web Configuration in the left pane.
In the Website list box, choose Default Web Site, and then select Create to create a web application.
Note
If you select Default Web Site, you'll need to separately create a web application. If you choose Create new website in the list box, the application is automatically created.
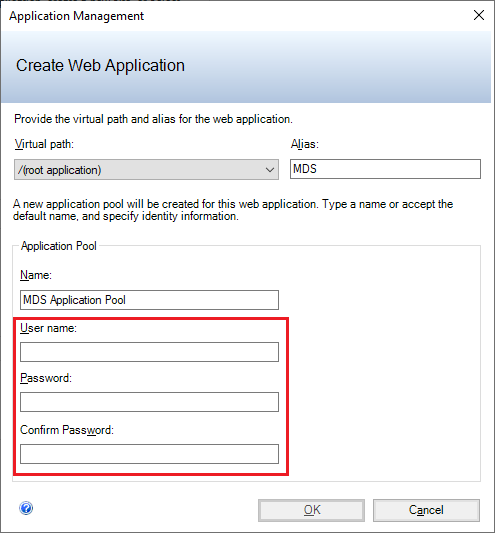
In the Application Pool section, enter a different user name, enter the password, and then select OK.
Note
Make sure that the user can access the database with the Active Directory Integrated authentication that you recently created. Alternatively, you can change the connection in
web.configlater.For more information about the Create Web Application dialog box, see Create Web Application Dialog Box (Master Data Services Configuration Manager).
On the Web Configuration pane in the Web application window, select the application you've created, and then choose Select in the Associate Application with Database section.
Select Connect and choose the Master Data Services database that you want to associate with the web application. Select OK.
You've finished setting up the website. The Web Configuration page now displays the website you selected, web application you created, and the Master Data Services database associated with the application.
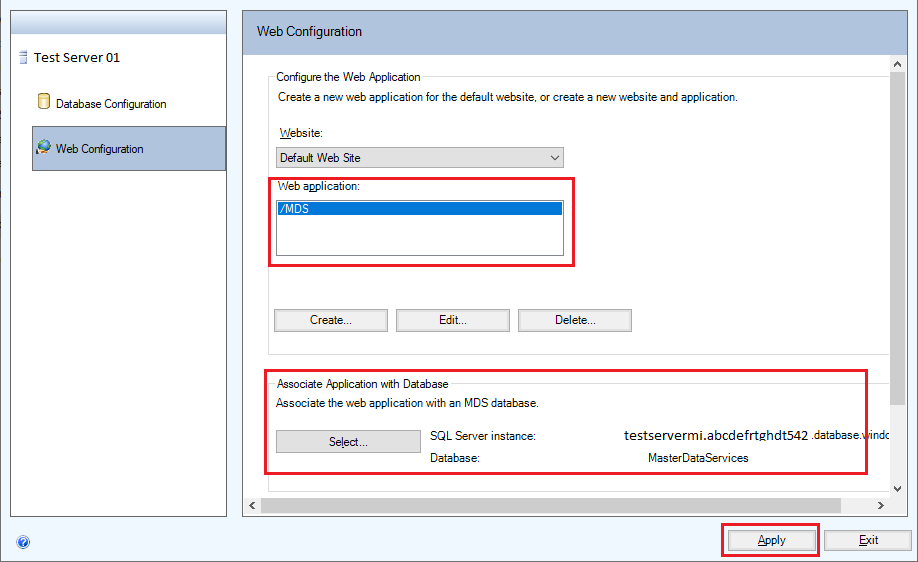
Select Apply. You'll see the Configuration Complete message. Select OK in the message box to launch the web application. The website address is
http://server name/web application/.
Configure authentication
To connect the managed instance database to the web application, you need to change the other authentication type.
Find the web.config file under C:\Program Files\Microsoft SQL Server\150\Master Data Services\WebApplication. Modify the connectionString to change the other authentication type to connect to the managed instance database.
The default authentication type is Active Directory Integrated as shown in the following sample connection string:
<add name="MDS1" connectionString="Data Source=*****.*****.database.windows.net;Initial Catalog=MasterDataServices;Integrated Security=False;Connect Timeout=60;Authentication="Active Directory Integrated"" />
MDS also supports Active Directory password authentication and SQL Server authentication, as shown in the following sample connection strings:
Active Directory password authentication. Replace
<password>with a valid password.<add name="MDS1" connectionString="Data Source=*****.*****.database.windows.net;Initial Catalog=MasterDataServices;Integrated Security=False;Connect Timeout=60;Authentication="Active Directory Password" ; [email protected]; PWD=<password>" />SQL Server authentication. Replace
<password>with a valid password.<add name="MDS1" connectionString="Data Source=*****.*****.database.windows.net;Initial Catalog=MasterDataServices;Integrated Security=False;Connect Timeout=60;User ID=UserName;Password=<password>;" />
Upgrade Master Data Services and SQL Database version
Upgrade Master Data Services
Install the SQL Server 2019 Cumulative Update. Master Data Services will be updated automatically.
Upgrade SQL Server
You might get the error: The client version is incompatible with the database version after installing SQL Server 2019 Cumulative Update.
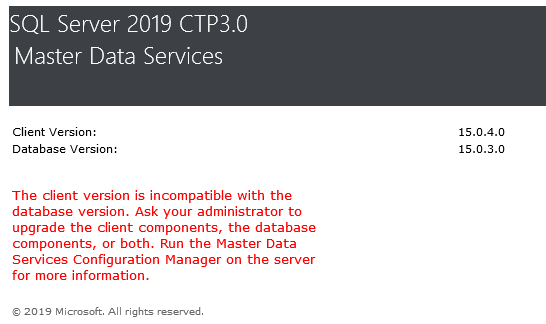
To fix this issue, you need upgrade the database version:
Open the Master Data Services Configuration Manager, and then select Database Configuration in the left pane.
On the Database Configuration page in the Master Data Services Configuration Manager, choose Select Database.
Choose the Master Data Services database that you associated with the web application. Select Connect, and then select OK.

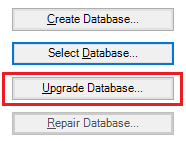
Select Upgrade Database… .
In the Upgrade Database Wizard, select Next on the Welcome page and on the Upgrade Review page.
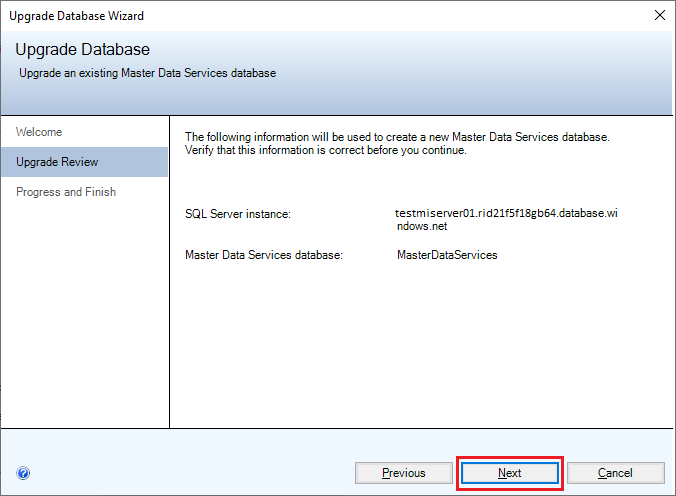
Select Finish after all tasks are complete.