Note
Access to this page requires authorization. You can try signing in or changing directories.
Access to this page requires authorization. You can try changing directories.
This article outlines how to register SAP ECC, and how to authenticate and interact with SAP ECC in Microsoft Purview. For more information about Microsoft Purview, read the introductory article.
Supported capabilities
Scanning capabilities
| Metadata Extraction | Full Scan | Incremental Scan | Scoped Scan |
|---|---|---|---|
| Yes | Yes | No | No |
When scanning SAP ECC source, Microsoft Purview supports:
Extracting technical metadata including:
- Instance
- Application components
- Packages
- Tables including the fields, foreign keys, indexes, and index members
- Views including the fields
- Transactions
- Programs
- Classes
- Function groups
- Function modules
- Domains including the domain values
- Data elements
Fetching static lineage on assets relationships among tables and views.
Other capabilities
For classifications, sensitivity labels, policies, data lineage, and live view, see the list of supported capabilities.
Known limitations
When object is deleted from the data source, currently the subsequent scan won't automatically remove the corresponding asset in Microsoft Purview.
Prerequisites
An Azure account with an active subscription. Create an account for free.
An active Microsoft Purview account.
You need Data Source Administrator and Data Reader permissions to register a source and manage it in the Microsoft Purview governance portal. For more information about permissions, see Access control in Microsoft Purview.
Set up the right integration runtime for your scenario:
- To use a self-hosted integration runtime:
- Follow the article to create and configure a self-hosted integration runtime.
- Ensure JDK 11 is installed on the machine where the self-hosted integration runtime is installed. Restart the machine after you newly install the JDK for it to take effect.
- Ensure that Visual C++ Redistributable (version Visual Studio 2012 Update 4 or newer) is installed on the machine where the self-hosted integration runtime is running. If you don't have this update installed, download it now.
- Download the 64-bit SAP Connector for Microsoft .NET 3.0 from SAP's website and install it on the self-hosted integration runtime machine. During installation, make sure you select the Install Assemblies to GAC option in the Optional setup steps window.
- The connector reads metadata from SAP using the SAP Java Connector (JCo) 3.0 API. Make sure the Java Connector is available on your virtual machine where self-hosted integration runtime is installed. Make sure that you're using the correct JCo distribution for your environment. For example: on a Microsoft Windows machine, make sure the sapjco3.jar and sapjco3.dll files are available. Note down the folder path which you will use to set up the scan.
- Self-hosted integration runtime communicates with the SAP server over dispatcher port 32NN and gateway port 33NN, where NN is your SAP instance number from 00 to 99. Make sure the outbound traffic is allowed on your firewall.
- To use a kubernetes supported self-hosted integration runtime:
- Follow the article to create and configure a kubernetes supported integration runtime.
- Download the 64-bit SAP Connector for Microsoft .NET 3.0 from SAP's website and install it on the self-hosted integration runtime machine. During installation, make sure you select the Install Assemblies to GAC option in the Optional setup steps window.
- The connector reads metadata from SAP using the SAP Java Connector (JCo) 3.0 API. Make sure the Java Connector is available on your virtual machine where self-hosted integration runtime is installed. Make sure that you're using the correct JCo distribution for your environment. For example: on a Microsoft Windows machine, make sure the sapjco3.jar and sapjco3.dll files are available. Note down the folder path which you'll use to set up the scan.
- Self-hosted integration runtime communicates with the SAP server over dispatcher port 32NN and gateway port 33NN, where NN is your SAP instance number from 00 to 99. Make sure the outbound traffic is allowed on your firewall.
Note
Scanning SAP ECC is a memory intensive operation, you're recommended to install Self-hosted Integration Runtime on a machine with at least 128 GB RAM.
- To use a self-hosted integration runtime:
Deploy the metadata extraction ABAP function module on the SAP server by following the steps mentioned in ABAP functions deployment guide. You need an ABAP developer account to create the RFC function module on the SAP server. For scan execution, the user account requires sufficient permissions to connect to the SAP server and execute the following RFC function modules:
- STFC_CONNECTION (check connectivity)
- RFC_SYSTEM_INFO (check system information)
- OCS_GET_INSTALLED_COMPS (check software versions)
- Z_MITI_DOWNLOAD (main metadata import, the function module you create following the Purview guide)
The underlying SAP Java Connector (JCo) libraries might call more RFC function modules; for example, RFC_PING, RFC_METADATA_GET, etc. See SAP support note 460089 for details.
Register
This section describes how to register SAP ECC in Microsoft Purview using the Microsoft Purview governance portal.
Authentication for registration
The only supported authentication for SAP ECC source is Basic authentication.
Steps to register
Open the Microsoft Purview governance portal by:
- Browsing directly to https://web.purview.azure.com and selecting your Microsoft Purview account.
- Opening the Azure portal, searching for and selecting the Microsoft Purview account. Selecting the the Microsoft Purview governance portal button.
Select Data Map on the left navigation.
Select Register
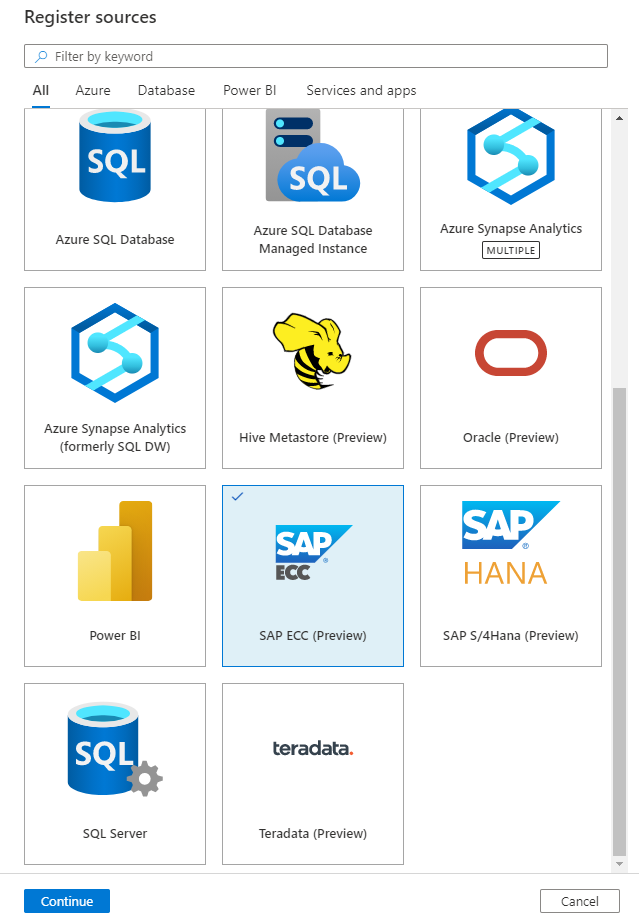
On Register sources, select SAP ECC. Select Continue.
On the Register sources (SAP ECC) screen, do the following:
Enter a Name that the data source will be listed within the Catalog.
Enter the Application server name to connect to SAP ECC source. It can also be an IP address of the SAP application server host.
Enter the SAP System number. This is a two-digit integer between 00 and 99.
Select a collection from the list.
Finish to register the data source.

Scan
Follow the steps below to scan SAP ECC to automatically identify assets. For more information about scanning in general, see our introduction to scans and ingestion.
Create and run scan
In the Management Center, select Integration runtimes. Make sure a self-hosted integration runtime is set up. If it isn't set up, use the steps mentioned in prerequisites to create a self-hosted integration runtime.
Navigate to Sources
Select the registered SAP ECC source.
Select + New scan
Provide the below details:
Name: The name of the scan
Connect via integration runtime: Select the configured self-hosted integration runtime.
Credential: Select the credential to connect to your data source. Make sure to:
- Select Basic Authentication while creating a credential.
- Provide a user ID to connect to SAP server in the User name input field.
- Store the user password used to connect to SAP server in the secret key.
Client ID: Enter the SAP Client ID. It's a three-digit numeric number from 000 to 999.
SNC Mode (Optional): Turn the toggle on if you prefer to use Secure Network Communications (SNC) mode for securing your technical connections to SAP RFCs through a certificate-based authentication mechanism. SNC Mode is off by default.
Follow these steps to set up the SAP Personal Secure Environment with SNC Certificate:
Get SAPCAR
- Go to the SAP Software Download Center and sign in with your SAP credentials.
- Search for SAPCAR and select the latest nonarchived version.
- Select your operating system.
- Download the
.EXE file to C:\sap\SAR.
Get SAP Common Crypto Library
- In the SAP Software Download Center, search for "COMMONCRYPTOLIB" and select the latest version.
- Select your operating system.
- Download the .SAR file with the most recent release date to
C:\sap\SAR.
Extract SAP Common Crypto Library
- Open PowerShell and navigate to
C:\sap\SAR. - Enter the following command, replacing xxxx with your values:
.\SAPCAR_xxxx.EXE -xvf .\SAPCRYPTOLIBP_xxxx.SAR -R .\..\libs\sapcryptolib. - Confirm that
sapgenpse.exeis in theC:\sap\libs\sapcryptolibdirectory.
Generate certificates
Note: This method is for demonstration purposes only and isn't recommended for production systems. For production systems, consult your internal PKI guidance or security team.
Set up the folder structure:
mkdir rootCAmkdir sncCert
Create the necessary serial and index files if they don't exist:
if (-Not (Test-Path "rootCA\index.txt")) { New-Item -Path "rootCA\index.txt" ItemType File }if (-Not (Test-Path "rootCA\serial")) { Set-Content -Path "rootCA\serial" -Value "01" }
Generate a Root CA:
openssl genpkey -algorithm RSA -out rootCA/ca.key.pem -pkeyopt rsa_keygen_bits:2048openssl req -x509 -new -key rootCA/ca.key.pem -days 7305 -sha256 -extensions v3_ca -out rootCA/ca.cert.pem -subj "/O=Contoso/CN=Root CA"
Generate the SNC certificate
openssl genrsa -out sncCert/snc.key.pem 2048openssl req -key sncCert/snc.key.pem -new -sha256 -out sncCert/snc.csr.pem subj "/O=Contoso/CN=SNC"
Create an OpenSSL configuration file,
sncCert/extensions.cnf, for signing:subjectKeyIdentifier = hashauthorityKeyIdentifier = keyid,issuerbasicConstraints = critical,CA:falsekeyUsage = critical,digitalSignature,keyEncipherment,dataEnciphermentextendedKeyUsage = clientAuth,emailProtection
Sign the SNC certificate with the Root CA:
openssl x509 -req in sncCert/snc.csr.pem CA rootCA/ca.cert.pem CAkey rootCA/ca.key.pem CAcreateserial out sncCert/snc.cert.pem days 3650 sha256 extfile sncCert\extensions.cnf extensions v3_leaf
Create a Personal Secure Environment
Create a Personal Secure Environment (PSE) for the on-premises data gateway. The NCo library looks for the SNC certificate inside the PSE.
Create a PKCS#12 container:
openssl pkcs12 -export -out snc.p12 -inkey sncCert\snc.key.pem -in sncCert\snc.cert.pem -certfile rootCA\ca.cert.pem
Create the SECUDIR environment variable.
Open System Properties: In File Explorer, right-click This PC, and then select Properties > Advanced system settings.
Select Environment Variables.
Under System variables, select New.
Set the variable name to SECUDIR.
Set the value to
C:\sapsecudir.Select OK.
Import the PKCS#12 container into a PSE:
C:\sap\libs\sapcryptolib\sapgenpse.exe import_p12 -p SAPSNCSKERB.pse C:\pki certs\snc.p12Allow your SHIR process to use your SAP PSE
Verify which user or service is being used by your SNC client to obtain the certificate to communicate with SAP. The Microsoft Purview SHIR uses the service user NT SERVICE\DIAHostService.
- Add a credential to allow the certificate retrieval request from the PSE:
.\sapgenpse.exe seclogin -p C:\sapsecudir\SAPSNCSKERB.pse -x your-pse-pin -O "NT SERVICE\DIAHostService" - Verify credentials like this:
.\sapgenpse.exe seclogin -l -O "NT SERVICE\DIAHostService" - You can delete them like this:
.\sapgenpse.exe seclogin -d -O "NT SERVICE\DIAHostService" - Use the -h parameter to get help with the sapgenpse command line tool or check the command reference here.
Give permission to access the SAP JCo library to SHIR Process
Verify if Microsoft Purview SHIR user NT SERVICE\DIAHostService has Read/Write/Execute/List permissions over these folders:
SNC Library Path: The folder that has the SNC Library,
sapcrypto.dll. Example:C:\Users\shir-admin\Desktop\snc\SAPCRYPTOLIBP_8557-20011729\sapcrypto.dllJCo Library Path: The folder that has the SAP Java Connector jar file. Example:
C:\Users\shir-admin\Desktop\snc\sapjco3-ntamd64-3.1\sapjco3-ntamd64-3.1.3
SAP NCo Library should also be installed on the virtual machine for test connection to work properly, as it still uses NCo library. This isn't necessary, and Test Connection can be skipped.
Enter SCN details for my name, partner name, library path, and quality of protection, as seen below, and initiate the scan:

JCo library path: Specify the directory path where the JCo libraries are located, for example:
D:\Drivers\SAPJCo. Make sure the path is accessible by the self-hosted integration runtime, learn more from prerequisites section.- For self-hosted integration runtime on a local machine:
D:\Drivers\SAPJCo. It's the path to valid JAR folder location. The value must be a valid absolute file path and doesn't contain space. Make sure the driver is accessible by the self-hosted integration runtime; learn more from prerequisites section. - For Kubernetes-supported self-hosted integration runtime:
./drivers/SAPJCo. It's the path to valid JAR folder location. The value must be a valid relative file path. Refer to the documentation to set up a scan with external drivers for uploading drivers in advance.
- For self-hosted integration runtime on a local machine:
Maximum memory available: Maximum memory (in GB) available on the Self-hosted Integration Runtime machine to be used by scanning processes. This is dependent on the size of SAP ECC source to be scanned. It's recommended to provide large available memory, for example, 100.

Select Continue.
Choose your scan trigger. You can set up a schedule or ran the scan once.
Review your scan and select Save and Run.

View your scans and scan runs
To view existing scans:
- Go to the Microsoft Purview portal. On the left pane, select Data map.
- Select the data source. You can view a list of existing scans on that data source under Recent scans, or you can view all scans on the Scans tab.
- Select the scan that has results you want to view. The pane shows you all the previous scan runs, along with the status and metrics for each scan run.
- Select the run ID to check the scan run details.
Manage your scans
To edit, cancel, or delete a scan:
Go to the Microsoft Purview portal. On the left pane, select Data Map.
Select the data source. You can view a list of existing scans on that data source under Recent scans, or you can view all scans on the Scans tab.
Select the scan that you want to manage. You can then:
- Edit the scan by selecting Edit scan.
- Cancel an in-progress scan by selecting Cancel scan run.
- Delete your scan by selecting Delete scan.
Note
- Deleting your scan does not delete catalog assets created from previous scans.
Lineage
After scanning your SAP ECC source, you can browse Unified Catalog or search Unified Catalog to view the asset details.
Go to the asset -> lineage tab, you can see the asset relationship when applicable. Refer to the supported capabilities section on the supported SAP ECC lineage scenarios. For more information about lineage in general, see data lineage and lineage user guide.

Next steps
Now that you've registered your source, follow the below guides to learn more about Microsoft Purview and your data.