Note
Access to this page requires authorization. You can try signing in or changing directories.
Access to this page requires authorization. You can try changing directories.
Note
The Power Platform CoE Starter Kit is no longer actively maintained. Its core capabilities are part of the Power Platform admin center.
Issues are no longer reviewed or addressed. If you identify a potential security issue, please report it to the Microsoft Security Response Center.
You can set up dataflows to retrieve your inventory from Data Export.
If your inventory comes from Data Export, you can configure dataflows as part of the setup.
Important
- Only complete the steps in this article if you configured Data Export as the mechanism for inventory and telemetry.
- When you see data in your storage account set up to receive data from Data Export, use these Data Export configuration steps. This configuration might show up to five days from the initial setup of Data Export in the Power Platform admin center.
Copy Azure Storage account URL
- Navigate to the Azure portal.
- Search for or select the storage account configured to receive Data Export data.
- Select Endpoints.
- Copy the Data Lake Storage URL to a text editor such as Notepad.
- Append
/powerplatformto the URL.
Confirm Storage Account permission
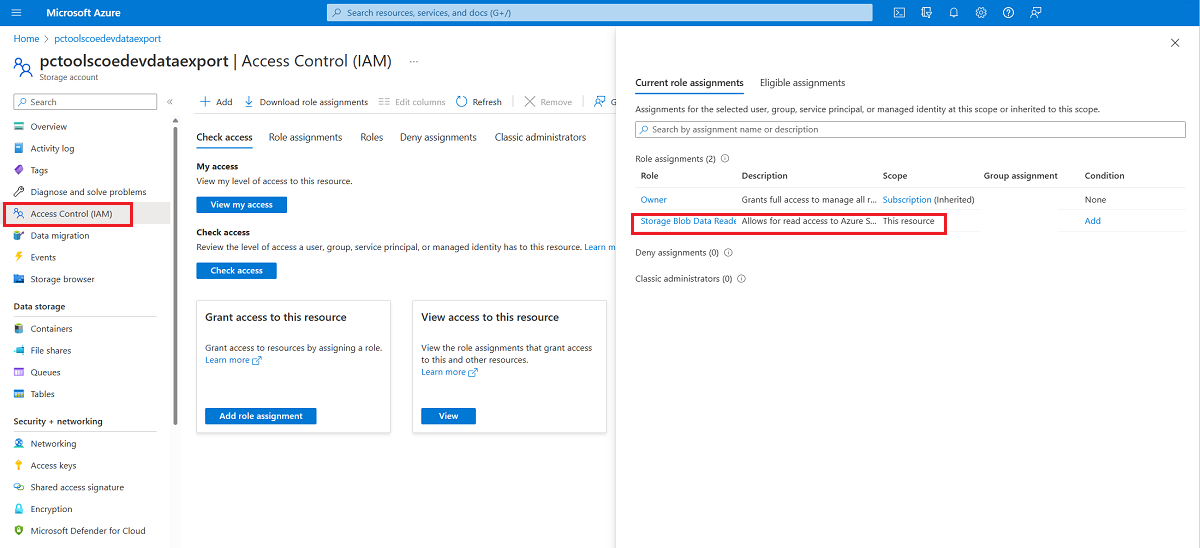
Navigate to the Azure portal.
Search for and select the storage account configured to receive Data Export data.
Select Access Control (IAM).
Select View my access.
Confirm you have the Storage Blob Data Reader role assigned.

Copy Environment Web API endpoint
- Navigate to make.powerapps.com.
- Select the environment with the CoE Starter Kit.
- Select the Settings icon, then select Developer resources.
- Copy the Web API endpoint.
Configure connections to data sources
Navigate to make.powerapps.com.
Select the environment with the CoE Starter Kit.
Select Dataflows.
Edit the CoE BYODL Makers dataflow.

Update the
DatalakeURLparameter with the link to your Data Lake Storage URL and theEnvironmentAPIparameter with the link to your Environment Web API endpoint.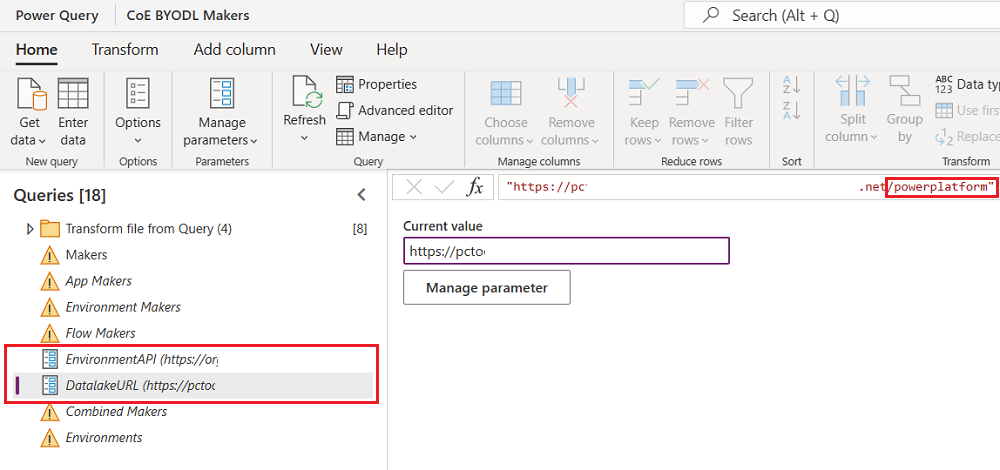
Select each table shown in the Queries section and configure the connection.
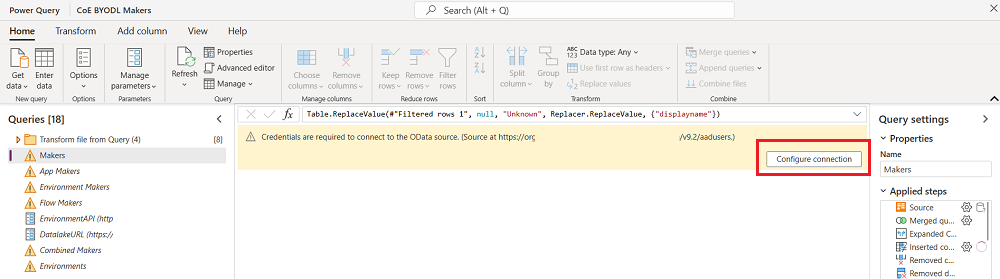
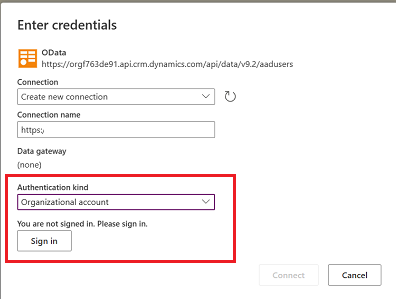
For each connection, select Organizational account and sign in.
Once all connections are configured and there are no more warnings, select Next.
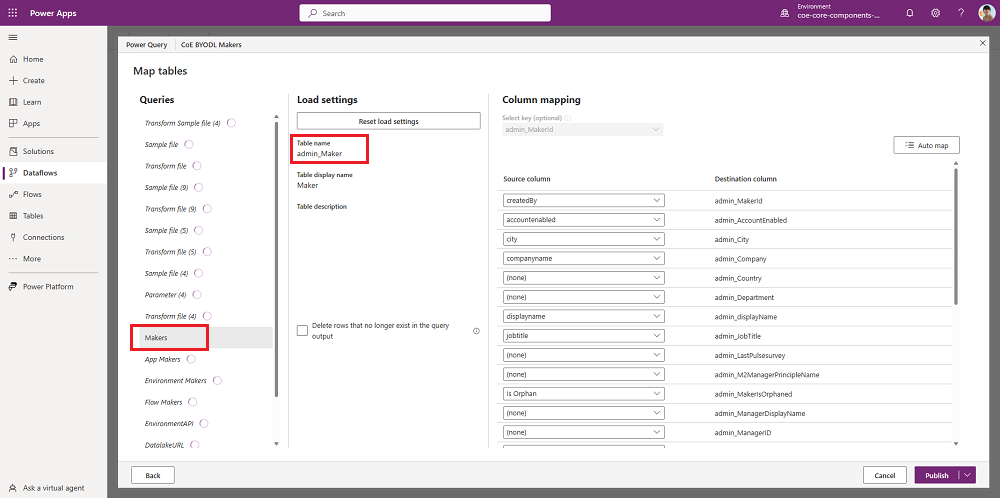
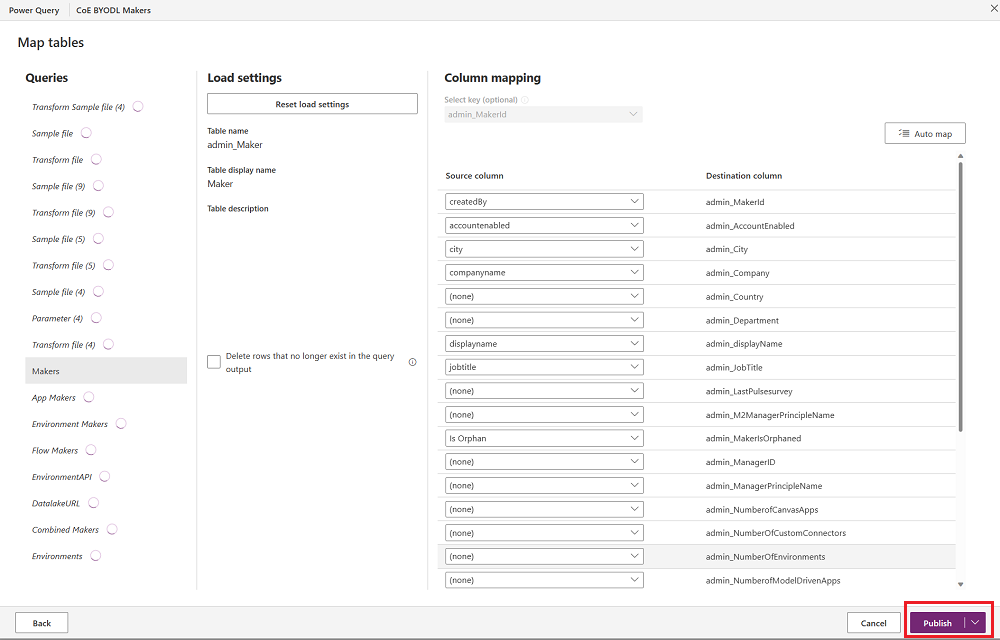
Select the Makers table and confirm that this table is configured to load data to the existing admin_Maker table.
Note
If the table is configured to map to a new table, or you don't see a mapping configured between source and destination columns, select Cancel and start again.
Select Publish. Don't change any data mapping configuration.
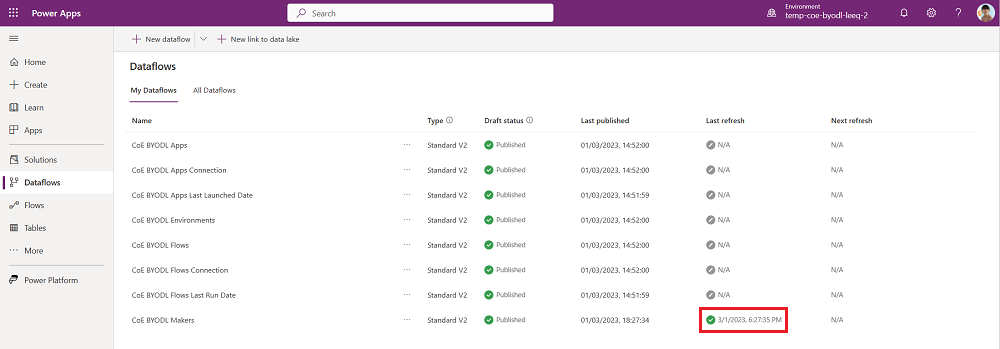
The CoE BYODL Makers start refreshing. Wait for the refresh to finish.
Edit the CoE BYODL Environments dataflow. Complete the same steps to update the DatalakeURL and EnvironmentAPI parameters and configure the connections to the data sources used by this dataflow.
Select Next.
Select the Environments table and confirm this table is configured to load data to the existing admin_Environment table.
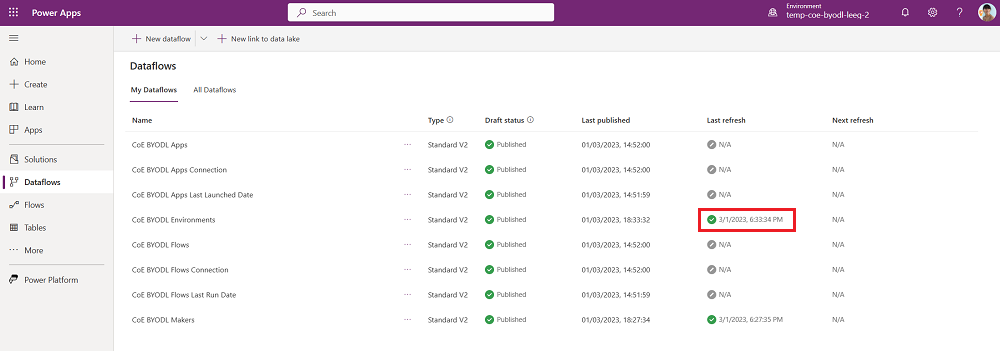
Publish the CoE BYODL Environments dataflow and wait for the refresh to finish.
Edit the CoE BYODL Apps, CoE BYODL Model Driven Apps, and CoE BYODL Flows dataflows. Complete the same steps to update the DatalakeURL and EnvironmentAPI parameters and configure the connections to the data sources used by this dataflow.
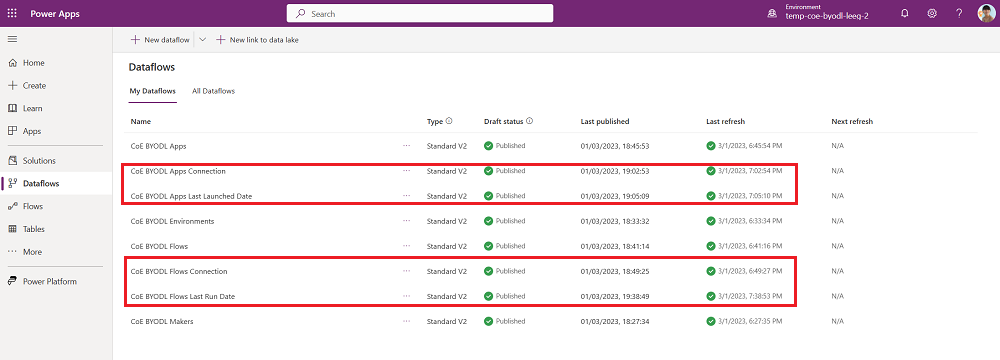
Confirm that the CoE BYODL Apps and CoE BYODL Model Driven Apps dataflows are configured to load data to the existing admin_App table. The CoE BYODL Flows dataflow should be configured to load data to the existing admin_Flow table.
Publish the CoE BYODL Apps, CoE BYODL Model Driven Apps, and CoE BYODL Flows dataflows and wait for the refresh to finish.

Edit the CoE BYODL Apps Connection, CoE BYODL Apps Last Launched Date, CoE BYODL Flows Connection, and CoE BYODL Flows Last Run Date dataflows. Complete the same steps to update the DatalakeURL and EnvironmentAPI parameters and configure the connections to the data sources used by this dataflow.
Confirm the CoE BYODL Apps Connection and CoE BYODL Apps Last Launched Date dataflows are configured to load data to the existing admin_App table. The CoE BYODL Flows Connection and CoE BYODL Flows Last Run Date dataflows should be configured to load data to the existing admin_Flow table.
Publish the CoE BYODL Apps Connection, CoE BYODL Apps Last Launched Date, CoE BYODL Flows Connection, and CoE BYODL Flows Last Run Date dataflows and wait for the refresh to finish.


Troubleshooting
This section provides guidance on how to resolve common issues that might arise during the setup and configuration of the Data Export.
The specified path doesn't exist
This dataSource error means not all required folders and files are available yet in the storage account, since you recently configured the Data Export. After the initial setup, updated data can take up to five days for folders to populate.

A DataFormat.Error after updating the DatalakeURL and EnvironmentAPI parameters
This error might mean you entered incorrect URLs. Verify that the DatalakeURL parameter points to your Azure Storage account URL. The URL should contain dfs.core and end with /powerplatform. Verify that the EnvironmentAPI points to your Environment Web API. The URL should contain api.crm and end with /api/data/v9.2.

The publish or refresh failed
Select the error to review the status alert in the Last refresh column.

The refresh might fail if you didn't configure connections to all data sources used by the dataflow. Edit the dataflow again and verify you configured the connections to all data sources. Select all the queries individually to check for warnings.

The publish button is disabled
If you configured connections in the dataflow, but the Publish button remains disabled (with a warning message), some configured connections might be missing. Select Back and review all queries for connection warnings.

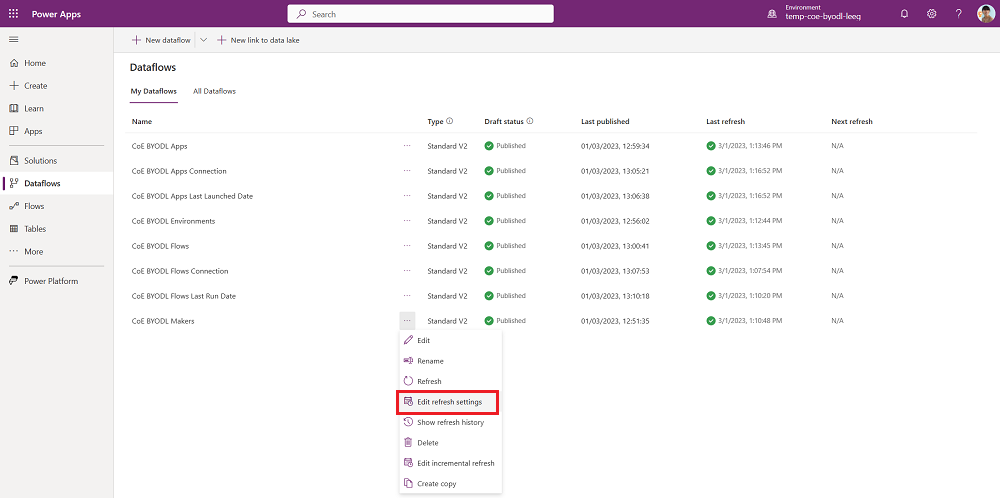
Configure scheduled refresh
Navigate to make.powerapps.com.
Select the environment with the CoE Starter Kit.
Select Dataflows.
Select Edit refresh settings for the CoE BYODL Makers dataflow.
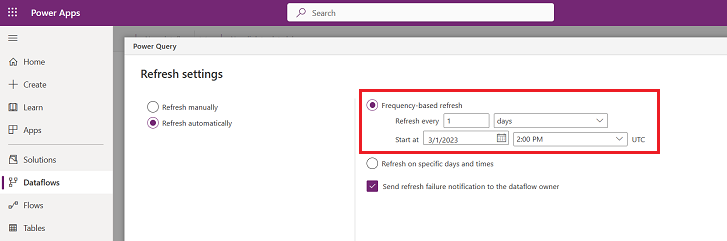
Select Refresh automatically and configure a daily refresh. Check when files write to your storage account by the Data Export feature and set the daily refresh of the dataflow after that time. The dataflow now runs after data is exported to your storage account.


Environment variables
This section includes the full list of environment variables that affect the Data Export methodology to inventory the tenant. The Setup Wizard fills in these values for you.
| Name | Description | Default value |
|---|---|---|
| App Connections Dataflow ID | Dataflow ID of the CoE BYODL App Connections dataflow. Only used when mechanism for inventory is Data Export. | Not applicable |
| App Dataflow ID | Dataflow ID of the CoE BYODL Apps dataflow. Only used when mechanism for inventory is Data Export. | Not applicable |
| App Usage Dataflow ID | Dataflow ID of the CoE BYODL App USage dataflow. Only used when mechanism for inventory is Data Export. | Not applicable |
| Current Environment | Current Dataflow Environment ID used by cloud flows to refresh dataflows. Only used when mechanism for inventory is Data Export. | Not applicable |
| Environment Dataflow ID | Dataflow ID of the CoE BYODL Environments dataflow. Only used when mechanism for inventory is Data Export. | Not applicable |
| Flow Connections Dataflow ID | Dataflow ID of the CoE BYODL Flow Connections dataflow. Only used when mechanism for inventory is Data Export. | Not applicable |
| Flow Usage Dataflow ID | Dataflow ID of the CoE BYODL Flow Usage dataflow. Only used when mechanism for inventory is Data Export. | Not applicable |
| Flow Dataflow ID | Dataflow ID of the CoE BYODL Flows dataflow. Only used when mechanism for inventory is Data Export. | Not applicable |
| Maker Dataflow ID | Dataflow ID of the CoE BYODL Makers dataflow. Only used when mechanism for inventory is Data Export. | Not applicable |
| Model App Dataflow ID | Dataflow ID of the CoE BYODL Model Driven Apps dataflow. Only used when mechanism for inventory is Data Export. | Not applicable |