Note
Access to this page requires authorization. You can try signing in or changing directories.
Access to this page requires authorization. You can try changing directories.
This article provides tips on setting up and using the Microsoft CoE Starter Kit and answers frequently asked questions (FAQs).
Install a solution in a production environment
Go to make.powerapps.com.
Go to your CoE environment. In this example, the environment is named Contoso CoE.

On the left pane, select Solutions.
Select Import, and then select Browse.
Select the solution from the CoE Starter Kit download.
Establish connections to activate your solution. If you create a new connection, select Refresh. Your import progress remains intact.
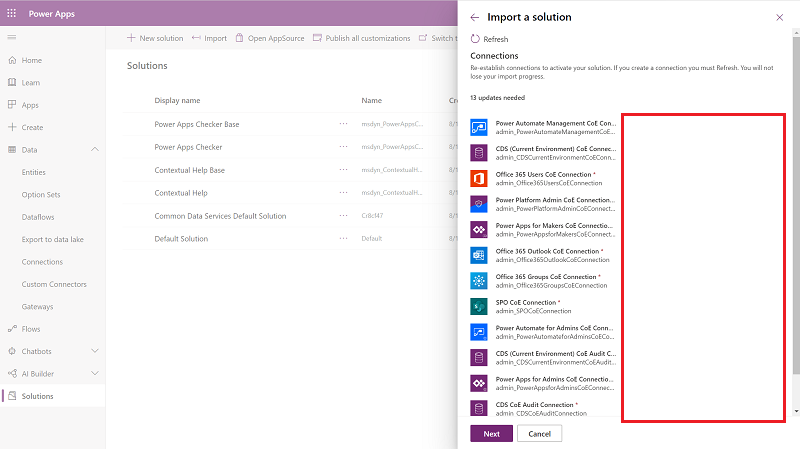
Update environment variable values.
These environment variables store application and flow configuration data specific to your organization or environment. By setting the value once per environment, it appears across all necessary flows and applications within that environment.

Select Import.

Set flow Run only users properties
Remove unmanaged layers for all flows.
Go to the Details page, and then select the Run only users edit button.

All connections in the child flow are displayed.
For each connection except Microsoft Dataverse, change the value to Use this connection `([email protected]). For Microsoft Dataverse, leave the value blank.
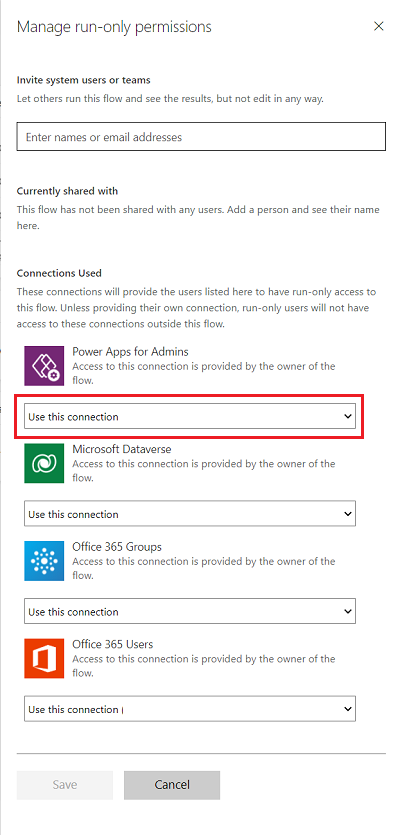
If there's no connection for any of the connectors, go to Data > Connections, and create one for the connector.
After you update all run-only users, enable the child flow.

Find a user's security roles in an environment
To find a user's security roles in an environment, follow these steps:
Go to Power Platform admin center.
Select Manage > Environments.
Select your environment.
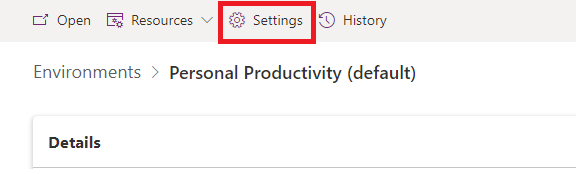
Select Settings.
From Users + Permissions, select Users.
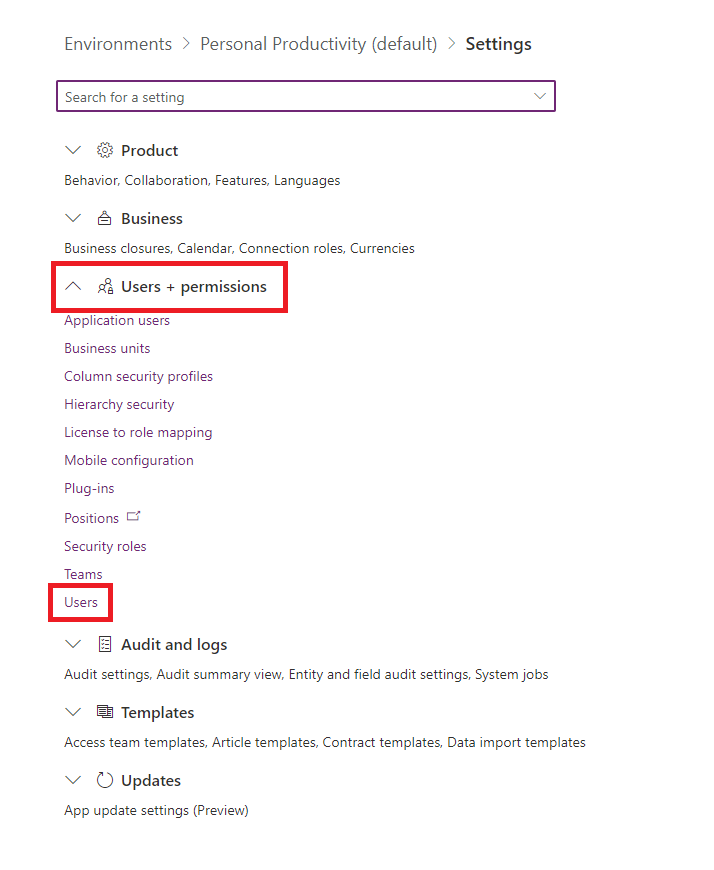
Find the user and select to view properties.
Check the user's security roles under Roles.

Import a flow
Occasionally, you might deploy a one-time flow to address specific issues. When you make these flows available, the first step is to import them.
To import your flows:
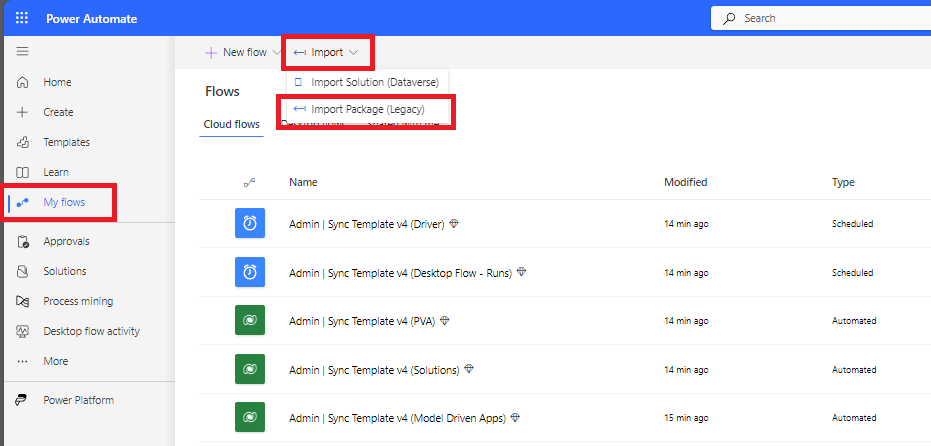
Go to make.powerautomate.com.
Select your target environment. For this example, choose your CoE Environment.
Select My flows > Import > Import Package (Legacy).
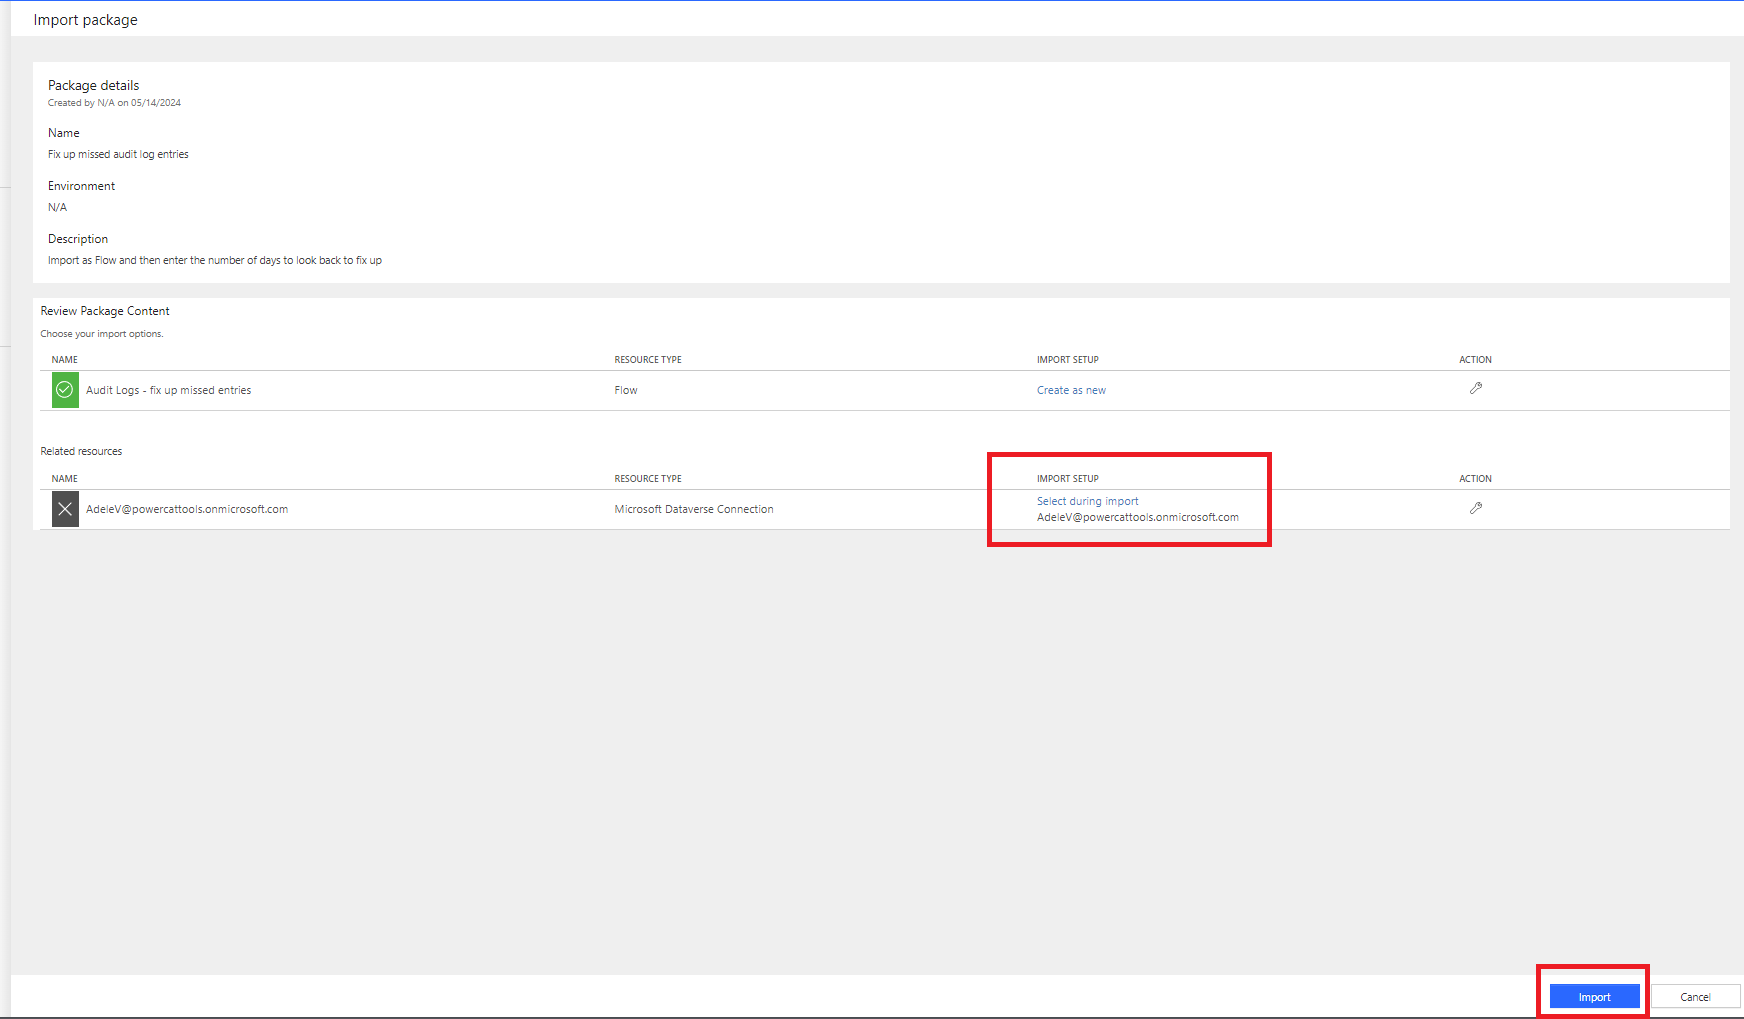
Select and upload your flow.

Create any needed connections, and then select Import.
Select Open flow to view.
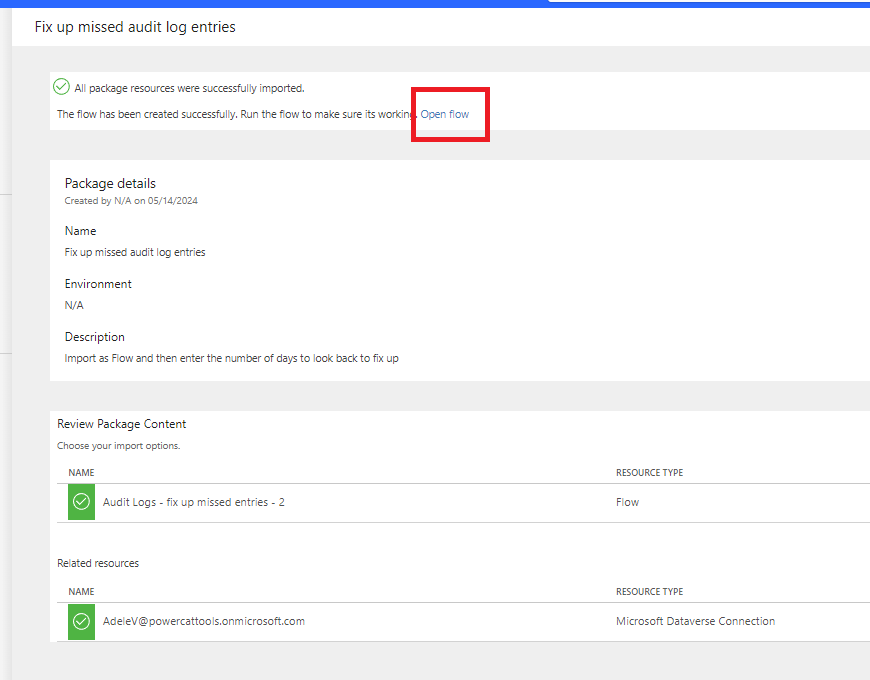
Return to the previous view to see package details.

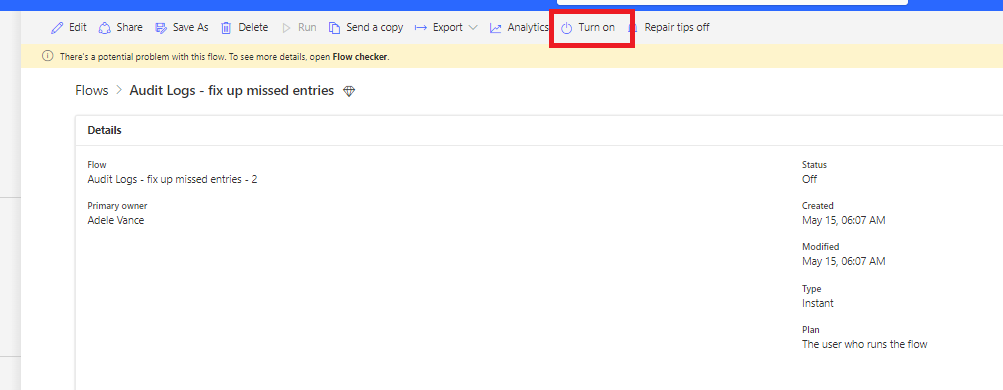
Turn on the flow.


Set up CoE for a subset of environments
You might want to monitor and govern only certain environments by using the CoE Starter Kit. For example, you might set up the CoE Starter Kit for individual business units managing their own smaller Centers of Excellence, or you might include your Dynamics 365 environments in the CoE Starter Kit processes.
Important
A starter kit process isn't a security feature and doesn't implement data privacy or row-level security. The process is solely intended to facilitate the monitoring and management of environments for organizational units.
You can selectively enable CoE Starter Kit processes for specific environments:
After you import the Core components and before you turn on flows, set the value of the is All Environments Inventory environment variable to No. Learn more in Update environment variables.
Continue with the inventory setup and turn on all inventory flows.
Wait for the first inventory run of Admin | Sync Template v3 to complete. All environments in the tenant are added as excluded from inventory.

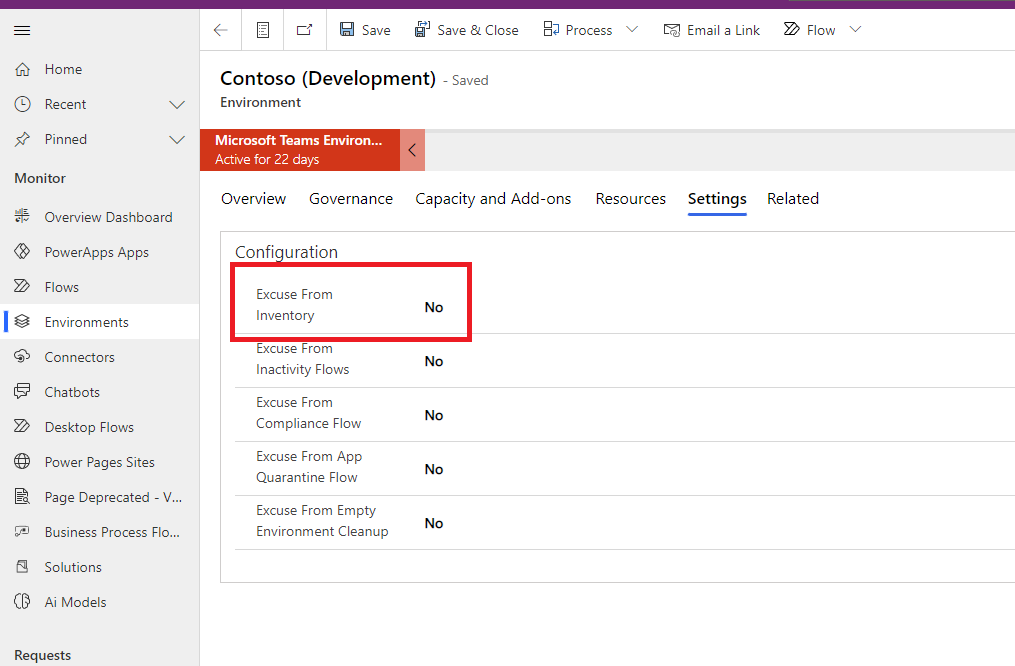
Add the environments you want to monitor and manage to the inventory by selecting No for the Excuse From Inventory configuration.
Wait for the next inventory run to complete. The run automatically picks up and monitors inventory for the selected environments.

Run a full inventory
To reduce API calls, inventory flows don't update all objects with every sync flow. The flows only update objects modified since the last inventory.
Note
Inventory flows don't check each object every day to see if its modified date is more recent than the date in inventory.
Inventory flow actions:
Gets all objects. For example, the flow calls Get Apps as Admin.
Filters the returned list of objects to get objects where the modified date is greater than seven days old (configurable via InventoryFilter_DaysToLookBack).
Checks each object in the filtered result to see if its current modified date is more recent than the inventory date.
Updates these objects with the more recent modified by date.
If sync flows are turned off for longer than seven days, you can only get the inventory updates you missed by modifying the InventoryFilter_DaysToLookBack environment variable. Learn more in Update environment variables.
To fully update your entire inventory again, change the Full inventory environment variable:
Set the value of the Full inventory environment variable to Yes. Learn more in Update environment variables.
Run the Admin | Sync Template v4 (Driver) flow.
Wait until the flow finishes running.
Set the Full inventory environment variable to No.
Update inventory for a selected app or flow
You can manually trigger an inventory update for a specific app or flow if you need the latest details outside the regular sync schedule.
Force inventory on objects
To reduce API calls, the inventory flows don't update all objects with each synchronization run. Instead, the flows only update objects modified since the last inventory. However, if you want to force the inventory for an individual object, use the Inventory Me flag. All objects have this flag.
Here's an example of how to set this flag by using Cloud Flow objects.
- Go to Power Apps and select your CoE environment.
- Open the Power Platform Admin View app.
- Select Flows.
- Select the flow for which you want to force inventory from the view.
- Select Settings.
- Change the Inventory Me flag to Yes.
When you set this flag to Yes, the next inventory run updates the object, even if it isn't recently modified. The flag then resets to No.
Force inventory on cloud flow action details
We gather details about the flow actions in a long running flow called Admin | Sync Template v3 (Flow Action Details).
To force inventory to run for your flow, use the Inventory My FlowActionDetails flag.
- Go to Power Apps and select your CoE environment.
- Open the Power Platform Admin View app.
- Select Flows.
- Select the flow for which you want to force flow action detail inventory from the view.
- Select Settings.
- Change the Inventory My FlowActionDetails flag to Yes.
Update environment variables
Use environment variables to manage configuration settings for your CoE Starter Kit across environments. This section highlights important limitations and explains how to update variables.
Limitations for environment variables
The following limitations apply when updating environment variables:
- You can't update the values for environment variables from within the imported solution.
- Always add or update the current value, not the default value, as the default value is overwritten when you install an upgrade.
- You can't update Azure Key Vault secret environment variables by using the CoE Admin Command Center. Instead, update them via the Default Solution.
Update CoE Starter Kit specific environment variables
To update environment variables used in the kit, use the CoE Admin Command Center:
- Go to Power Apps and select your CoE environment.
- Open the CoE Admin Command Center app.
- Select the Environment Variables screen.
- Select an environment variable to update, and then select Edit from the navigation bar.
Ensure flows that use environment variables aren't cached
Power Automate sometimes caches old values for environment variables. If you don't see the expected behavior after changing an environment variable, restart the impacted flows.
Go to Power Automate.
On the left pane, select Solutions.
Select the Default Solution, and change the filter to show Environment variables.
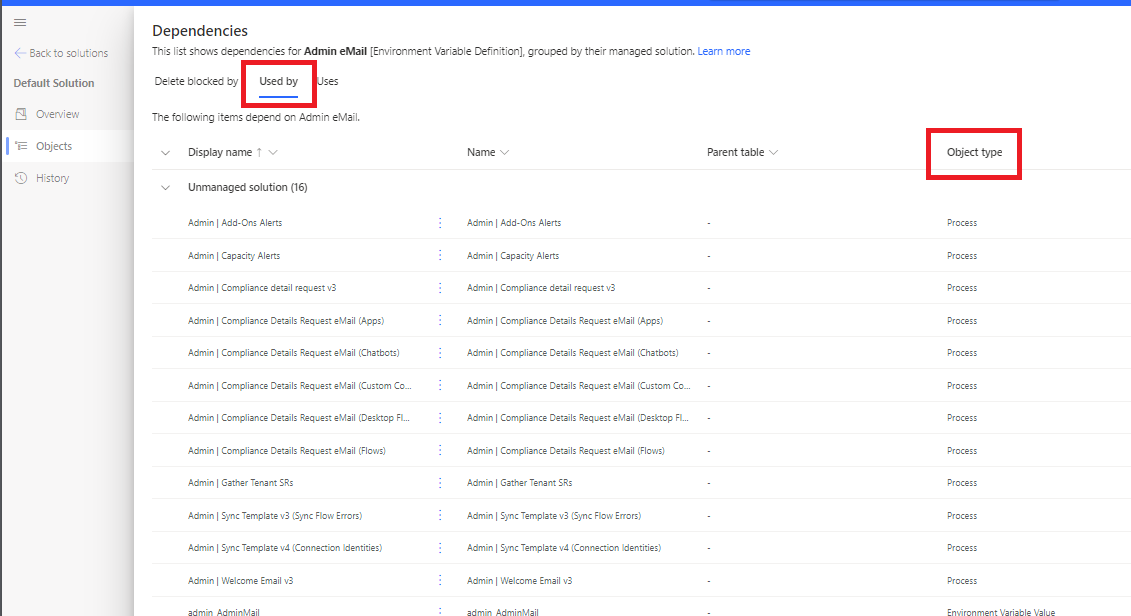
Select a variable that you want to update and select its overflow menu to Advanced > Show dependencies.
Locate the Used by tab and the Object type process.
Turn off all flows and then turn them back on.

Environment variables outside the kit
If you aren't using the CoE Admin Command Center app, you can update environment variables outside the kit directly in the environment. Updating through the environment is the only way to update Azure Key Vault secret environment variables.
Go to Power Automate.
On the left pane, select Solutions.
Select the Default Solution, and change the filter to show Environment variables.
Select a variable that you want to update, and then configure its Current Value.
If you're updating an Azure Key Vault secret environment variable, enter the following information:
- Azure Subscription ID: The Azure subscription ID associated with the key vault.
- Resource Group Name: The Azure resource group where the key vault that contains the secret is located.
- Azure Key Vault Name: The name of the key vault that contains the secret.
- Secret Name: The name of the secret located in Azure Key Vault.
Tip
You can find the subscription ID, resource group name, and key vault name on the Azure portal Overview page of the key vault. To find the secret name on the key vault page in the Azure portal, select Settings > Secrets.
Update connection references
- Go to Power Automate.
- On the left pane, select Solutions.
- Select the Default Solution, and change the filter to show Connection References.
- Select a connection reference.
- Set the value by selecting an existing connection from the dropdown or by creating a new connection.
- Select Save and confirm your changes.
Monitor and customize emails
The solution stores all emails sent as part of the CoE Starter Kit in the Customized Emails table. To customize the emails, you don't need to modify the flows or apps that send the emails. Instead, you can use the CoE Admin Command Center app.
- Go to Power Apps and select your CoE environment.
- Open the CoE Admin Command Center app.
- Select Customized Emails.
- Select the email you want to customize, and then select Edit.
By default, all emails are provided in English. To add localized versions of the email, select Add language.

Share an app from a production environment
Go to Power Apps and select your CoE environment.
On the app that you want to share, select the overflow menu ... > Share.
Select the Dataverse security role. The CoE Starter Kit provides three security roles:
- Power Platform Admin SR for sharing an app with admins
- Power Platform Maker SR for sharing an app with your makers
- Power Platform User SR for sharing an app with users
Select Share.
Get a Power Apps URL from a production environment
- Go to Power Apps and select your CoE environment.
- Select Apps.
- Select the app that has the URL you need.
- Select the overflow menu ... > Details.
- Select the Web link.
Handle backend throttling during inventory runs
Some users might encounter throttling by the product backends, such as updating records in Dataverse, during their inventory process. This throttling results in 429 errors. To address this issue, use an environment variable that adds a delay at the beginning of each individual inventory action. This delay prevents actions from running concurrently. Note that while this approach mitigates concurrency issues, it might prolong the inventory process.
To use this environment variable, change DelayObjectInventory to Yes.
Learn more in Update environment variables.
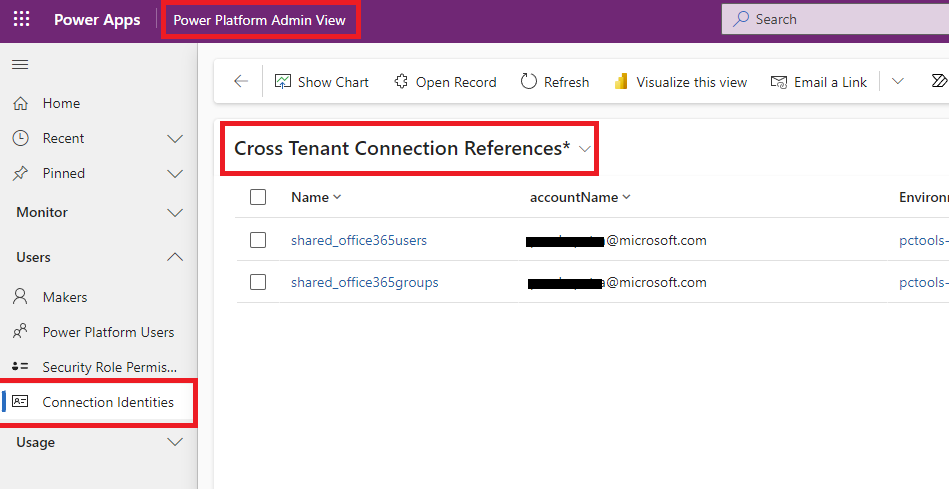
Configure cross tenant connection identities
In the Power Platform Admin View app, you see highlighted cross-tenant connection identities. How do you configure what is considered cross-tenant?
How to configure a local connection identity
By default, only the host domain of the identity running the inventory flows is a local_ identity. To configure this identity, use the Host Domains environment variable.
Enter any hosts you want to add as a comma-separated string.

Learn more in How to update environment variables.
How to update data to respect configured local tenants
Changing the Host Domains environment variable doesn't retroactively update old data in tables. Since this setting change is infrequent, the solution doesn't regularly compare it to avoid extra API calls. You need to update this environment variable manually.
Update this variable manually with custom flows, an Excel add-in, or through plugins. The underlying logic is consistent across these methods, so choose the method that best suits your needs.
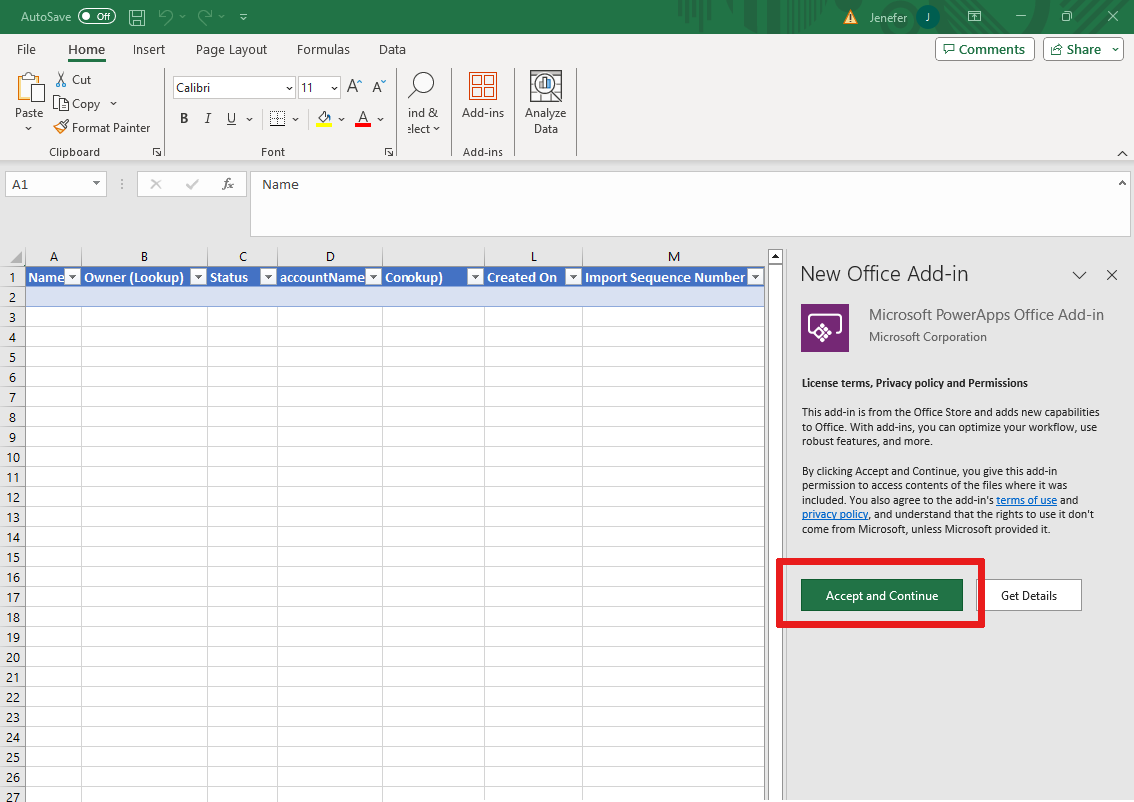
For this example, we're using the Excel Add-In due to its speed and minimal API impact.
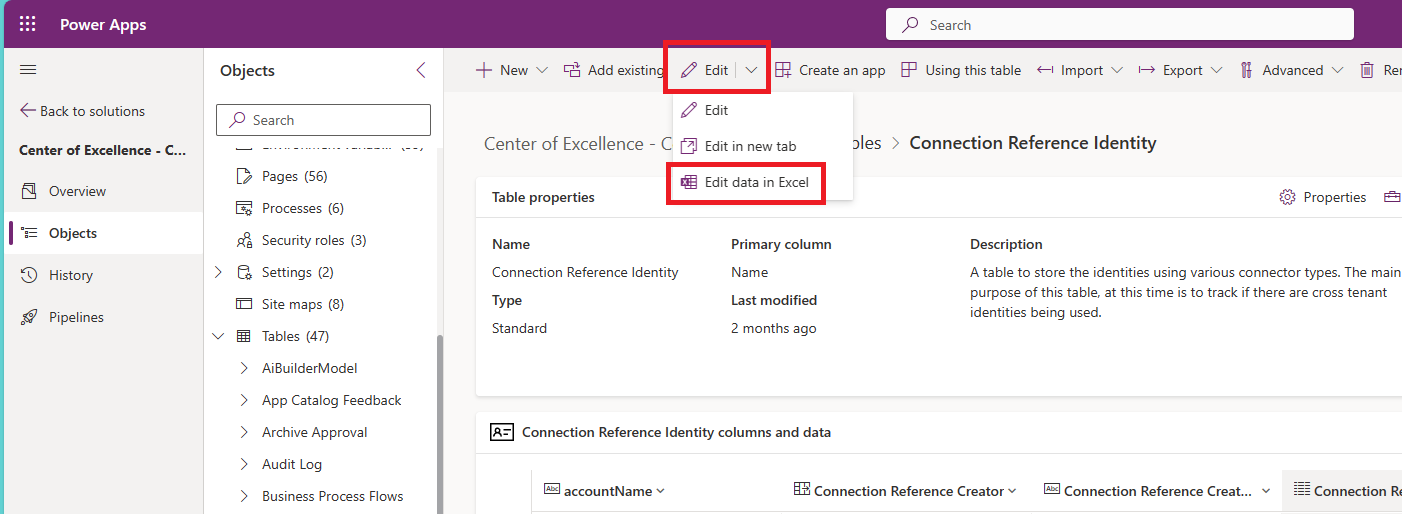
Go to the Connection Reference Identity table and select Edit data in Excel.
Select Enable Editing.

Select Accept and Continue, if prompted, then sign in with your CoE Admin identity.
Filter the accountName field by the domain you added to the Host Domains environment variable.

Set the NoneOrCrossTenantIdentity field to No.
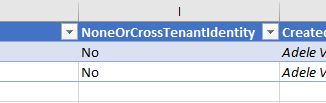
Remove the filters and publish.


How do I activate Business Process Flows?
Occasionally, users encounter disabled Business Process Flows (BPFs) within the kit due to installation issues.
To use features that rely on these BPFs, you can activate them manually:
Browse to the solution with the BPFs and select to view Processes.
Find BPFs that are turned off and select the one you want to activate to open it.
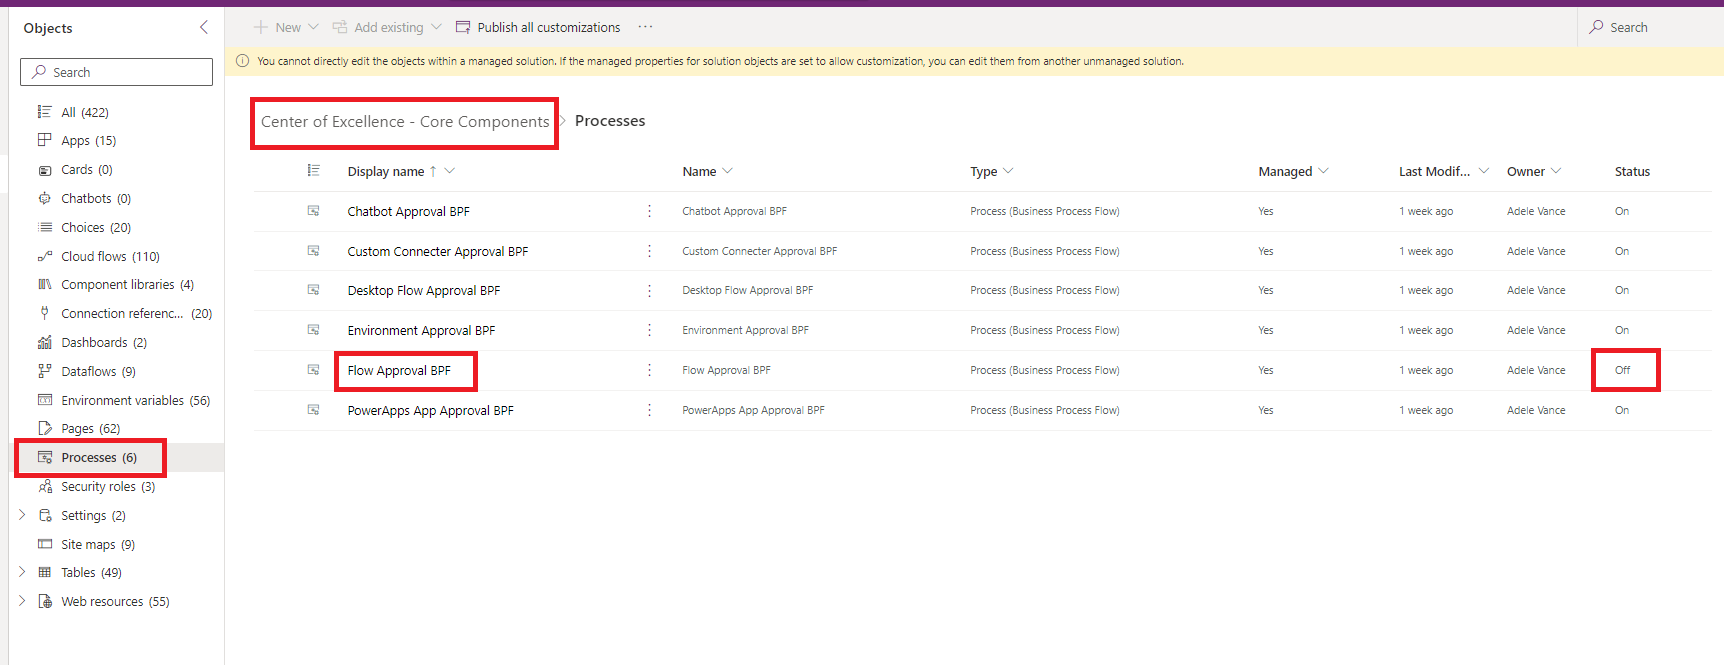
Select Activate to turn on the BPF.


Which license should I assign to the user running CoE Starter Kit flows?
Before installing the CoE Starter Kit, the user must have a Power Automate Per User license, or the flows must be covered by a Per Flow license.
Often, you need a combination of these licenses to run the CoE Starter Kit successfully. The specific combination depends on factors such as the number of resources (apps, flows, environments) in your tenant, the number of makers, and how frequently new resources are created and modified.
Different Power Automate license types have different API limits and enforcements. If your license type isn't sufficient, the flow might be throttled or run for an extended period.
Follow these steps to help you determine which license to select:
Understand Power Automate requests limits.
Start by assigning a Power Automate Per user license and turn on all required flows. Monitor the flows with CLEANUP, Sync Template (Flows), and Sync Template (Apps) in the name. The options might consume a high number of API requests. You can use action analytics to monitor the API requests of these flows.
If the flow runs too many actions, change the flow owner to a different account with a Power Automate Per User license. This step load balances the API requests.
If the flow continues to execute too many actions, consider assigning a Per Flow plan to it. This action allocates capacity and API requests specifically for the flow.