Automate tests with Azure Pipelines using YAML
In this article, you'll learn how to set up and run your canvas app tests built in the Test Studio by using a YAML pipeline in Azure DevOps Services.
You can use a public project on GitHub—Microsoft/PowerAppsTestAutomation—to:
- Automate the operations of signing in to your application.
- Open a browser on the build agent and execute a set of test cases and suites.
- View the status of the test execution in the Azure DevOps pipeline.
Prerequisites
Before you begin, you must complete the following steps:
Fork the Microsoft/PowerAppsTestAutomation project on GitHub.
Note
Public forks can't be made private. If you want to create a private repo, you need to duplicate the repository.
Create a new Test URLs .json file that includes the app test URLs you want to run from the pipeline.
Create a new Azure Pipelines YAML file.
Create a GitHub service connection to your repo.
Step 1 - Fork the PowerAppsTestAutomation project
A fork is a copy of a repository. By forking a repository, you can make changes without affecting the original project.
Sign in to GitHub.
Go to the microsoft/PowerAppsTestAutomation repository. You can also search for microsoft/PowerAppsTestAutomation instead, and then select the repository.

Select Fork.

Select where you want to locate the fork.

Your forked repository will now be available.
Step 2 - Create a test URL .json file
The test URL .json file will contain the test suite and test case URLs for validating your app. The app test suite and test case URLs can be retrieved by selecting the copy play link in Test Studio.
You can find a sample file, Samples/TestAutomationURLs.json, in the repo you created earlier.
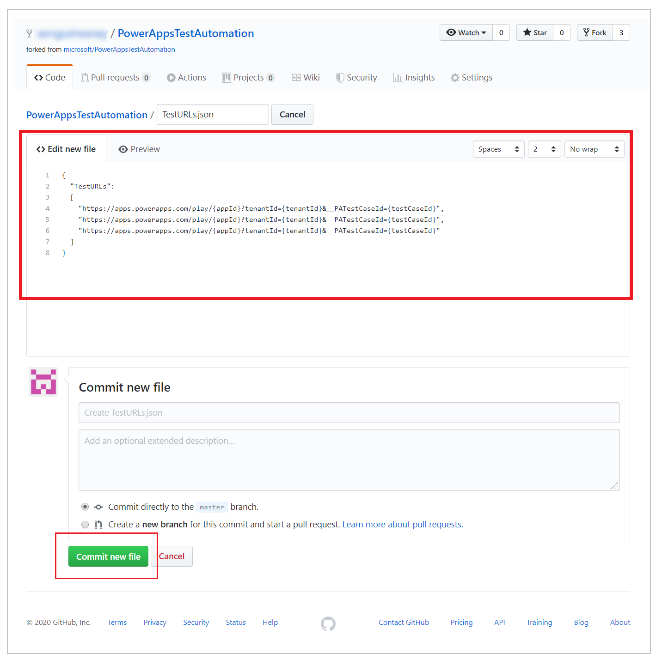
Create a new file named TestURLs.json file in your repo, or use any file name you want. The file name and location will be mapped in the pipeline variables later in the document.
Copy the format from the Samples/TestAutomationURLs.json file.
Update the Test URLs section with the tests that you want to validate in your app.
Commit the changes to your repo.
Step 3 - Create an Azure Pipelines YAML file
You can find a sample file, Samples/azure-pipelines.yml, in the repo you created earlier.
Create a new file named azure-pipelines.yml file in your repo.
Copy the content from the Samples/azure-pipelines.yml file.
Commit the changes to your repo. You'll reference and update the azure-pipelines.yml file when you're configuring your pipeline in Step 4.
Step 4 - Create a GitHub service connection
Sign in to your Azure DevOps instance.
Select an existing project, or create a new project.
Select Project settings at the bottom of the left navigation pane.

Under Pipelines, select Service connections.
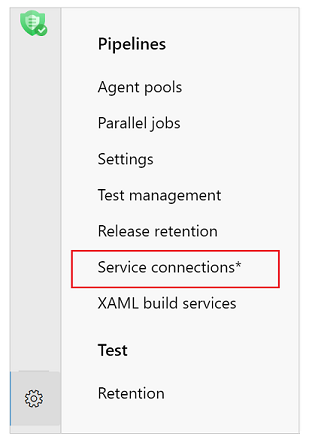
Select Create service connection.
Select the GitHub service.
Select Next.

Under OAuth Configuration, select AzurePipelines.
Select Authorize.
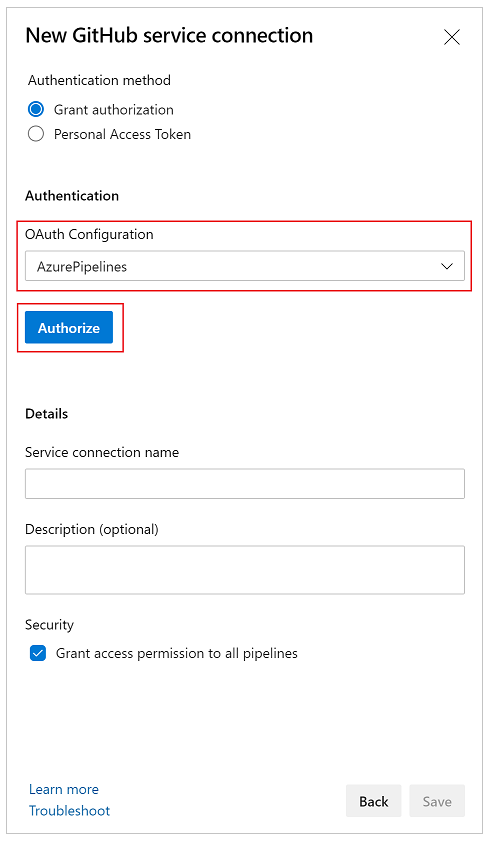
Optionally, you can update the Service connection name.
Select Save.

Create a pipeline
Select Pipelines in the left navigation pane.
Select Create Pipeline.
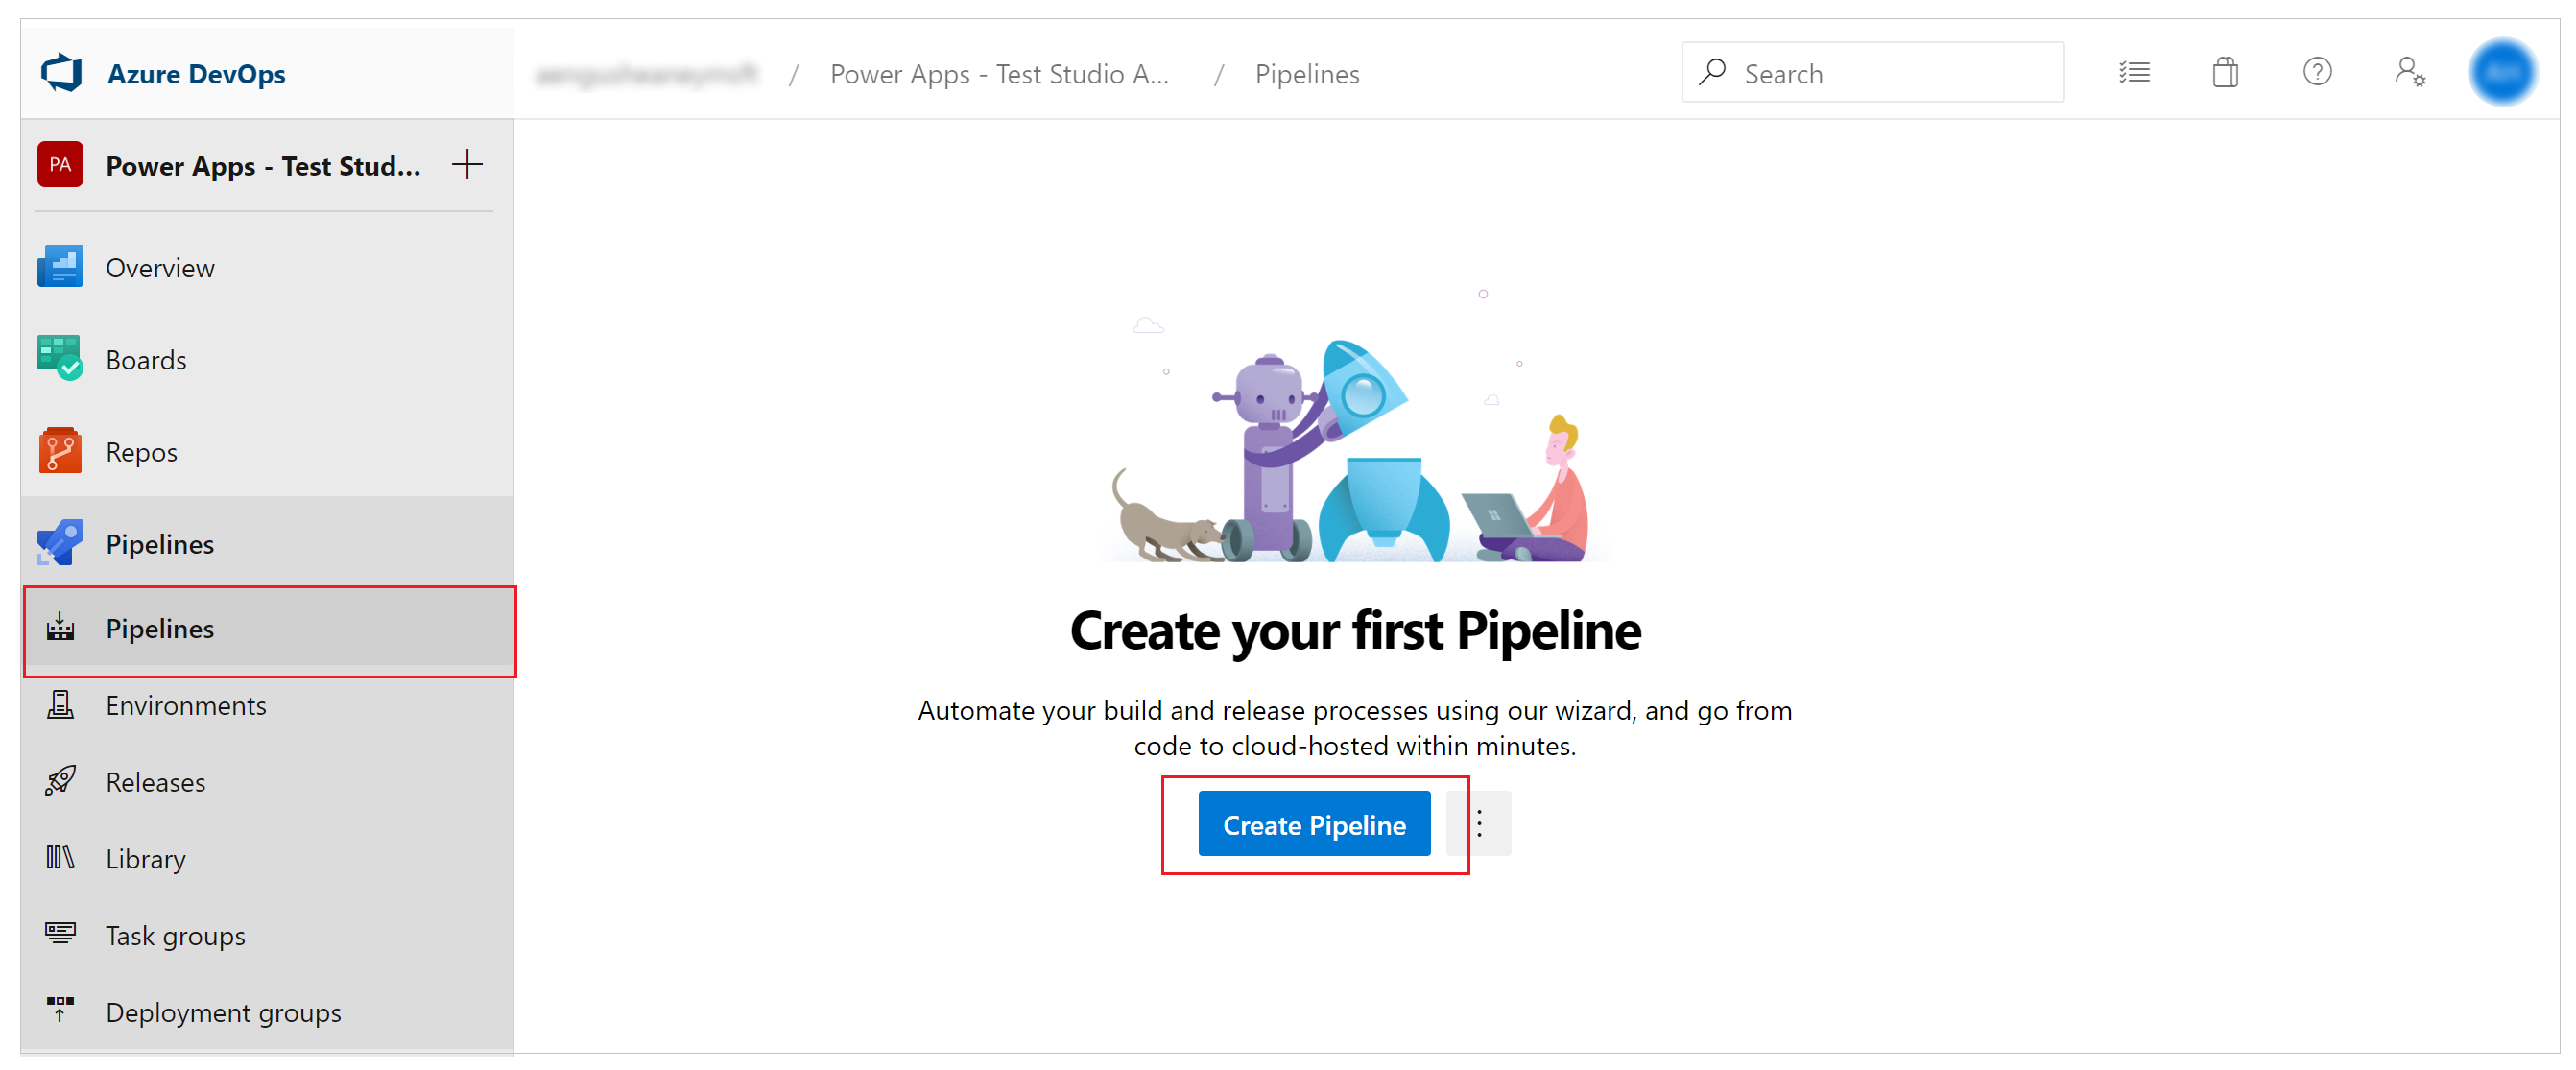
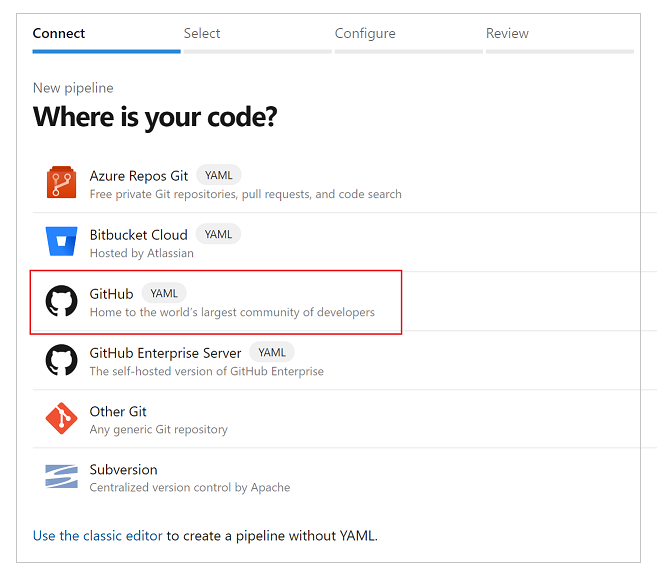
Select GitHub YAML.
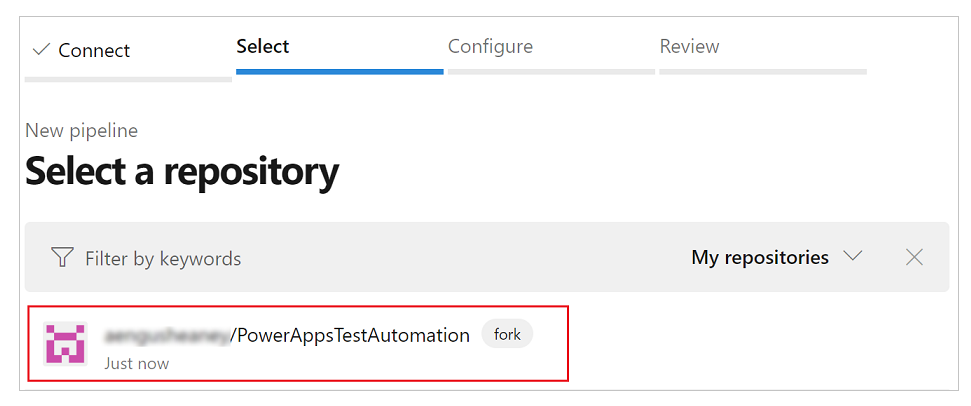
Search for or select your repo.
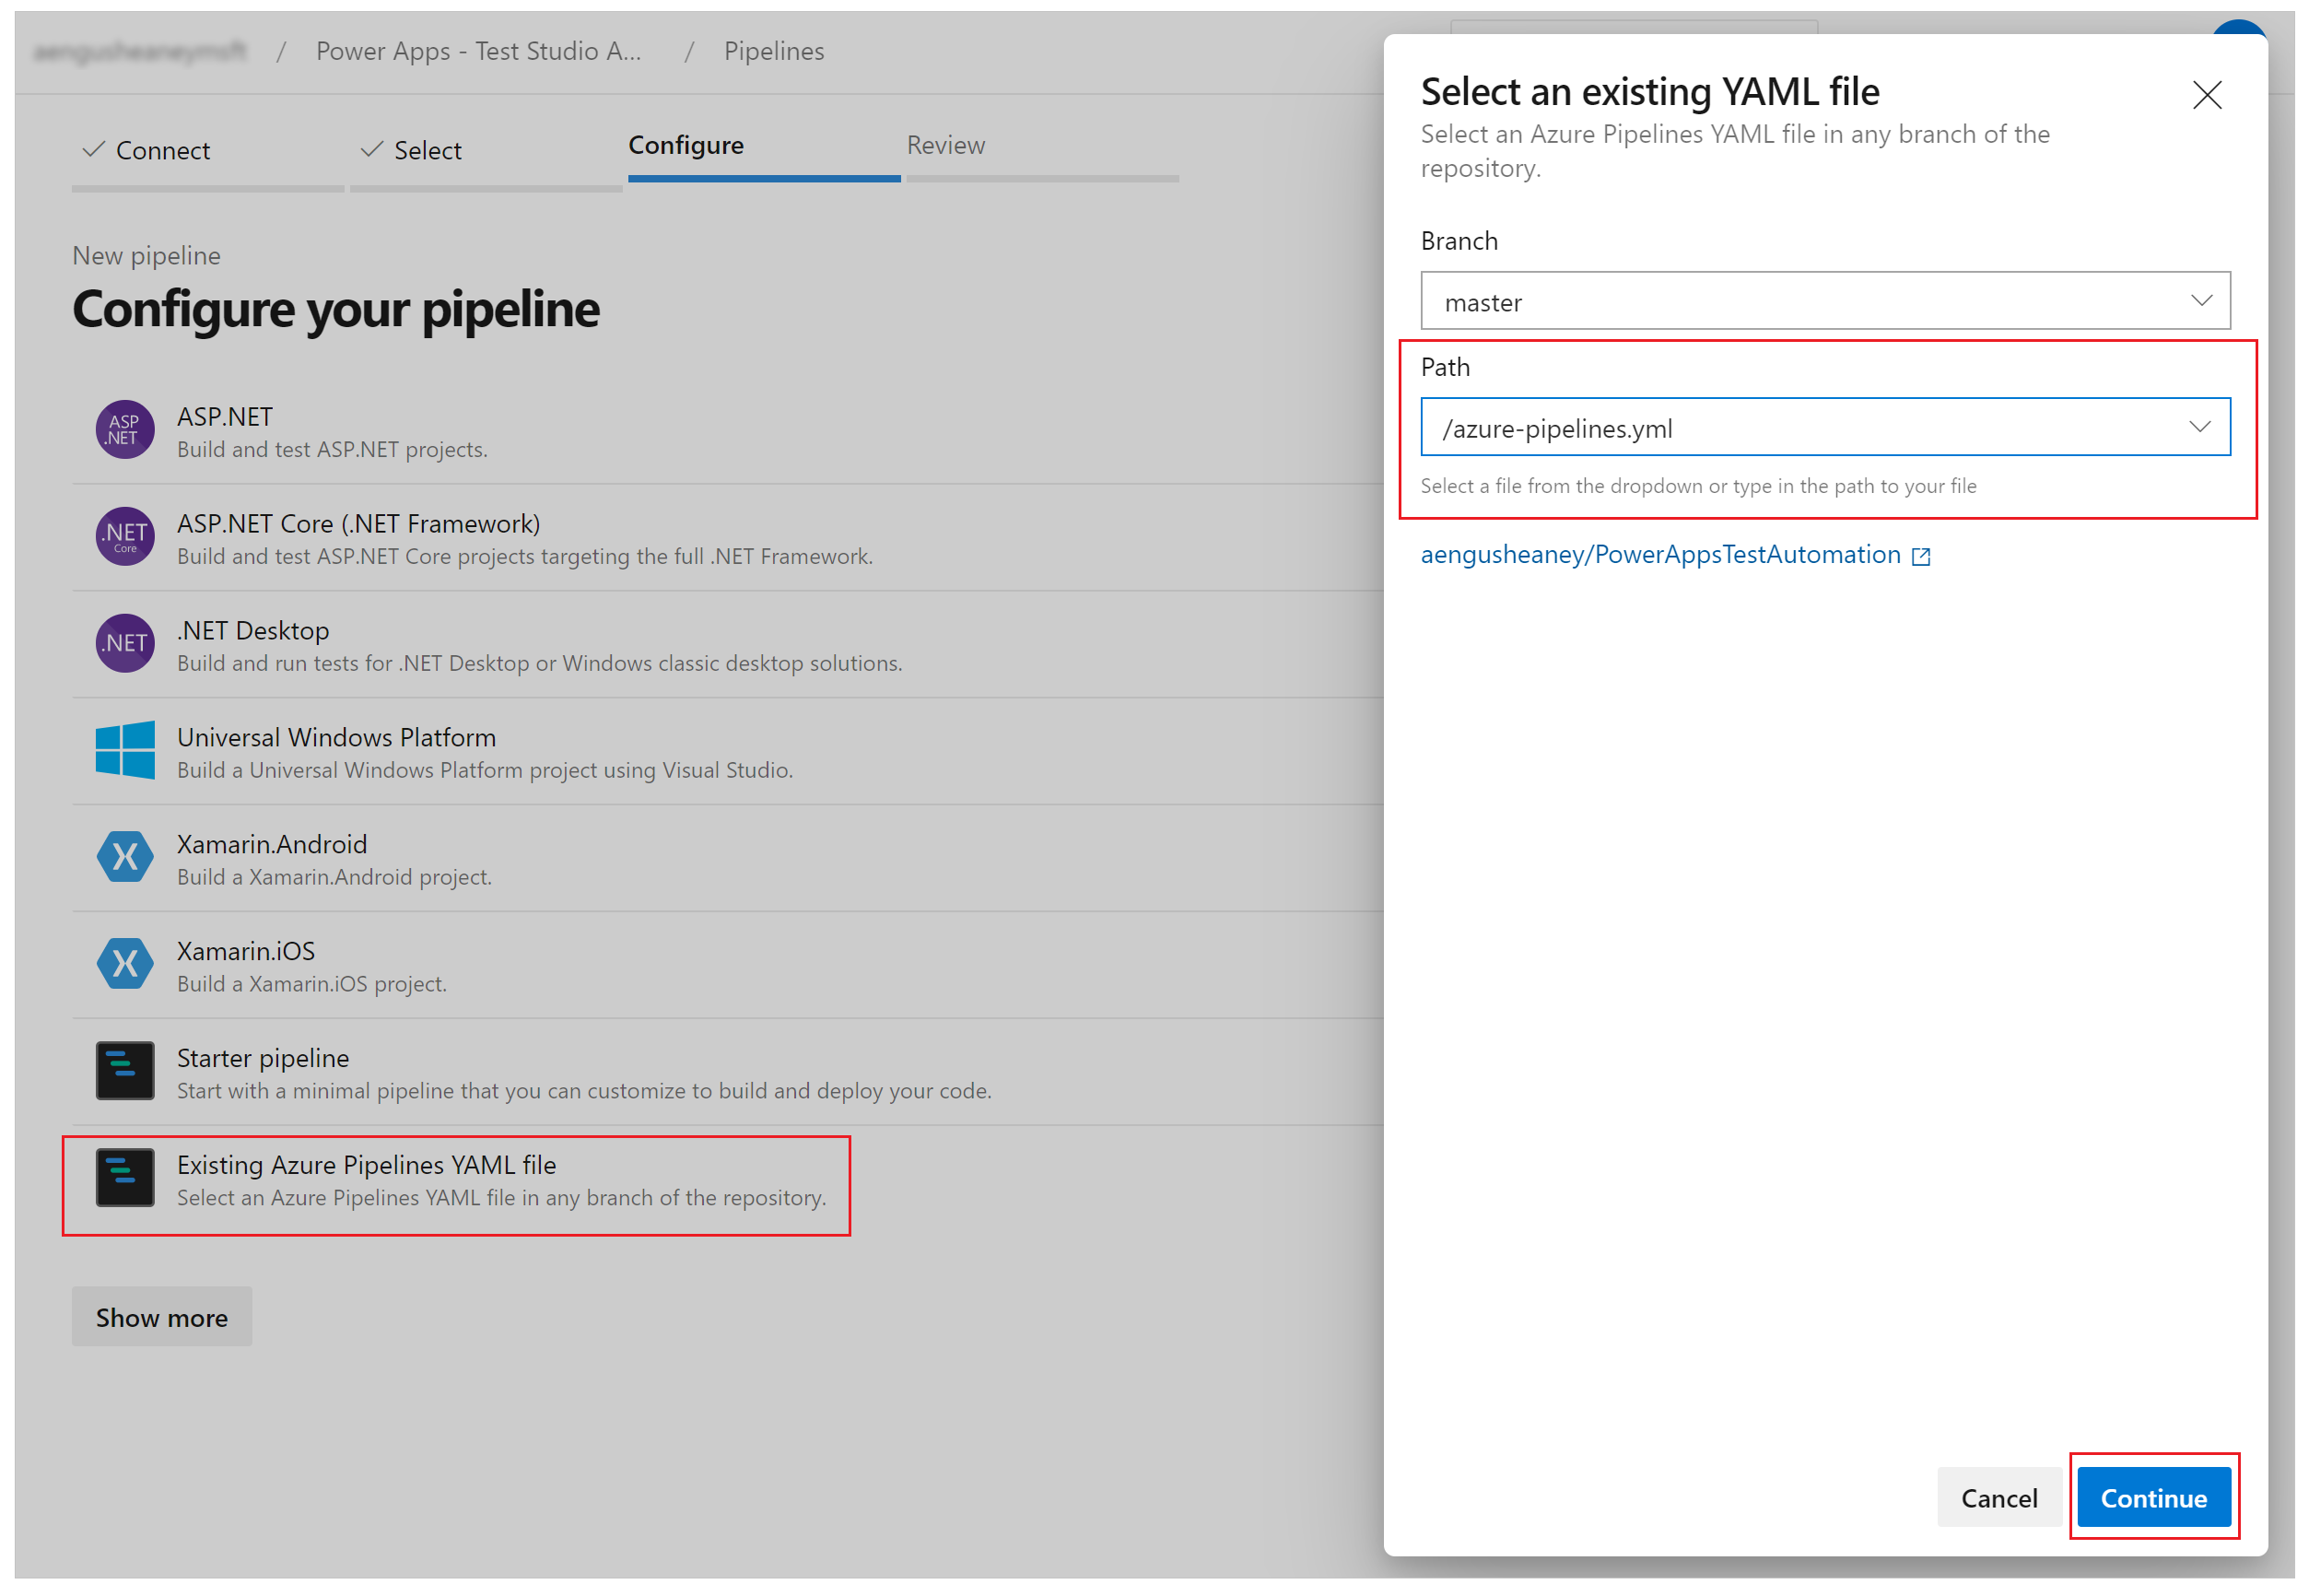
Select Existing Azure Pipelines YAML file.
Set the path to the Azure YAML pipeline file you created earlier.
Select Continue:
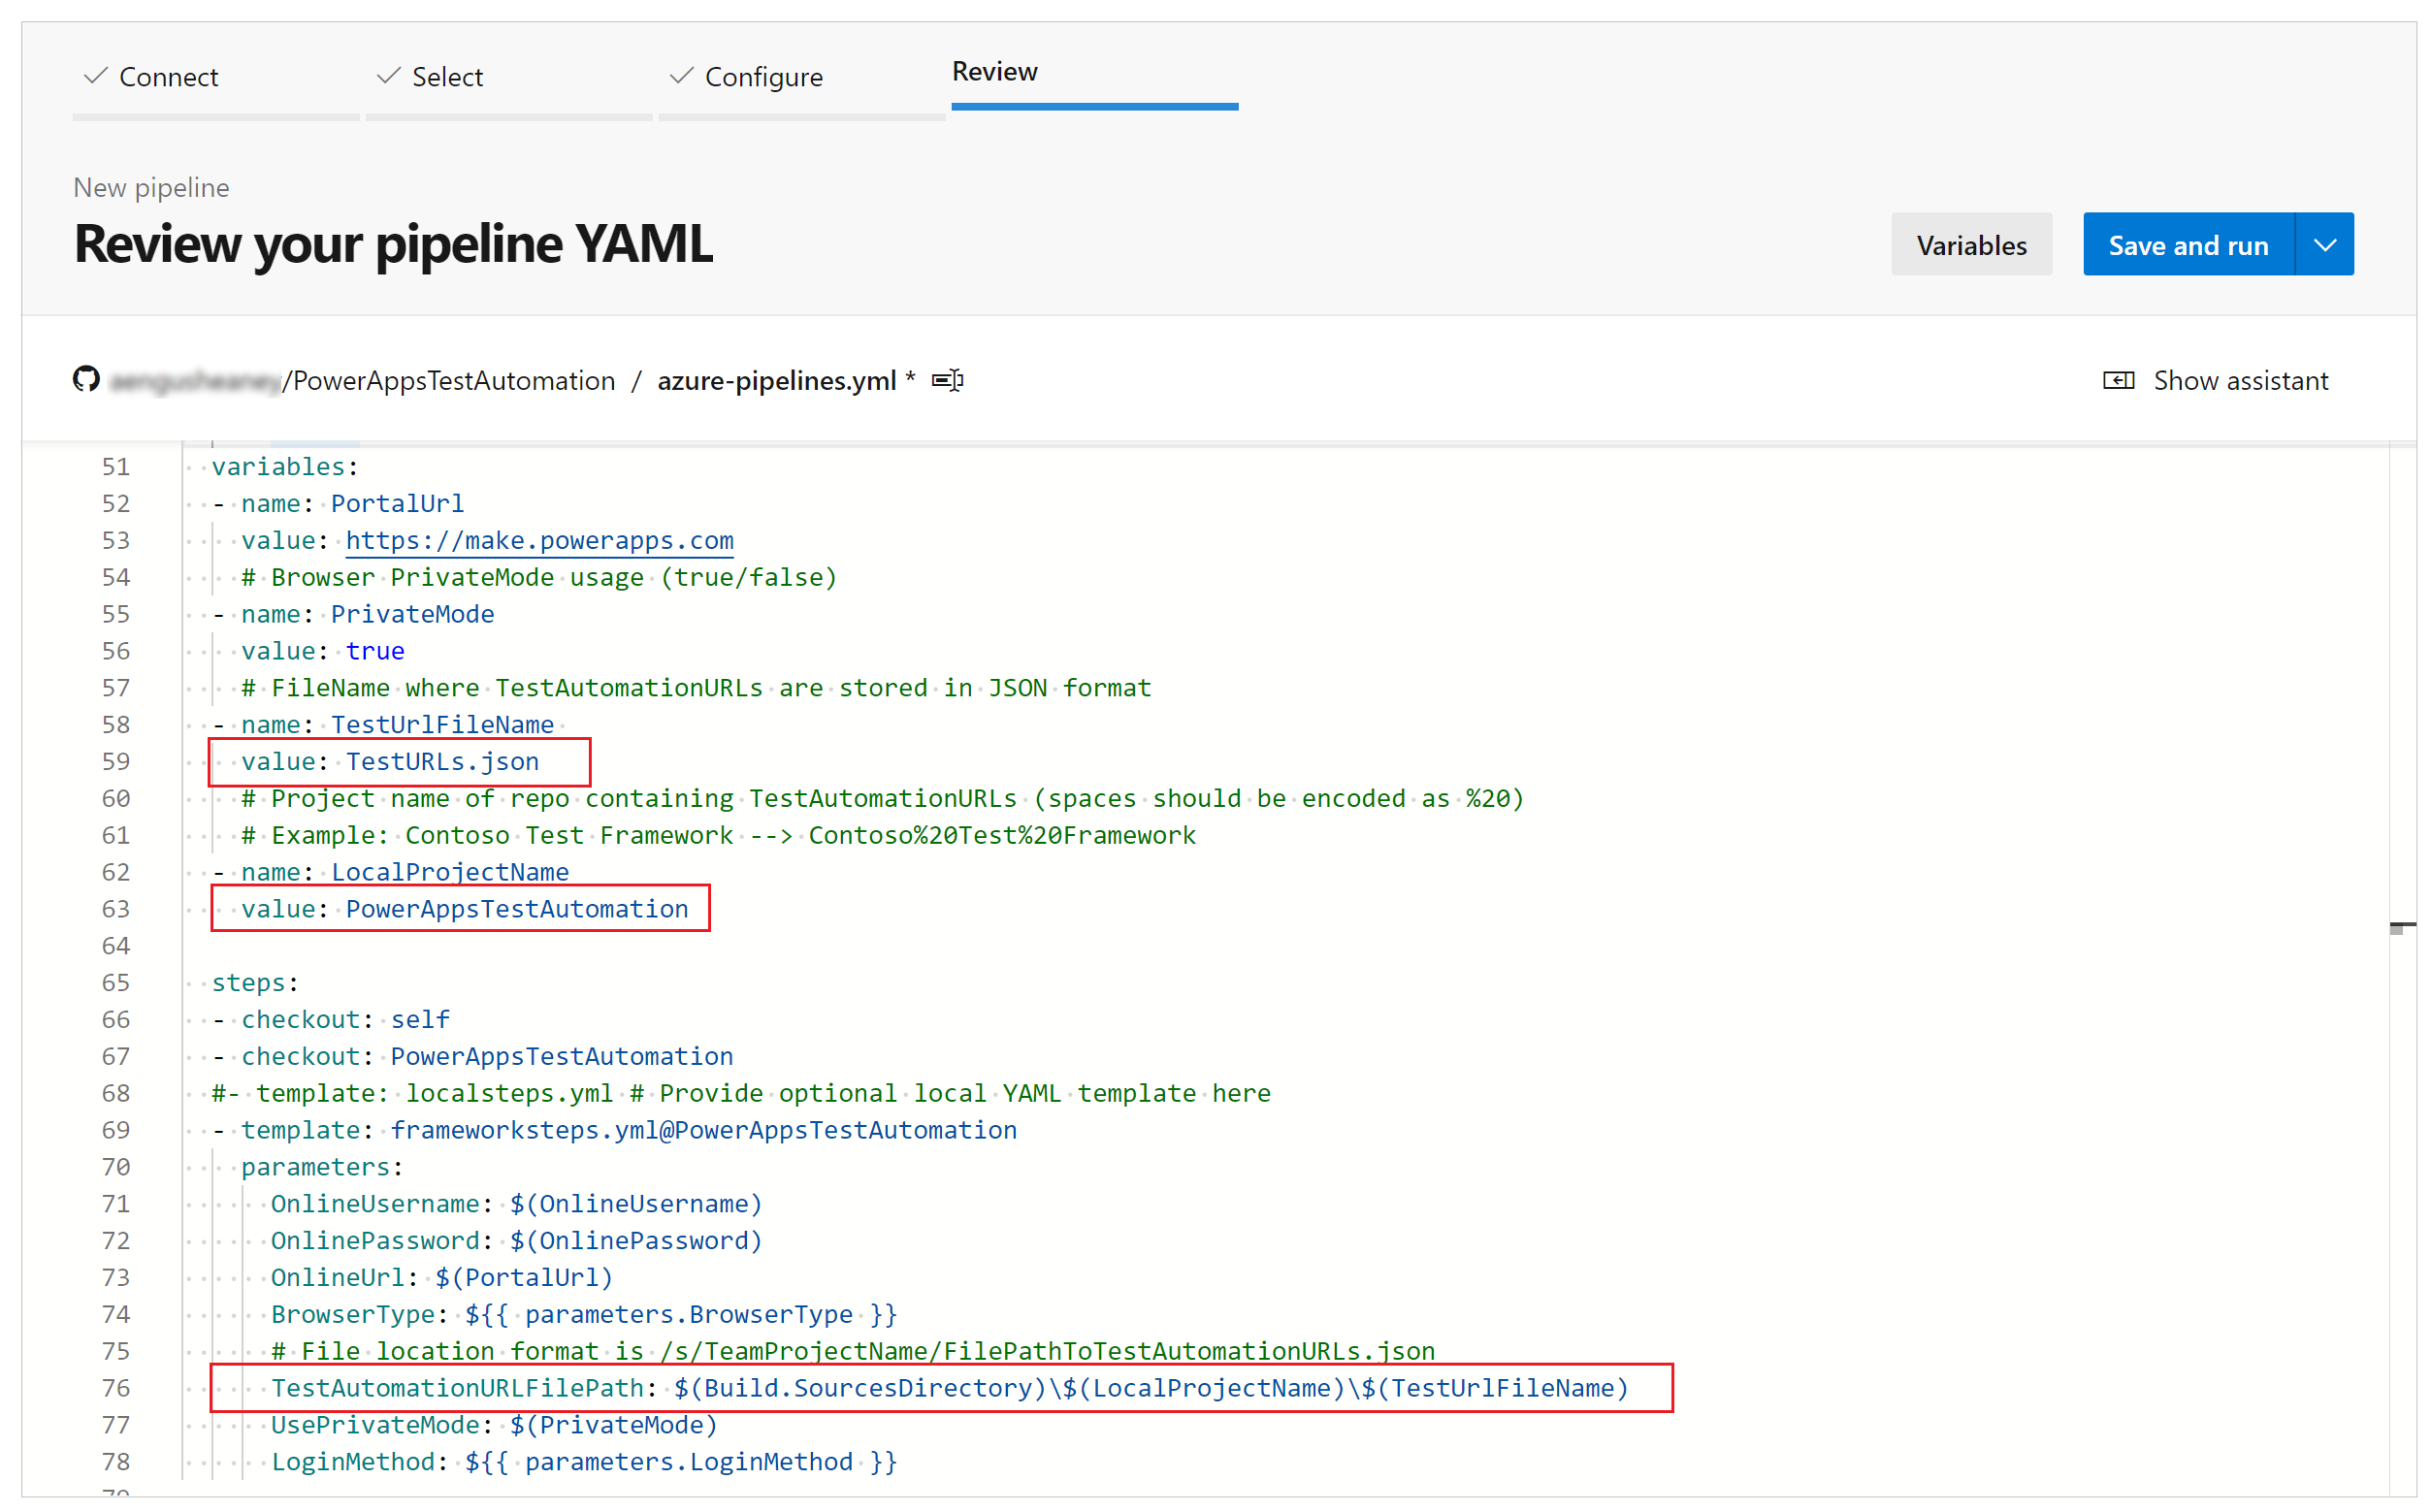
The azure-pipelines.yml file appears.

Update repositories name to your repo.
Update endpoint to the name of the GitHub service connection you created earlier.

Update the TestAutomationURLs file name. This is the test URLs .json file file you created earlier.
Update the LocalProjectName value to your repo name, if you changed it.
Update the TestAutomationURLFilePath to the location of the test URLs .json file in your repo.
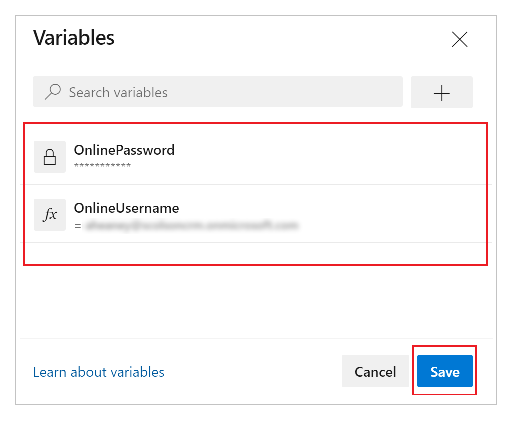
Select Variables.
Add a variable named OnlineUsername, and set the value to the Microsoft Entra email address of the user context who will sign in to the application. Tests will run under the context of this user account.
Select OK.
Add another variable named OnlinePassword. Set the value to the password of the Microsoft Entra account created earlier.
Select Keep this value secret and Let users override this value when running this pipeline.

Save and Commit the changes to your repo.
Run and analyze tests
To validate whether your tests are being successfully executed, select Run. Optionally, you can optionally select the server image to run your tests and also the browser types.

As the job runs, select it to see detailed status for each of the tasks that are running.

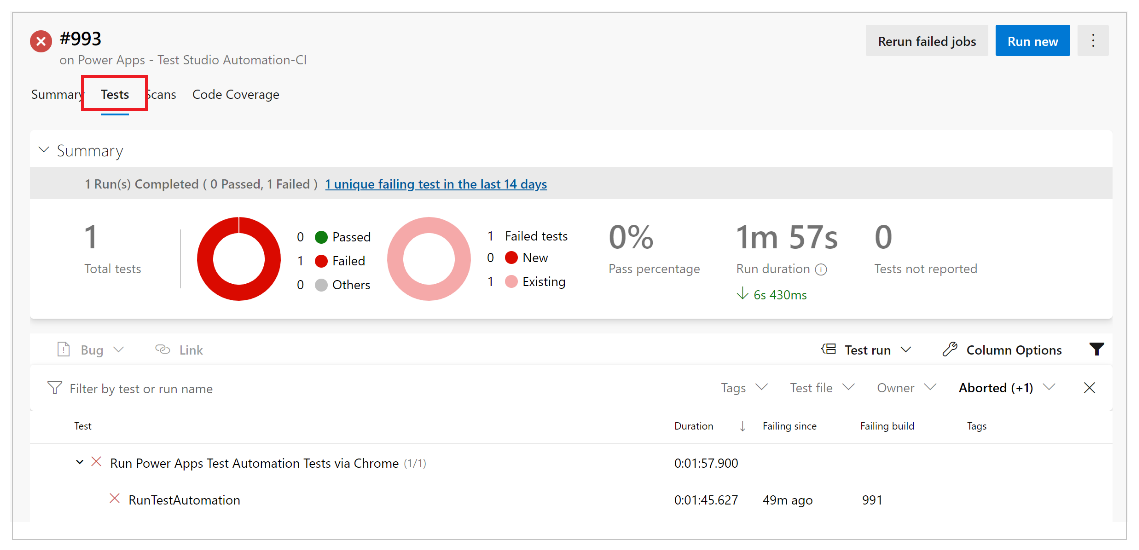
When the job is completed, you can view the high-level job summary and any errors or warnings. By selecting the Test tab, you can view specific details on the test cases you've executed.
The following example indicates that at least one of our test cases has failed while executing the tests by using the Chrome browser.
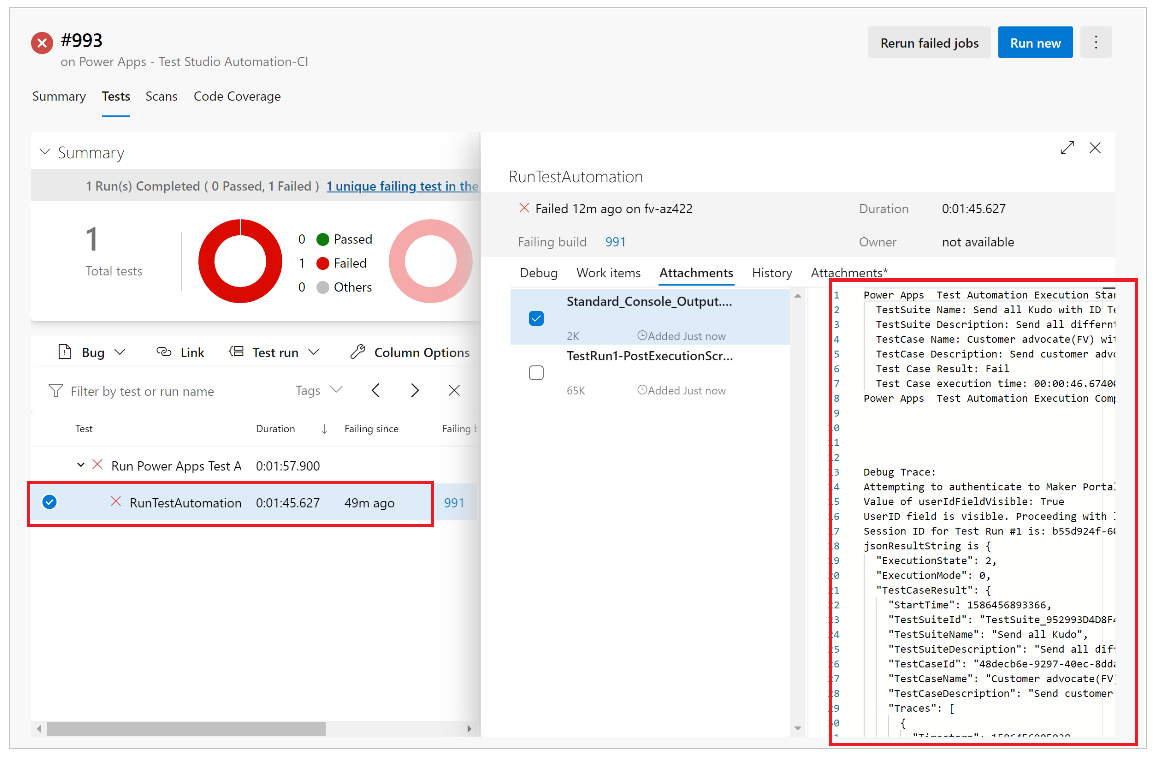
Select RunTestAutomation to drill into the details about the failed test cases. On the Attachments tab, you can see the summary of the test execution and which test cases have failed or passed in your test suite.
Note
If you execute a test suite, you'll see a summary of test cases that have passed and failed. If you execute a test case, you'll see specific details about the failure with any trace information, if available.
Known limitations
Multi-factor authentication isn't supported.
The test summary will report a single test result per browser. The test result will contain one or more test cases or test suite results.
For any authentication process other tha Microsoft Entra sign-in, you'll need to customize the sign-in process in the PowerAppsTestAutomation solution.