Use this article to connect DNS records at OVH to Microsoft 365 by verifying domain ownership and adding the required records for email, Microsoft Teams, and device management. After you add the records, your domain is ready to work with Microsoft 365.
This article covers the creation of the following DNS records at OVH:
Note
OVH is a non-Microsoft site. Microsoft doesn't control the OVH site. Additionally, OVH might change their website and tools so that the steps in this article are no longer valid. For support with OVH's site and tools, contact OVH support.
Before you begin
- You must own a domain registered with OVH.
- You must add the domain in the Microsoft 365 admin center. If the domain isn't added in the Microsoft 365 admin center, follow the steps in Add a domain to add your domain before you start adding DNS records at OVH.
Note
When creating or updating DNS records, it typically takes about 15 minutes for DNS changes to take effect. However, it can occasionally take longer for a DNS record change to update across the Internet's DNS system. If you're having trouble with mail flow or other issues after adding DNS records, see Find and fix issues after adding your domain or DNS records.
Sign in to OVH to manage your domain's DNS records
To add DNS records at OVH, sign in to your OVH account and then go to the page where you can manage your domain's DNS records. Follow these steps to get there:
Sign in to your OVH domains page by going to the OVH Log in to OVH page.

On the dashboard landing page, under View all my activity, select the name of the domain that you want edit.
Select the DNS zone tab.

Add Microsoft 365 DNS records at OVH
To add required DNS records at OVH for Microsoft 365 services, select the tab based on which DNS records you need to add:
Add a TXT record for domain ownership verification
Before you can use your domain with Microsoft 365, you need to prove you own the domain. Your ability to sign in to your account at your domain registrar and create the DNS record proves to Microsoft that you own the domain. This process involves creating a TXT record at your domain registrar with a specific value that Microsoft can look for. When Microsoft finds the record with the correct value, your domain is verified. The TXT record is used only to verify that you own your domain. It doesn't affect anything else and can be deleted once domain verification is complete.
Note
The procedures in this section assume that you started the process of adding a domain, but you didn't verify domain ownership yet.
To add the TXT record for domain verification at OVH, follow these steps:
Get the TXT value specific for your domain from the Microsoft 365 admin center. For help on finding the value of your TXT record in the Microsoft 365 admin center, see Gather the information you need to create DNS records.
If you're not already signed in to the OVH DNS Zone page for your domain, follow the steps in Sign in to OVH to manage your domain's DNS records to get there.
In the DNS Zone page, select the Add an entry tile.

In the Extended records section of the Step 1 of 3 - Add an entry to the DNS zone pane, select TXT.

In the Step 2 of 3 - Add an entry to the DNS zone pane, enter the values from the following table:
| Record Type |
Subdomain |
TTL |
Value |
| TXT |
leave blank |
3600 (seconds) |
MS=msXXXXXXXX |
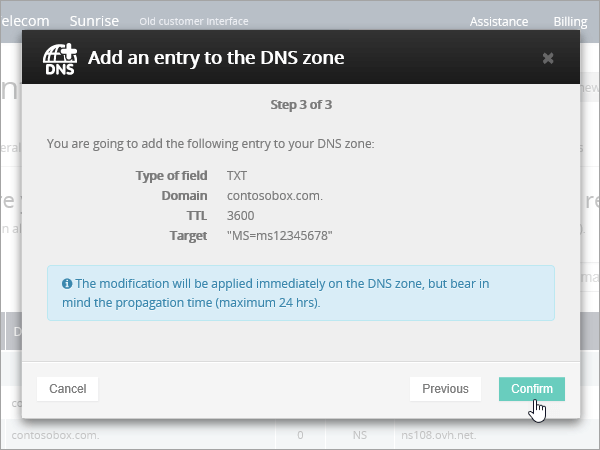
- In the Value field, replace MS=msXXXXXXXX with the TXT value you gathered earlier from the Microsoft 365 admin center. The value shown in the table is only an example.
Select Next.
In the Step 3 of 3 - Add an entry to the DNS zone pane, select Confirm.
Wait a few minutes before you continue, so that the record you created can update across the Internet.
Now that you added the TXT record at your domain registrar's site, go back to the Microsoft 365 admin center and complete the domain ownership verification process. When Microsoft 365 finds the correct TXT record, your domain is verified.
To verify the record in the Microsoft 365 admin center, follow these steps:
Sign in to the Microsoft 365 admin center.
From the left navigation bar, select ... Show all, and then select Settings to expand it.
Under Settings, select Domains.
In the Domains page, select the ellipsis ⋮ next to the domain that you're verifying, and then select Start setup.

In the Verify you own your domain page, make sure Add a TXT record to the domain's DNS records is selected, and then select Continue.
On the Add a record to verify domain ownership page, select Verify.
After you verify domain ownership, the How do you want to connect your domain? page appears. The rest of the wizard walks you through adding additional DNS records to connect your domain to Microsoft 365 services. For more information, see the following article or the following sections in this article:
DNS records for Microsoft 365 email
Microsoft 365 email requires three types of DNS records:
- An MX record for email delivery.
- A CNAME record for email account discovery.
- A TXT record for SPF email spam protection.
To add each of these types of records at OVH, follow the steps in the following sections.
Add an MX record to enable email delivery to Microsoft 365
To add the MX record for email at OVH, follow these steps:
Get the MX value specific for your domain from the Microsoft 365 admin center. For help on finding the value of your MX record in the Microsoft 365 admin center, see Gather the information you need to create DNS records.
If you're not already signed in to the OVH DNS Zone page for your domain, follow the steps in Sign in to OVH to manage your domain's DNS records to get there.
In the DNS Zone page, select the Add an entry tile.
In the Mail records section of the Step 1 of 3 - Add an entry to the DNS zone pane, select MX.

In the Step 2 of 3 - Add an entry to the DNS zone pane, enter the values from the following table:
| Subdomain |
TTL |
Priority |
Target |
| leave blank |
3600 (seconds) |
0 |
<mx-value>.mail.protection.outlook.com. |
- In the Target field, replace <mx-value> with the MX value you gathered earlier from the Microsoft 365 admin center. Make sure this entry ends with a period (.). The value shown in the table is only an example.
- For more information about priority, see What is MX priority?
Note
By default OVH uses relative notation for the target. Relative notation adds the domain name to the end of the target record. To use absolute notation instead, add a dot to the target record as shown in the table.
Select Next.

In the Add an entry to the DNS zone pane, select Confirm.

Remove all previous MX records except for the one that you just added. In the DNS zone page, select each record that needs to be deleted and then in the Actions column, select the trash-can Delete icon.

Once all previous MX records are deleted, in the Step 3 of 3 - Add an entry to the DNS zone pane, select Confirm.
Add a CNAME record so email accounts are automatically set up in Outlook and other email clients
To add a CNAME record for email account discovery at OVH, follow these steps:
If you're not already signed in to the OVH DNS Zone page for your domain, follow the steps in Sign in to OVH to manage your domain's DNS records to get there.
In the DNS Zone page, select the Add an entry tile.
In the Pointer records section of the Step 1 of 3 - Add an entry to the DNS zone pane, select CNAME.

In the Step 2 of 3 - Add an entry to the DNS zone pane, enter the values from the following table:
| Subdomain |
TTL |
Target |
| autodiscover |
3600 (seconds) |
autodiscover.outlook.com. |
Important
Make sure the Value autodiscover.outlook.com. ends with a period (.).

Select Next.

In the Step 3 of 3 - Add an entry to the DNS zone pane, select Confirm.
Add an SPF TXT record to help prevent email spam
Important
If your domain already has an SPF record, don't create a new one for Microsoft 365. Instead, add the required Microsoft 365 values to the existing record so that you have a single SPF record that includes both sets of values.
To add an SPF TXT record for email spam protection at OVH, follow these steps:
If you're not already signed in to the OVH DNS Zone page for your domain, follow the steps in Sign in to OVH to manage your domain's DNS records to get there.
In the DNS Zone page, select the Add an entry tile.
In the Pointer records section of the Step 1 of 3 - Add an entry to the DNS zone pane, select TXT.
In the Step 2 of 3 - Add an entry to the DNS zone pane, enter the values from the following table:
| Subdomain |
TTL |
Value |
| leave blank |
3600 (seconds) |
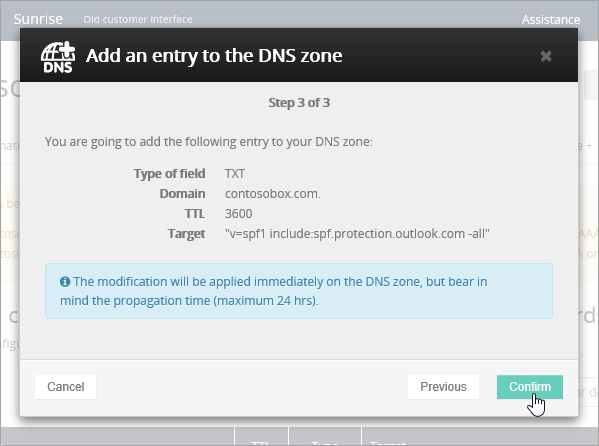
v=spf1 include:spf.protection.outlook.com -all |

Select Next.

In the Step 3 of 3 - Add an entry to the DNS zone pane, select Confirm.
DNS records for Microsoft Teams
Microsoft Teams needs four records:
- Two SRV records for user-to-user communication.
- Two CNAME records to sign in and connect users to the service.
Only add these DNS records if your organization uses Microsoft Teams.
Add the two required SRV records for Microsoft Teams
To add SRV records for Microsoft Teams at OVH, follow these steps:
If you're not already signed in to the OVH DNS Zone page for your domain, follow the steps in Sign in to OVH to manage your domain's DNS records to get there.
In the DNS Zone page, select the Add an entry tile.
In the Extended records section of the Step 1 of 3 - Add an entry to the DNS zone pane, select SRV.
In the Step 2 of 3 - Add an entry to the DNS zone pane, enter the values from the following table:
| Subdomain |
TTL |
Value |
| leave blank |
3600 (seconds) |
v=spf1 include:spf.protection.outlook.com -all |
| Subdomain |
TTL |
Priority |
Weight |
Port |
Target |
| _sip._tls |
3600 (seconds) |
100 |
1 |
443 |
sipdir.online.lync.com. |
| _sipfederationtls._tcp |
3600 (seconds) |
100 |
1 |
5061 |
sipfed.online.lync.com. |
Important
Make sure both Target fields sipdir.online.lync.com. and sipfed.online.lync.com. end with a period (.).
To add the second SRV record, select Add another record, create another SRV record using the values from the second row in the table, and then select Create records.
Once both SRV records are added, select Confirm.
In the Step 3 of 3 - Add an entry to the DNS zone pane, select Confirm.
Add the two required CNAME records for Microsoft Teams
To add CNAME records for Microsoft Teams at OVH, follow these steps:
If you're not already signed in to the OVH DNS Zone page for your domain, follow the steps in Sign in to OVH to manage your domain's DNS records to get there.
In the DNS Zone page, select the Add an entry tile.
In the Pointer records section of the Step 1 of 3 - Add an entry to the DNS zone pane, select CNAME.
In the Step 2 of 3 - Add an entry to the DNS zone pane, enter the values from the following table:
| Subdomain |
TTL |
Target |
| sip |
3600 (seconds) |
sipdir.online.lync.com. |
| lyncdiscover |
3600 (seconds) |
webdir.online.lync.com. |
Important
Make sure both Target fields sipdir.online.lync.com. and webdir.online.lync.com. end with a period (.).
Select Next.
In the Step 3 of 3 - Add an entry to the DNS zone pane, select Confirm.
Repeat the steps to add the second CNAME record using the values from the second row in the table.
DNS records for Microsoft Intune and Mobile Device Management for Microsoft 365
Microsoft Intune and Mobile Device Management for Microsoft 365 help you secure and remotely manage devices that connect to your domain. Mobile Device Management for Microsoft 365 needs two CNAME records so that users can enroll devices to the service. Only add these records if your organization uses Microsoft Intune or Mobile Device Management for Microsoft 365.
Add the two required CNAME records for Microsoft Intune and Mobile Device Management for Microsoft 365
To add CNAME records for Microsoft Intune and Mobile Device Management for Microsoft 365 at OVH, follow these steps:
If you're not already signed in to the OVH DNS Zone page for your domain, follow the steps in Sign in to OVH to manage your domain's DNS records to get there.
In the DNS Zone page, select the Add an entry tile.
In the Pointer records section of the Step 1 of 3 - Add an entry to the DNS zone pane, select CNAME.
In the Step 2 of 3 - Add an entry to the DNS zone pane, enter the values from the following table:
| Subdomain |
TTL |
Target |
| enterpriseregistration |
3600 (seconds) |
enterpriseregistration.windows.net. |
| enterpriseenrollment |
3600 (seconds) |
enterpriseenrollment-s.manage.microsoft.com. |
Important
Make sure both Target fields enterpriseregistration.windows.net. and enterpriseenrollment-s.manage.microsoft.com. end with a period (.).
Select Next.
In the Step 3 of 3 - Add an entry to the DNS zone pane, select Confirm.
Repeat the steps to add the second CNAME record using the values from the second row in the table.
Advanced option: Intune and Mobile Device Management for Microsoft 365
This service helps you secure and remotely manage mobile devices that connect to your domain. Mobile Device Management needs two CNAME records so that users can enroll devices to the service.
Support
If you don't find what you're looking for, check the Domains FAQ.
Tip
Some configuration tasks might be complex to perform. For technical support, follow these steps:
- Sign in to the Microsoft 365 admin center.
- At the bottom right, select Help & Support.
- In the Support Assistant pane that opens, enter your question.
- Review the results. If you still have questions, select Contact support.
To learn about your options for contacting support, see Get support for Microsoft 365 for business.


