Note
Access to this page requires authorization. You can try signing in or changing directories.
Access to this page requires authorization. You can try changing directories.
Applies toL
- Android
- iOS/iPadOS
- macOS
- Windows
Microsoft Intune supports the use of private and public key pair (PKCS) certificates. This article reviews the requirements for PKCS certificates with Intune, including the export of a PKCS certificate then adding it to an Intune device configuration profile.
Microsoft Intune includes built-in settings to use PKCS certificates for access and authentication to your organizations resources. Certificates authenticate and secure access to your corporate resources like a VPN or a WiFi network. You deploy these settings to devices using device configuration profiles in Intune.
For information about using imported PKCS certificates, see Imported PFX Certificates.
Tip
PKCS certificate profiles are supported for Windows Enterprise multi-session remote desktops.
Requirements
To use PKCS certificates with Intune, you need the following infrastructure:
Active Directory domain: All servers listed in this section must be joined to your Active Directory domain.
For more information about installing and configuring Active Directory Domain Services (AD DS), see AD DS Design and Planning.
Certification Authority: An Enterprise Certification Authority (CA).
For information on installing and configuring Active Directory Certificate Services (AD CS), see Active Directory Certificate Services Step-by-Step Guide.
Warning
Intune requires you to run AD CS with an Enterprise Certification Authority (CA), not a Standalone CA.
A client: To connect to the Enterprise CA.
Root certificate: An exported copy of your root certificate from your Enterprise CA.
Certificate Connector for Microsoft Intune: For information about the certificate connector, see:
Update certificate connector: Strong mapping requirements for KB5014754
The Key Distribution Center (KDC) requires a strong mapping format in PKCS certificates deployed by Microsoft Intune and used for certificate-based authentication. The mapping must have a security identifier (SID) extension that maps to the user or device SID. If a certificate doesn't meet the new strong mapping criteria set by the full enforcement mode date, authentication will be denied. For more information about the requirements, see KB5014754: Certificate-based authentication changes on Windows domain controllers .
In the Microsoft Intune Certificate Connector, version 6.2406.0.1001, we released an update that adds the object identifier attribute containing the user or device SID to the certificate, effectively satisfying the strong mapping requirements. This update applies to users and devices synced from an on-premises Active Directory to Microsoft Entra ID, and is available across all platforms, with some differences:
Strong mapping changes apply to user certificates for all OS platforms.
Strong mapping changes apply to device certificates for Microsoft Entra hybrid-joined Windows devices.
To ensure that certficate-based authentication continues working, you must take the following actions:
Update the Microsoft Intune Certificate Connector to version 6.2406.0.1001. For information about the latest version and how to update the certificate connector, see Certificate connector for Microsoft Intune.
Make changes to registry key information on the Windows server that hosts the certificate connector.
Complete the following procedure to modify the registry keys and apply the strong mapping changes to certificates. These changes apply to new PKCS certificates and PKCS certificates that are being renewed.
Tip
This procedure requires you to modify the registry in Windows. For more information, see the following resources on Microsoft Support:
In the Windows registry, change the value for
[HKLM\Software\Microsoft\MicrosoftIntune\PFXCertificateConnector](DWORD)EnableSidSecurityExtensionto 1.Restart the certificate connector service.
- Go to Start > Run.
- Open services.msc.
- Restart these services:
PFX Create Legacy Connector for Microsoft Intune
PFX Create Certificate Connector for Microsoft Intune
Changes begin applying to all new certificates, and to certificates being renewed. To verify that authentication works, we recommend testing all places where certificate-based authentication could be used, including:
- Apps
- Intune-integrated certification authorities
- NAC solutions
- Networking infrastructure
To roll back changes:
Restore the original registry settings.
Restart these services:
PFX Create Legacy Connector for Microsoft Intune
PFX Create Certificate Connector for Microsoft Intune
Create a new PKCS certificate profile for affected devices, to reissue certificates without the SID attribute.
Tip
If you use a Digicert CA, you must create a certificate template for users with an SID and another template for users without an SID. For more information, see the DigiCert PKI Platform 8.24.1 release notes.
Export the root certificate from the Enterprise CA
To authenticate a device with VPN, WiFi, or other resources, a device needs a root or intermediate CA certificate. The following steps explain how to get the required certificate from your Enterprise CA.
Use a command line to complete these steps:
Sign in to the Root Certification Authority server with Administrator Account.
Go to Start > Run, and then enter Cmd to open a command prompt.
Enter certutil -ca.cert ca_name.cer to export the root certificate as a file named ca_name.cer.
Configure certificate templates on the CA
Sign in to your Enterprise CA with an account that has administrative privileges.
Open the Certification Authority console, right-click Certificate Templates, and select Manage.
Find the User certificate template, right-click it, and choose Duplicate Template to open Properties of New Template.
Note
For S/MIME email signing and encryption scenarios, many administrators use separate certificates for signing and encryption. If you're using Microsoft Active Directory Certificate Services, you can use the Exchange Signature Only template for S/MIME email signing certificates, and the Exchange User template for S/MIME encryption certificates. If you're using a non-Microsoft certification authority, we recommend reviewing their guidance to set up signing and encryption templates.
On the Compatibility tab:
- Set Certification Authority to Windows Server 2008 R2
- Set Certificate recipient to Windows 7 / Server 2008 R2
On the General tab:
- Set Template display name to something meaningful to you.
- Deselect Publish certificate in Active Directory.
Warning
Template name by default is the same as Template display name with no spaces. Note the template name, because you need it later.
In Request Handling, select Allow private key to be exported.
Note
Unlike SCEP, with PKCS the certificate private key is generated on the server where the certificate connector is installed and not on the device. The certificate template must allow the private key to be exported so that the connector can export the PFX certificate and send it to the device.
After the certificates install on the device, the private key is marked as not exportable.
In Cryptography, confirm that the Minimum key size is set to 2048.
Windows and Android devices support the use of 4096-bit key size with a PKCS certificate profile. To use this key size, adjust the value to 4096.
Note
For Windows devices, 4096-bit key storage is supported only in the Software Key Storage Provider (KSP). The following features do not support storage for keys of this size:
- The hardware TPM (Trusted Platform Module): As a workaround you can use the Software KSP for key storage.
- Windows Hello for Business: There is no workaround for Windows Hello for Business at this time.
In Subject Name, choose Supply in the request.
In Extensions, under Application Policies, confirm that you see Encrypting File System, Secure Email, and Client Authentication.
Important
For iOS/iPadOS certificate templates, go to the Extensions tab, update Key Usage, and then deselect Signature is proof of origin.
In Security:
- Add the computer account for the server where you install the Certificate Connector for Microsoft Intune. Allow this account Read and Enroll permissions.
- Remove the domain users group from the list of groups or user names allowed permissions on this template. To remove the group:
- Select the Domain Users group.
- Select Remove.
- Review the other entries under Groups or user names to confirm permissions and applicability to your environment.
Select Apply > OK to save the certificate template. Close the Certificate Templates Console.
In the Certification Authority console, right-click Certificate Templates.
Select New > Certificate Template to Issue.
Choose the template that you created in the previous steps. Select OK.
Permit the server to manage certificates for enrolled devices and users:
- Right-click the Certification Authority, and then choose Properties.
- On the security tab, add the computer account of the server where you run the connector.
- Grant Issue and Manage Certificates and Request Certificates permissions to the computer account.
Sign out of the Enterprise CA.
Download, install, and configure the Certificate Connector for Microsoft Intune
For guidance, see Install and configure the Certificate Connector for Microsoft Intune.
Create a trusted certificate profile
Sign in to the Microsoft Intune admin center.
Select and go to Devices > Manage devices > Configuration > Create.
Enter the following properties:
- Platform: Choose the platform of the devices receiving this profile.
- Android device administrator
- Android Enterprise:
- Fully Managed
- Dedicated
- Corporate-Owned Work Profile
- Personally-Owned Work Profile
- iOS/iPadOS
- macOS
- Windows
- Profile: Select Trusted certificate. Or, select Templates > Trusted certificate.
- Platform: Choose the platform of the devices receiving this profile.
Select Create.
In Basics, enter the following properties:
- Name: Enter a descriptive name for the profile. Name your profiles so you can easily identify them later. For example, a good profile name is Trusted certificate profile for entire company.
- Description: Enter a description for the profile. This setting is optional, but recommended.
Select Next.
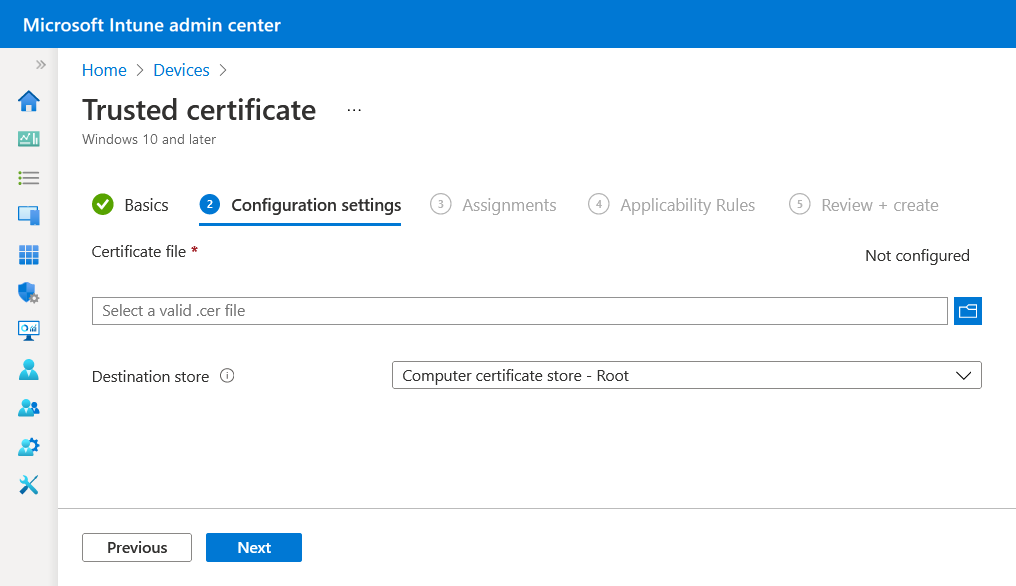
In Configuration settings, specify the .cer file for the Root CA Certificate you previously exported.
Note
Depending on the platform you chose in Step 3, you may or may not have an option to choose the Destination store for the certificate.
Select Next.
In Assignments, select the user or device groups you want to include in the assignment. These groups receive the profile after you deploy it. For more granularity, see Create filters in Microsoft Intune and apply them by selecting Edit filter.
Plan to deploy this certificate profile to the same groups that receive:
The PKCS certificate profile and
A configuration profile, such as a Wi-Fi profile that makes use of the certificate.
For more information about assigning profiles, see Assign user and device profiles.
Select Next.
(Applies to Windows only) In Applicability Rules, specify applicability rules to refine the assignment of this profile. You can choose to assign or not assign the profile based on the OS edition or version of a device.
For more information, see Applicability rules in Create a device profile in Microsoft Intune.
In Review + create, review your settings. When you select Create, your changes are saved, and the profile is assigned. The policy is also shown in the profiles list.
Create a PKCS certificate profile
Important
Android device administrator (DA) management is deprecated and no longer available for devices with access to Google Mobile Services (GMS). If you currently use DA management, we recommend switching to another Android management option. Support and help documentation remain available for some Android 15 and earlier devices without GMS. For more information, see Ending support for Android device administrator on GMS devices.
Sign in to the Microsoft Intune admin center.
Select and go to Devices > Manage devices > Configuration > Create.
Enter the following properties:
- Platform: Choose the platform of your devices. Your options:
- Android device administrator
- Android Enterprise:
- Fully Managed
- Dedicated
- Corporate-Owned Work Profile
- Personally-Owned Work Profile
- iOS/iPadOS
- macOS
- Windows
- Profile: Select PKCS certificate. Or, select Templates > PKCS certificate.
Note
On devices with an Android Enterprise profile, certificates installed using a PKCS certificate profile are not visible on the device. To confirm successful certificate deployment, check the status of the profile in the Intune admin center.
- Platform: Choose the platform of your devices. Your options:
Select Create.
In Basics, enter the following properties:
- Name: Enter a descriptive name for the profile. Name your profiles so you can easily identify them later. For example, a good profile name is PKCS profile for entire company.
- Description: Enter a description for the profile. This setting is optional, but recommended.
Select Next.
In Configuration settings, depending on the platform you chose, the settings you can configure are different. Select your platform for detailed settings:
- Android device administrator
- Android Enterprise
- iOS/iPadOS
- Windows
Setting Platform Details Deployment channel macOS Select how you want to deploy the profile. This setting also determines the keychain where the linked certificates are stored, so it's important to select the proper channel.
Always select the user deployment channel in profiles with user certificates. The user channel stores certificates in the user keychain. Always select the device deployment channel in profiles with device certificates. The device channel stores certificates in the system keychain.
It's not possible to edit the deployment channel after you deploy the profile. You must create a new profile to select a different channel.Renewal threshold (%) All Recommended is 20% Certificate validity period All If you didn't change the certificate template, this option might be set to one year.
Use a validity period of five days or up to 24 months. When the validity period is less than five days, there's a high likelihood of the certificate entering a near-expiry or expired state, which can cause the MDM agent on devices to reject the certificate before it's installed.Key storage provider (KSP) Windows For Windows, select where to store the keys on the device. Certification authority All Displays the internal fully qualified domain name (FQDN) of your Enterprise CA. Certification authority name All Lists the name of your Enterprise CA, such as "Contoso Certification Authority." Certificate template name All Lists the name of your certificate template. Certificate type - Android Enterprise (Corporate-Owned and Personally-Owned Work Profile)
- iOS
- macOS
- Windows
Select a type: - User certificates can contain both user and device attributes in the subject and subject alternative name (SAN) of the certificate.
- Device certificates can only contain device attributes in the subject and SAN of the certificate. Use Device for scenarios such as user-less devices, like kiosks or other shared devices.
This selection affects the Subject name format.
For macOS, if this profile is configured to use the device deployment channel, you can select User or Device. If the profile is configured to use the user deployment channel, you can select only User.
Subject name format All For details on how to configure the subject name format, see Subject name format later in this article.
For the following platforms, the Subject name format is determined by the certificate type:- Android Enterprise (Work Profile)
- iOS
- macOS
- Windows
Subject alternative name All For Attribute, select User principal name (UPN) unless otherwise required, configure a corresponding Value, and then select Add.
You can use variables or static text for the SAN of both certificate types. Use of a variable isn't required.
For more information, see Subject name format later in this article.Extended key usage - Android device administrator
- Android Enterprise (Device Owner, Corporate-Owned and Personally-Owned Work Profile)
- Windows
Certificates usually require Client Authentication so that the user or device can authenticate to a server. Allow all apps access to private key macOS Set to Enable to give apps that are configured for the associated mac device access to the PKCS certificate's private key.
For more information on this setting, see AllowAllAppsAccess the Certificate Payload section of Configuration Profile Reference in the Apple developer documentation.Root Certificate - Android device administrator
- Android Enterprise (Device Owner, Corporate-Owned and Personally-Owned Work Profile)
Select a root CA certificate profile that was previously assigned. This step applies only to Android Enterprise devices profiles for Fully Managed, Dedicated, and Corporate-Owned work Profile.
In Apps, configure Certificate access to manage how certificate access is granted to applications. Choose from:
- Require user approval for apps (default) – Users must approve use of a certificate by all applications.
- Grant silently for specific apps (require user approval for other apps) – With this option, select Add apps. Then select all apps that should silently use the certificate without user interaction.
Select Next.
In Assignments, select the users and groups you want to include in the assignment. Users and groups receive the profile after you deploy it. Plan to deploy this certificate profile to the same groups that receive:
The trusted certificate profile and
A configuration profile, such as a Wi-Fi profile that makes use of the certificate.
For more information about assigning profiles, see Assign user and device profiles.
Select Next.
In Review + create, review your settings. When you select Create, your changes are saved, and the profile is assigned. The policy is also shown in the profiles list.
Subject name format
When you create a PKCS certificate profile for the following platforms, options for the subject name format depend on the Certificate type you select, either User or Device.
Platforms:
- Android Enterprise (Corporate-Owned and Personally-Owned Work Profile)
- iOS
- macOS
- Windows
Note
There is a known issue for using PKCS to get certificates which is the same issue as seen for SCEP when the subject name in the resulting Certificate Signing Request (CSR) includes one of the following characters as an escaped character (proceeded by a backslash \):
- +
- ;
- ,
- =
Note
Beginning with Android 12, Android no longer supports use of the following hardware identifiers for personally-owned work profile devices:
- Serial number
- IMEI
- MEID
Intune certificate profiles for personally-owned work profile devices that rely on these variables in the subject name or SAN will fail to provision a certificate on devices that run Android 12 or later at the time the device enrolled with Intune. Devices that enrolled prior to upgrade to Android 12 can still receive certificates so long as Intune previously obtained the devices hardware identifiers.
For more information about this and other changes introduced with Android 12, see the Android Day Zero Support for Microsoft Endpoint Manager blog post.
User certificate type
Format options for the Subject name format include two variables: Common Name (CN) and Email (E). Email (E) would usually be set with the {{EmailAddress}} variable. For example: E={{EmailAddress}}Common Name (CN) can be set to any of the following variables:
CN={{UserName}}: The user name of the user, such as Jane Doe.
CN={{UserPrincipalName}}: The user principal name of the user, such as [email protected].
CN={{AAD_Device_ID}}: An ID assigned when you register a device in Microsoft Entra ID. This ID is typically used to authenticate with Microsoft Entra ID.
CN={{DeviceId}}: An ID assigned when you enroll a device in Intune.
CN={{SERIALNUMBER}}: The unique serial number (SN) typically used by the manufacturer to identify a device.
CN={{IMEINumber}}: The International Mobile Equipment Identity (IMEI) unique number used to identify a mobile phone.
CN={{OnPrem_Distinguished_Name}}: A sequence of relative distinguished names separated by comma, such as CN=Jane Doe,OU=UserAccounts,DC=corp,DC=contoso,DC=com.
To use the {{OnPrem_Distinguished_Name}} variable, be sure to sync the onpremisesdistinguishedname user attribute using Microsoft Entra Connect to your Microsoft Entra ID.
CN={{onPremisesSamAccountName}}: Admins can sync the samAccountName attribute from Active Directory to Microsoft Entra ID using Microsoft Entra Connect into an attribute called onPremisesSamAccountName. Intune can substitute that variable as part of a certificate issuance request in the subject of a certificate. The samAccountName attribute is the user sign-in name used to support clients and servers from a previous version of Windows (pre-Windows 2000). The user sign-in name format is: DomainName\testUser, or only testUser.
To use the {{onPremisesSamAccountName}} variable, be sure to sync the onPremisesSamAccountName user attribute using Microsoft Entra Connect to your Microsoft Entra ID.
All device variables listed in the following Device certificate type section can also be used in user certificate subject names.
By using a combination of one or many of these variables and static text strings, you can create a custom subject name format, such as: CN={{UserName}},E={{EmailAddress}},OU=Mobile,O=Finance Group,L=Redmond,ST=Washington,C=US
That example includes a subject name format that uses the CN and E variables, and strings for organizational unit, organization, location, state, and country/region values. CertStrToName function describes this function, and its supported strings.
User attributes aren't supported for devices that don't have user associations, such as devices that are enrolled as Android Enterprise dedicated. For example, a profile that uses CN={{UserPrincipalName}} in the subject or SAN can't get the user principal name when there isn't a user on the device.
Device certificate type
Format options for the Subject name format include the following variables:- {{AAD_Device_ID}}
- {{DeviceId}} - The Intune device ID
- {{Device_Serial}}
- {{Device_IMEI}}
- {{SerialNumber}}
- {{IMEINumber}}
- {{AzureADDeviceId}}
- {{WiFiMacAddress}}
- {{IMEI}}
- {{DeviceName}}
- {{FullyQualifiedDomainName}} (Only applicable for Windows and domain-joined devices)
- {{MEID}}
You can specify these variables, followed by the text for the variable, in the textbox. For example, the common name for a device named Device1 can be added as CN={{DeviceName}}Device1.
Important
- When you specify a variable, enclose the variable name in curly brackets { } as seen in the example, to avoid an error.
- Device properties used in the subject or SAN of a device certificate, like IMEI, SerialNumber, and FullyQualifiedDomainName, are properties that could be spoofed by a person with access to the device.
- A device must support all variables specified in a certificate profile for that profile to install on that device. For example, if {{IMEI}} is used in the subject name of a SCEP profile and is assigned to a device that doesn't have an IMEI number, the profile fails to install.