Note
Access to this page requires authorization. You can try signing in or changing directories.
Access to this page requires authorization. You can try changing directories.
Sign up for a Microsoft Intune free trial to evaluate mobile device management for your organization. In this article, you learn how to sign up for a free trial, create a new tenant, set up Intune, and prepare your environment for testing.
This article is part of an Evaluate and Try series that helps you evaluate Microsoft Intune's capabilities.
When you complete the signup process, you automatically create a new tenant. A tenant is a dedicated instance of Microsoft Entra ID that hosts your Intune subscription. After creating the tenant, you can add users and groups, and assign licenses to users.
The free trial is an Enterprise Mobility + Security (EMS) subscription, which includes Microsoft Entra ID P1 or P2 and Microsoft Intune. After the free trial is configured, you can confirm your free trial licenses.
You also get access to the following admin centers, which are used by Intune admins:
Microsoft Intune admin center (https://intune.microsoft.com) - Intune admins use this admin center to manage devices, apps, and policies. You can explore the Intune features and capabilities.
Microsoft 365 admin center (https://admin.microsoft.com) - Add and manage users, if you don't use Microsoft Entra ID for this task. You can also manage other aspects of your account, including billing and support.
Prerequisites
Before you set up Microsoft Intune, review the following requirements:
![]() Device platform requirements
Device platform requirements
![]() Network and connectivity requirements
Network and connectivity requirements
Important
On October 15, 2024, Microsoft began enforcement of the Azure sign-in requirement to use multifactor authentication (MFA). When enforced, MFA is required for all users who sign-in to Intune admin center regardless of any roles they have or don’t have. The MFA requirements also apply to services that you access through the admin center, like Windows 365 Cloud PC, and to use of the Microsoft Azure portal and Microsoft Entra admin center. MFA requirements don’t apply to end users who access applications, websites, or services hosted on Azure where those users don’t sign-in to the admin center.
The requirement to sign-in using MFA applies to all Intune subscriptions, including Plan 1 subscriptions with or without add-ons, and free trial subscriptions. The prerequisites and process required to configure MFA depend on the MFA method you choose to use for your tenant. Shortly after MFA is enabled for a tenant, subsequent sign-in attempts require the user to complete setup for using the configured MFA solution.
To learn more about the MFA requirement, see Planning for mandatory multifactor authentication for Azure and admin portals in the Microsoft Entra documentation.
In the Microsoft Entra planning article, you’ll find guidance and resources to help you Prepare for multifactor authentication, including methods to configure MFA including but not limited to:
- Conditional Access policies
- The MFA Wizard for Microsoft Entra ID from the Microsoft 365 admin center
- Entra ID security defaults
Sign up for a free trial
The Intune trial is free for 30 days. If you have an existing work or school account, you can sign in with that account and add Intune to your subscription. Or, you can sign up for a new account. If you sign up for a new account, you can't combine the new account with an existing work or school account.
To sign up for the Microsoft Intune free trial, use the following steps:
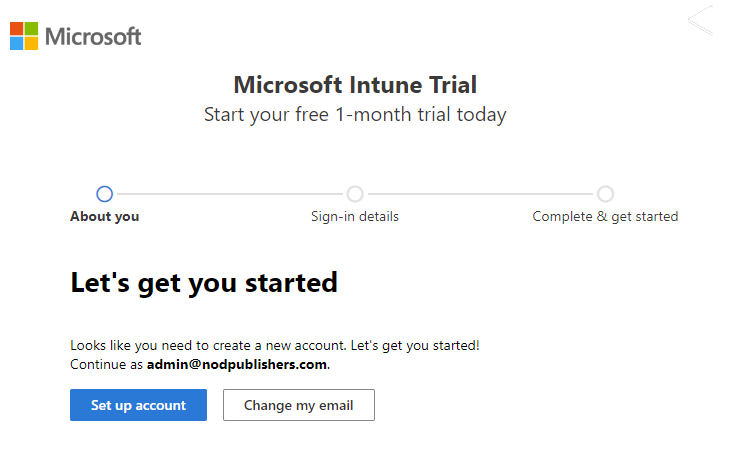
Enter your email address and select Next.
If you already have an account set up with another Microsoft service using your email address, you can sign in with this same account for the Intune trial. Or, you can create a new account. These steps assume you're creating a new account.

Select Set up account to create a new account.
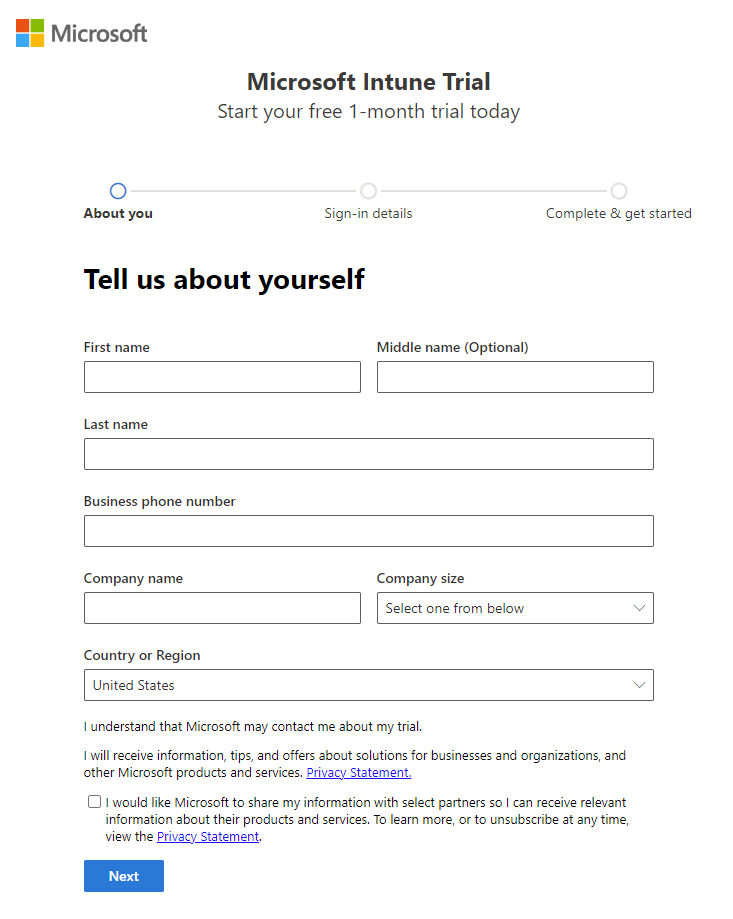
Add your name, phone number, company name, company size, and region. Review the remaining information and select Next.
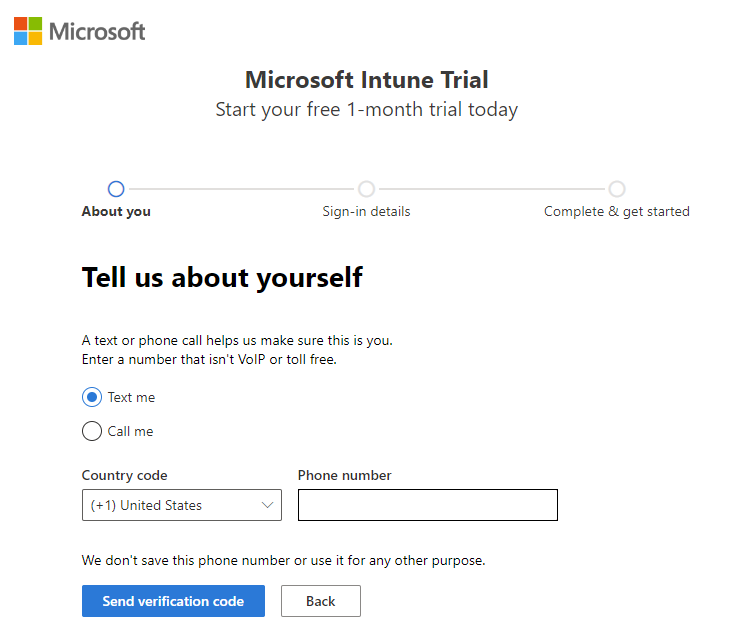
Select Send verification code to verify the phone number you added.
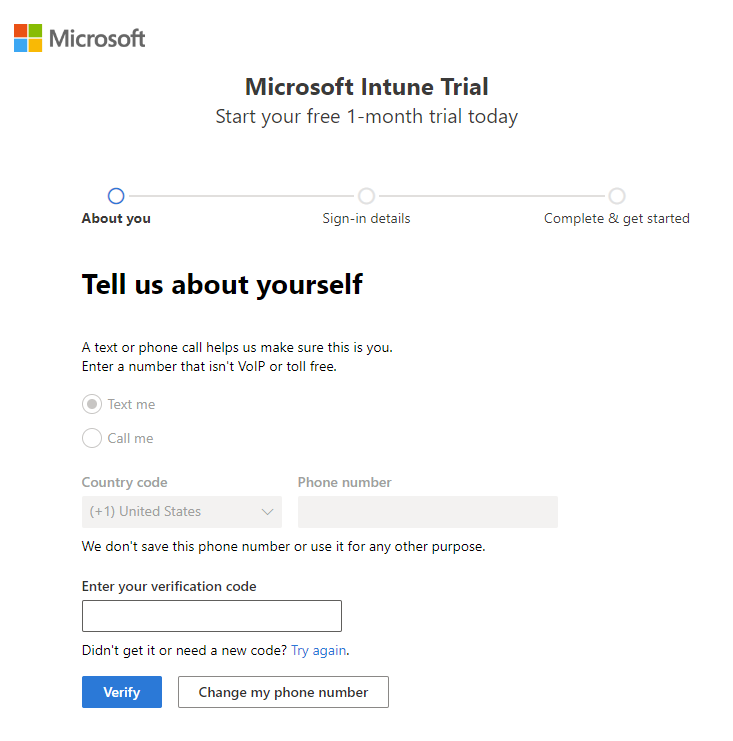
Enter the verification code you receive on your mobile device, and then select Verify.
Add your Username and Domain name for your trial that represents your business or organization. Your name added before
.onmicrosoft.com. Select Save to check availability. Select Next to continue. If you like, you can change this domain name to your custom domain name later.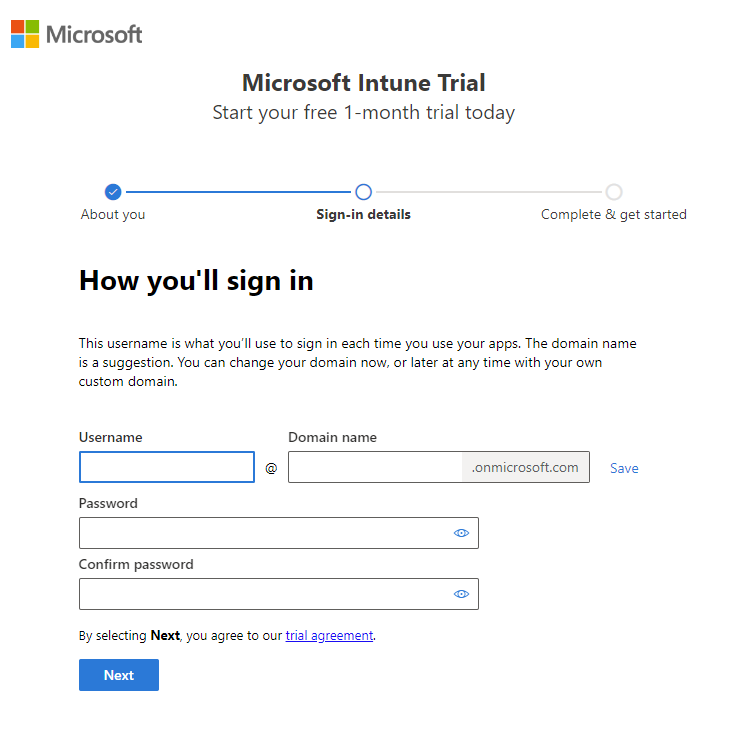
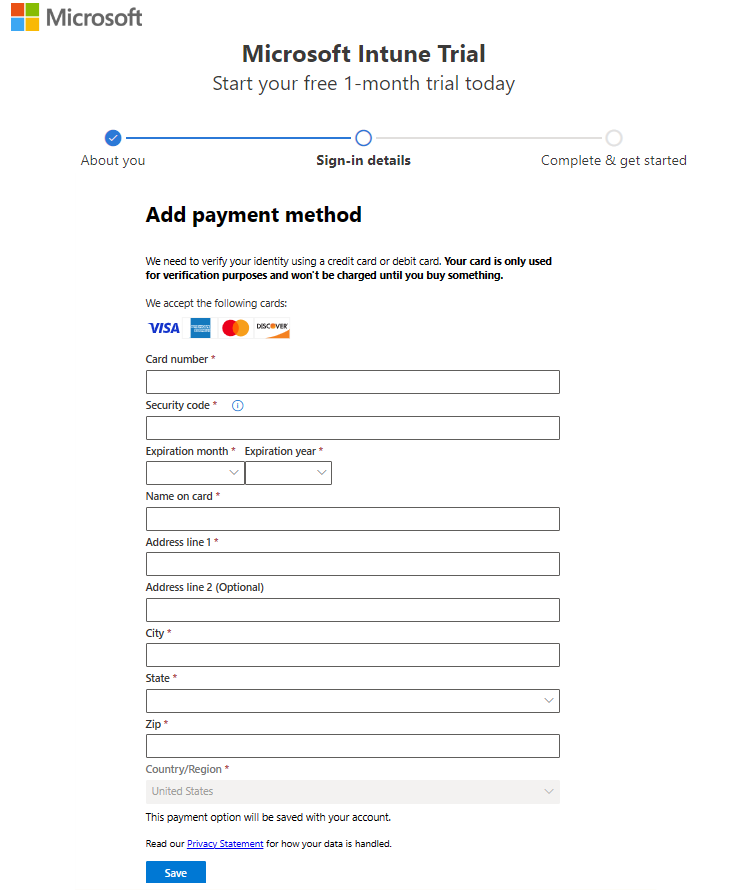
Add a payment method. Your card is only used for verification purposes and won't be charged unless you buy something.
After your account is created, you see your user name. Use this user name to sign in to Intune. You also receive an email message that includes your account information at the email address that you provided during the sign-up process. This email confirms your subscription is active.
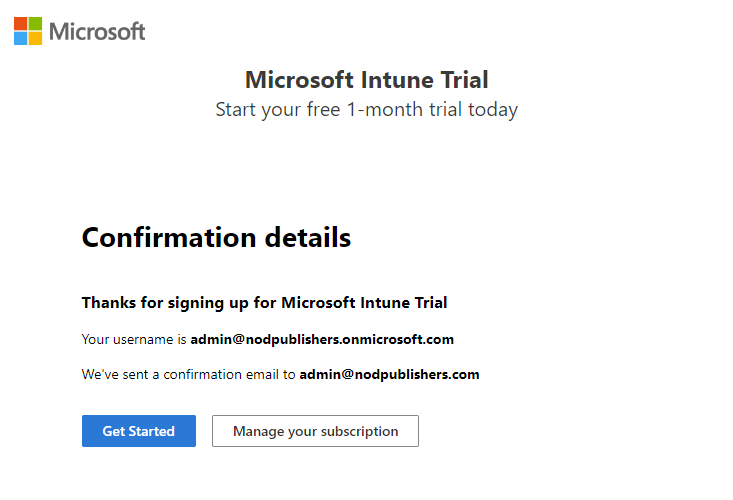
Note
If you select Get Started, the Microsoft 365 admin center opens. If you select Manage your subscription, you see Your products and can view details about your Microsoft Intune Trial subscription.


Sign in to the Intune admin center and create your admin team
If you're not already signed in to the admin center, sign in now:
Open your web browser and go to https://intune.microsoft.com.
Use the same user ID that you used to sign in. The user ID looks similar to
[email protected].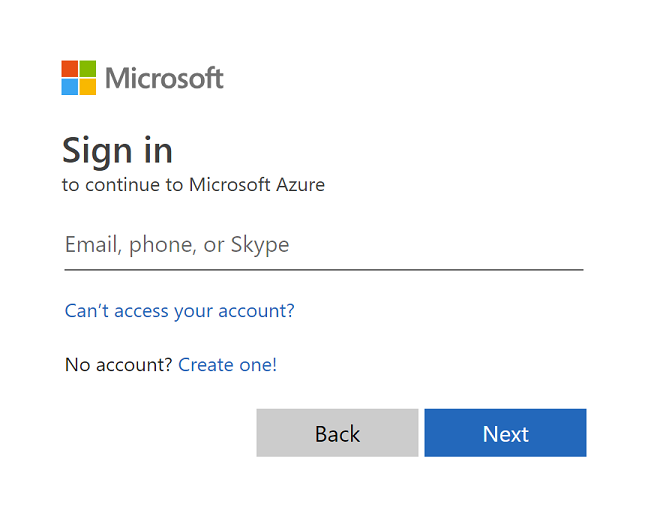

To get the user ID, refer to the email message you received after signing up for the trial.
Tip
When working with Microsoft Intune, you get better results by using a browser in regular mode, rather than private mode.
Assign built-in roles to your admin team
Intune uses role-based access control (RBAC) to manage permissions.
The account that creates the subscription is assigned the Microsoft Entra Global Administrator role. This built-in role is a privileged Microsoft Entra role and has more permissions than needed for most Intune tasks.
We suggest that you sign out of the Global Administrator role account and sign in with an account that's needed for the Intune task.
There are built-in roles specifically created and used to manage Intune. Your goal is to use the least privilege role that can perform the necessary tasks. For this series of articles, the following built-in roles are needed:
| Role | Description |
|---|---|
| Domain Name Administrator role | A Microsoft Entra role that can add and verify custom domain names in your tenant. This role is only used if you configure a custom domain name in this series, which is optional. |
| Intune Administrator | A Microsoft Entra role that has full access to all features in Microsoft Intune. You can use this account to set up Intune and set up Automatic Enrollment for Windows devices. |
| User Administrator | A Microsoft Entra role that can create and manage user accounts and groups in Intune and Microsoft 365. |
| Application Manager | An Intune role that can add and manage apps in Intune. |
| Intune Role Administrator | An Intune role that can create and manage custom roles and add users to Intune roles. |
| Policy and Profile Manager | An Intune role that can create and manage Intune policies, including compliance, device configuration, and most enrollment policies. |
If many admins are testing Intune, then assign their accounts to only the roles they need. For example, if an admin is only responsible for adding and managing apps, assign that admin only to the Application Manager role.
- To assign built-in roles to your admin team, see Assign Microsoft Intune roles for role-based access control.
For more information about Intune built-in roles, see:
- Role-based access control (RBAC) with Microsoft Intune
- Built-in role permissions for Microsoft Intune
Confirm the MDM authority
By default, the Mobile Device Management (MDM) authority is set when you create your free trial. You can confirm that the MDM authority is set by using the following steps:
- Sign in to the Microsoft Intune admin center as the Intune Administrator Microsoft Entra role
- Select Tenant administration.
- View the tenant details. The MDM authority should be set to Microsoft Intune.
If you see an orange banner that states you didn't set the MDM authority, you can activate it now. The mobile device management (MDM) authority setting determines how you manage your devices. Set the MDM authority before users can enroll devices for management.
Set the MDM authority to Intune
If the MDM authority isn't set, sign in to the Microsoft Intune admin center as the Intune Administrator Microsoft Entra role.
Select the orange banner to open the Mobile Device Management Authority setting. The orange banner appears only if you didn't set the MDM authority.
You can confirm the MDM Authority is set using the steps in Confirm the MDM authority (in this article).
If your MDM Authority isn't set, under Choose MDM Authority, set your MDM authority to Intune MDM Authority.
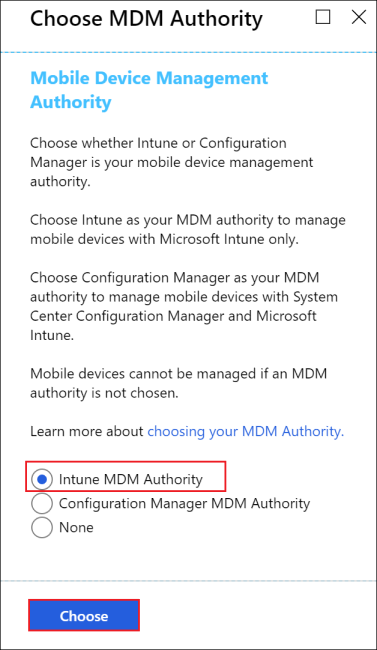

For more information about the MDM authority, see Set the mobile device management authority.
Configure your custom domain name (optional)
If your organization has its own custom domain that you want to use without .onmicrosoft.com, you can change it in the Microsoft 365 admin center. Use the following steps to add, verify, and configure your custom domain name.
Important
You can't rename or remove the initial onmicrosoft.com part of the domain name. However, you can add, verify, or remove custom domain names used with Intune to keep your business identity clear. For more information, see Configure a custom domain name.
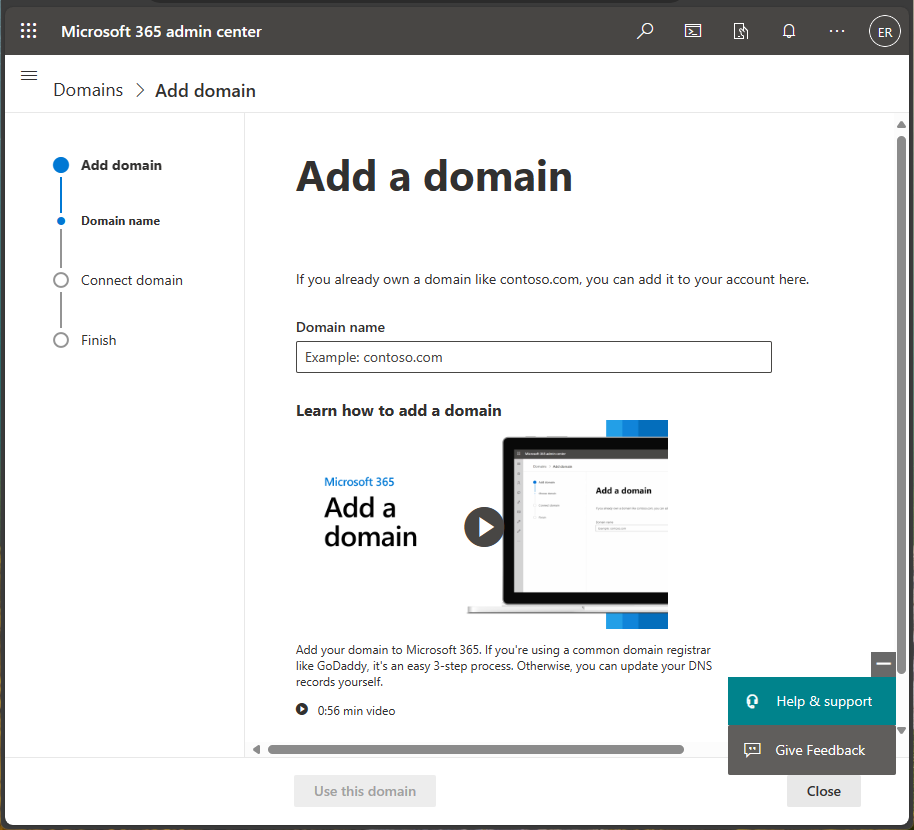
Sign in to the Microsoft 365 admin center as the Domain Name Administrator Microsoft Entra role.
In the navigation pane, choose Setup.
In the Sign-in and security section, select Get your custom domain set up.
Select Get started to set up your custom domain.
Enter your domain name and select Use this domain.
Verify that you're the owner of the domain that you entered. Select the method that you'll use to verify your domain.
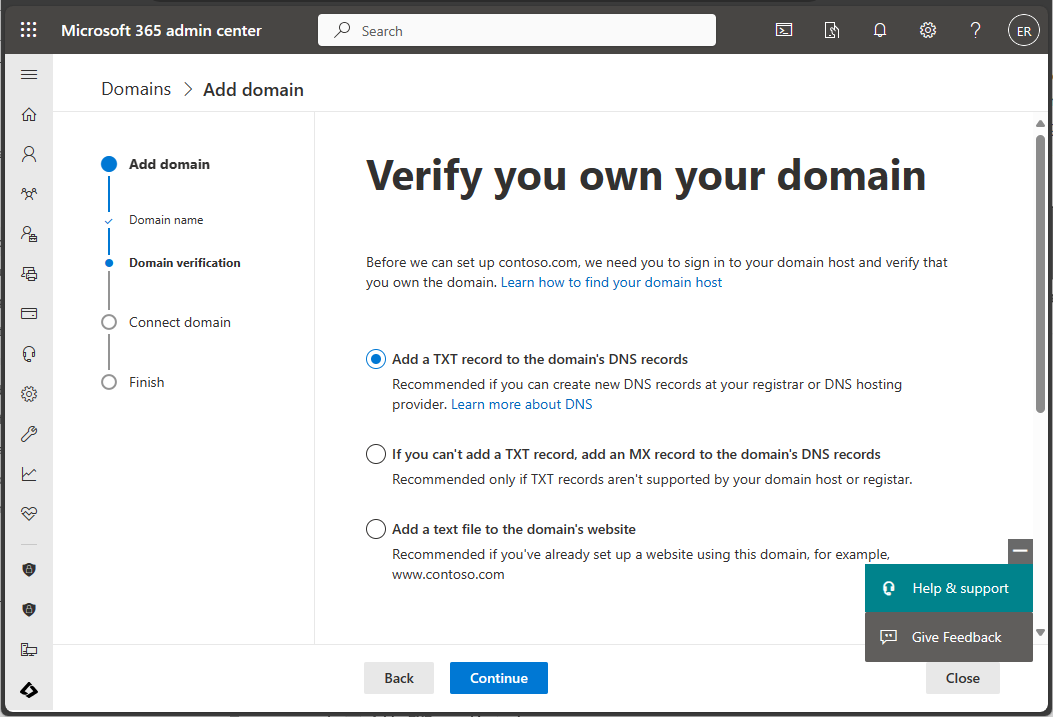
Note
For TXT record verification details, see Create DNS records at any DNS hosting provider for Microsoft 365.

Next steps
In this article, you created a free subscription to try Intune in a test environment. For more information about setting up Intune, see Set up Intune.
To continue evaluating Microsoft Intune, go to the next step: