Note
Access to this page requires authorization. You can try signing in or changing directories.
Access to this page requires authorization. You can try changing directories.
Mac users can join their new device to Microsoft Entra ID during the first-run out-of-box experience (OOBE). The macOS Platform single sign-on (PSSO) is a capability on macOS that is enabled using the Microsoft Enterprise Single Sign-on Extension. PSSO allows users to sign in to a Mac device using a hardware-bound key, smart card or their Microsoft Entra ID password. This tutorial shows you how to set up a Mac device during the OOBE to use PSSO using Automated Device Enrollment.
Prerequisites
- A recommended minimum version of macOS 14 Sonoma. While macOS 13 Ventura is supported, we strongly recommend using macOS 14 Sonoma for the best experience.
- A device with Automated Device Enrollment (ADE) enrolled. Check with your administrator if you're unsure if your device is enrolled with this requirement.
- Microsoft Intune Company Portal version 5.2404.0 or later.
- A Mac device enrolled in mobile device management (MDM) with Microsoft Intune.
- A configured single sign-on (SSO) extension MDM payload with PSSO settings in Intune by an administrator
- Microsoft Authenticator (recommended): The user must be registered for some form of Microsoft Entra ID multifactor authentication (MFA) on their mobile device to complete device registration.
- For smart card setup, certificate based authentication configured and enabled. A smart card loaded with a certificate for authentication with Microsoft Entra and the smart card paired with local account.
- Users must have sufficient permissions to register and join devices to Microsoft Entra ID.
- If you have network proxy filtering or TLS inspection enabled in your environment, be sure to review the suggested settings documented in the Platform Single Sign-On troubleshooting guide
Set up your macOS device
Upon seeing the "Hello" screen when opening your Mac for the first time, follow the steps to select your country or region, and configure network settings as required.
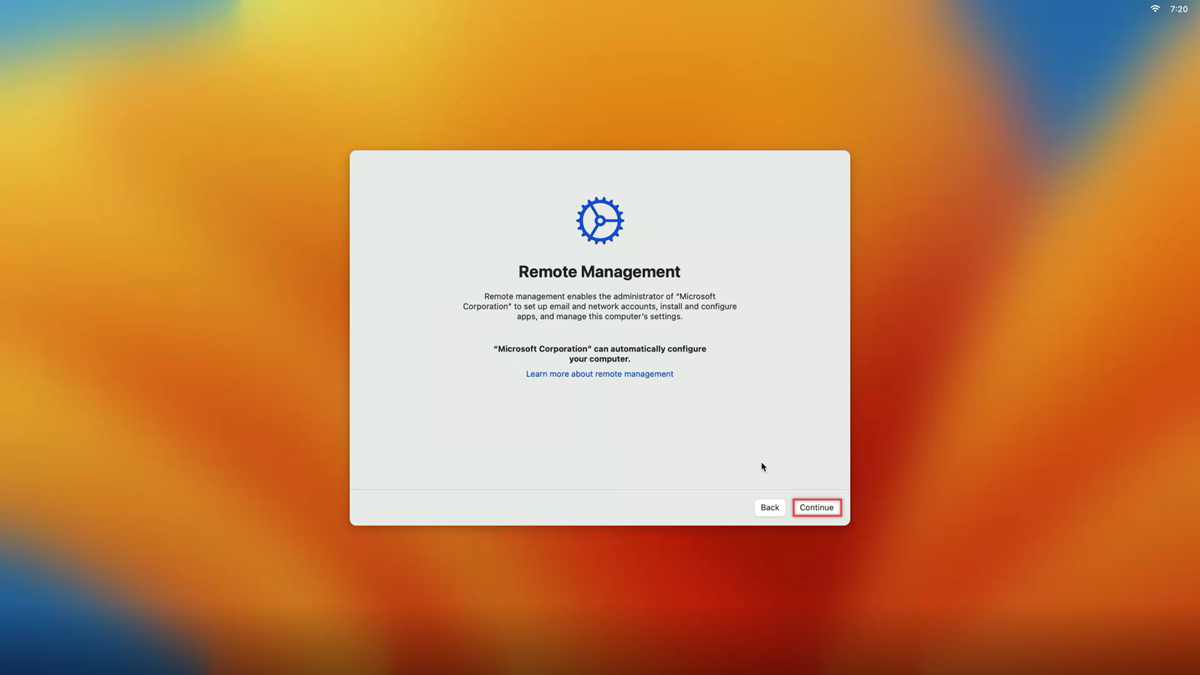
You're prompted to download a Remote Management profile, which allows the configuration setup in Microsoft Intune to be applied to your device. Select Continue, and enter your Microsoft Entra ID credentials when prompted to approve the management profile download.
Enter the code sent to your Authenticator app (recommended) or use another MFA method.
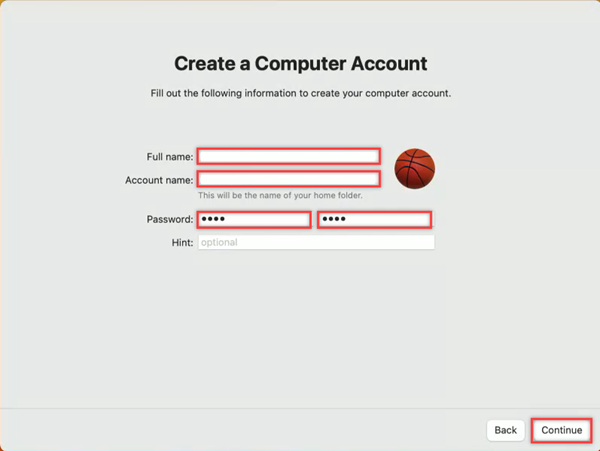
To create a user account, fill in your full name, account name, and create a local account password. Select Continue and your home screen appears.
Registration with Automated Device Enrollment
There are three authentication methods for PSSO registration:
- Secure Enclave: User logs on to their device which has a secure enclave backed cryptographic key used for SSO across apps that use Microsoft Entra ID for authentication. It can also be referred to as Platform Credential for macOS.
- Smart card: User logs into the machine using an external smart card or smart card compatible hard token.
- Password: User logs on to their local device with a local account, updated to use their Microsoft Entra ID password. This method also supports federated identity credentials.
Check that your system administrator has the Mac enrolled using secure enclave or smart card. These new passwordless features are supported only by PSSO. Check which authentication method has been set up by your administrator before continuing.
Navigate to the Registration Required popup at the top right of the screen. Hover over the popup and select Register. For macOS 14 Sonoma users, you see a prompt to register your device with Microsoft Entra. This prompt doesn't appear for macOS 13 Ventura.
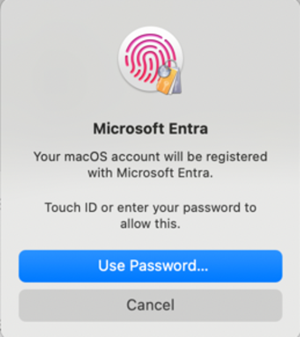
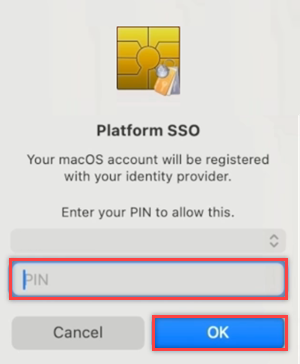
A prompt appears to enter your local account password. Enter your password and select Ok.
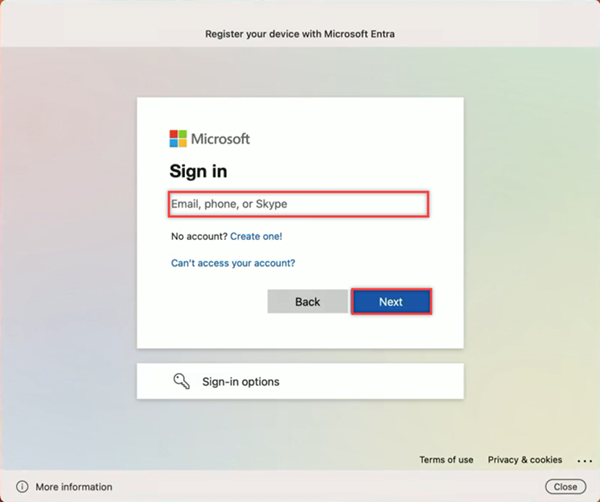
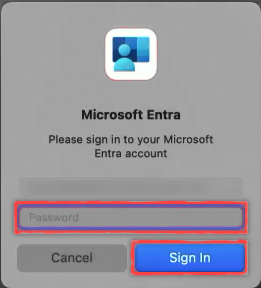
Once your account is unlocked, select the account to sign in to, enter your sign-in credentials and select Next.
MFA is required as part of this sign in flow. Open your Authenticator app (recommended) or use your other MFA methods you have registered, and enter the number displayed on the screen to finish registration.
When the MFA flow completes and the loading screen disappears, your device should be registered with PSSO. You can now use PSSO to access Microsoft app resources.
Enable Platform Credential for macOS for use as a passkey
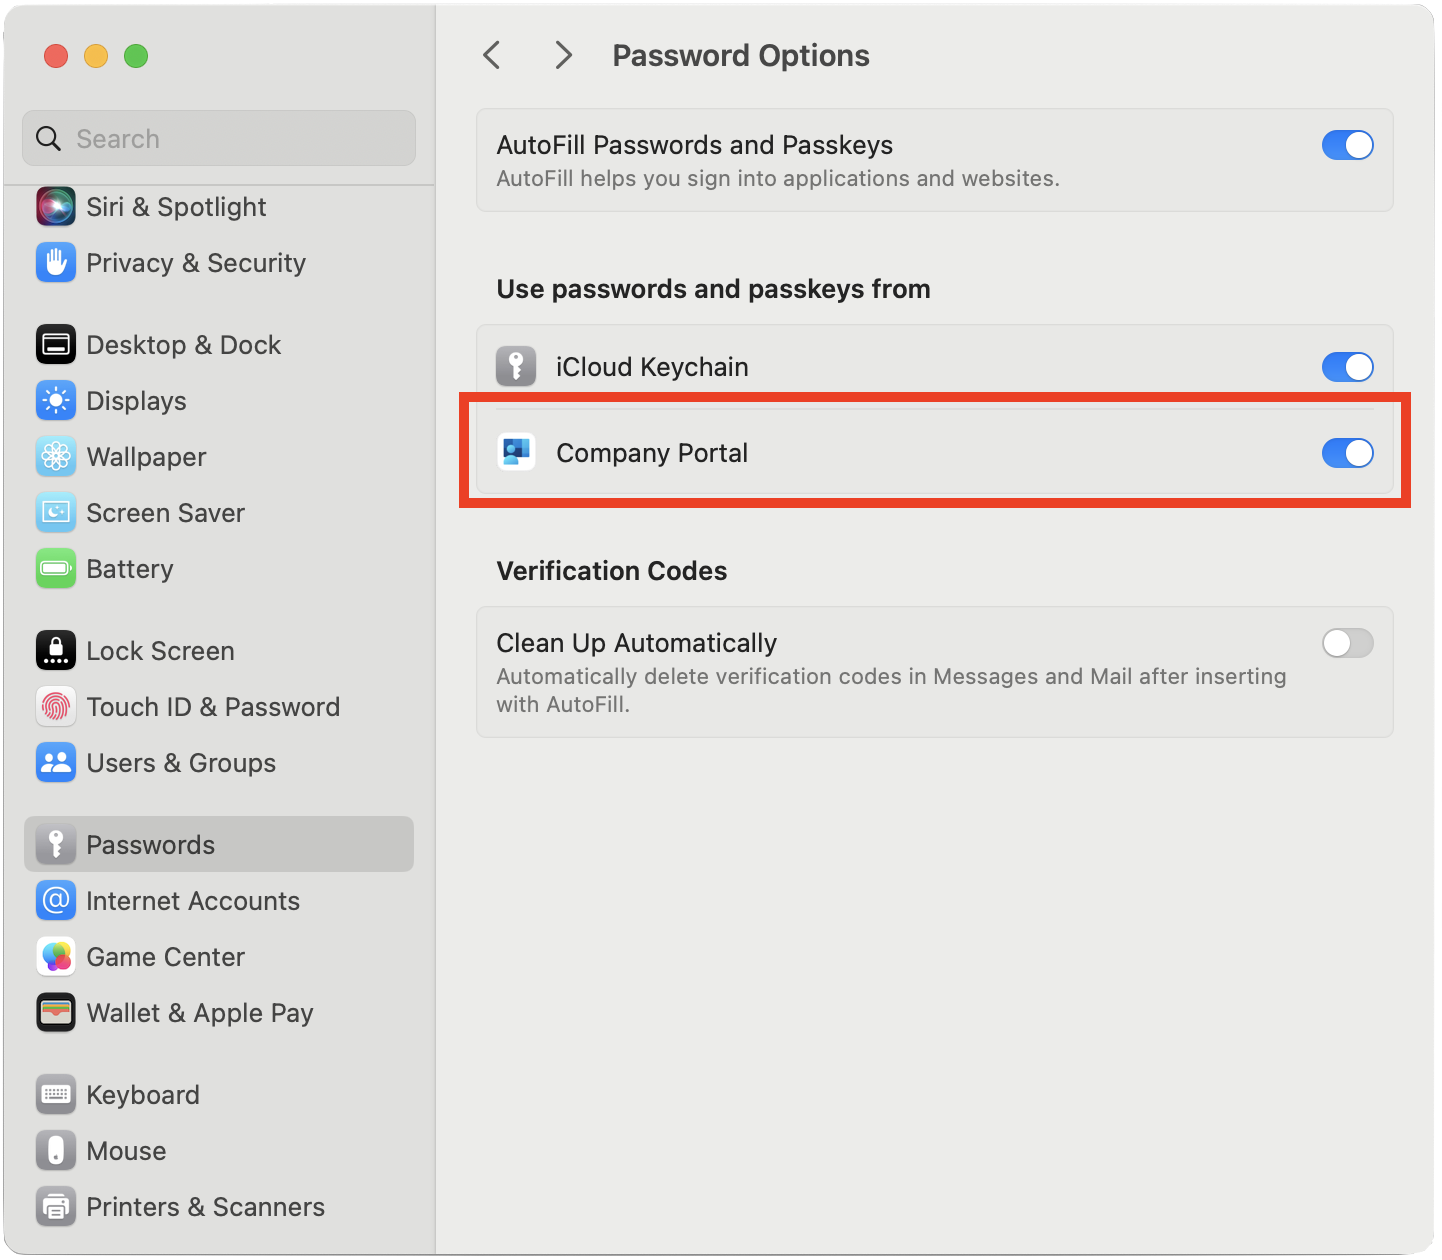
Setting up your device using secure enclave method enables you to use the resulting credential saved to the Mac as a passkey in the browser. To enable it;
Open the Settings app, and navigate to Passwords > Password options.
Under Password Options, find Use passwords and passkeys from and enable Company Portal through the toggle switch.

Check your device registration status
Once you've completed the steps above, it's a good idea to check your device registration status.
To check that registration has completed successfully, navigate to Settings and select Users & Groups.
Select Edit next to Network Account Server and check that Platform SSO is listed as Registered.
To verify the method used for authentication, navigate to your username in the Users & Groups window and select the Information icon. Check the method listed, which should be Secure enclave, Smart Card, or Password.
Note
You can also use the Terminal app to check the registration status. Run the following command to check the status of your device registration. You should see in the bottom of the output that SSO tokens are retrieved. For macOS 13 Ventura users, this command is required to check the registration status.
app-sso platform -s