Note
Access to this page requires authorization. You can try signing in or changing directories.
Access to this page requires authorization. You can try changing directories.
Resource pools let you book work to a group of interchangeable resources without immediately assigning a specific person. Use pools when you want to collect requirements centrally and assign specific resources later, manage capacity across a group of similar resources, or defer the assignment decision until closer to the work date.
If your resources need to work together as a team, use crews instead.
Pool scheduling at a glance
| Step | What you do | Key detail |
|---|---|---|
| 1. Create a pool | Create a bookable resource with type Pool, set capacity, and add members. | Use the same resource type within a pool. |
| 2. Book to the pool | Use the schedule assistant to book requirements to the pool. | The assistant can split work across multiple pool members. |
| 3. Assign pool bookings | Reassign pool bookings to specific members before the work begins. | Drag-drop, substitute, or rebook. |
Prerequisites
- Bookable resources created for each pool member (recommended: same resource type within a pool).
- Pool members added with date ranges for their membership.
- Start and end location configured (Organizational Unit Address for physical location, Location Agnostic for remote).
Note
- Crews and other pools can't be children of a pool.
- Don't choose the Resource address option for pool start/end location.
Step 1: Create a pool
Open the Resources area, select Resources, and then select New.
On the General tab, set Resource Type to Pool and choose a Pool Type.
Enter a Name and choose a Time Zone.
On the Scheduling tab, choose a Start Location and End Location. Choose Organizational Unit Address to represent a physical location where the pool works, or Location Agnostic for a pool of resources that work remotely.
Note
Don't choose the Resource address option.
Choose an option for Derive Capacity From Group Members and then select Save.
Derive Capacity setting Behavior Yes Pool capacity calculated dynamically from members' work calendars. Pool capacity changes when you add or remove members. No Fixed pool capacity, independent of member changes. You can change the capacity manually. Add resource attributes to consider for scheduling. Consider the pool as a standard resource as it relates to adding attributes like characteristics or territories.
Select Save & Close.
Add pool members
Add members to a pool. The location of the pool member comes from the pool.
On a resource pool record, go to Related > Resource's Children.
Select New Bookable Resource Group and enter a Name for the resource. This related entity is called BookableResourceGroup.
Choose a Child Resource and set a date range for the pool membership. You can't make crews and other pools a child of a pool.
Select Save & Close. Add other pool members as needed.

Step 2: Book to the pool
Use the schedule assistant to book requirements to the pool. The system shows pool resources as available if it can distribute the planned work duration across multiple child resources. For example, if you want to schedule a one-hour task and no single resource is available for the full hour, the system suggests two resources available for 30 minutes each.
The system doesn't show pool resources as available if the pool is fully booked for the time period, even if individual members aren't booked.
Select Book on a requirement form to open the schedule assistant. The schedule assistant shows the pool and individual pool members based on the configuration of the requirement.
Select the pool resource and a time slot, and select Book & Exit.
Note
The schedule assistant doesn't return resource pools for onsite work requirements.
Step 3: Assign pool bookings
Before the actual work begins, assign pool bookings to specific members on the schedule board. Bookings assigned to pool member resources during nonworking hours count against the capacity of the pool resource twice.
On the Schedule Board, open the Filters pane. Set the Resource Types filter to Pool and select Apply.
To set pool as the default view for the selected schedule board tab, select the ellipsis (…) and then Save as default.
Right-click the resource pool and select View Group Members to see the pool and pool members.
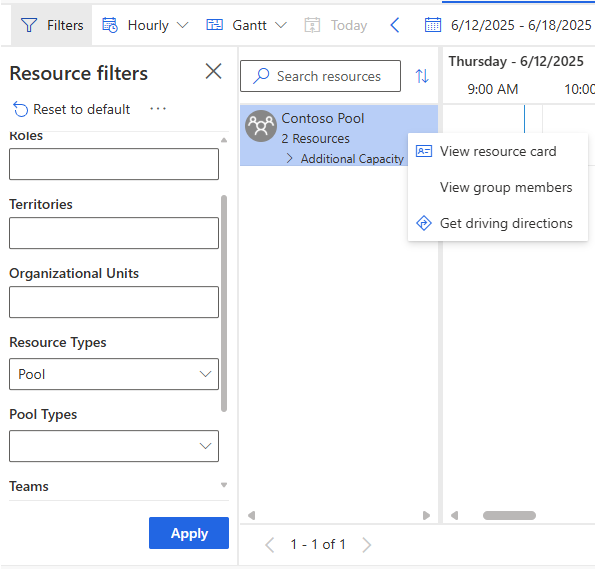
To assign a pool booking to a pool member, choose one of the following options:
Drag and drop: Select and drag a booking from the resource pool to one of the pool members.
Substitution: Right-click a booking in the resource pool, select Book Substitute, and choose a pool member.
Rebook: Right-click a pool booking and select Rebook. Edit the filter criteria to search for Contact, User, and Account type resources instead of pools. The new booking uses the default booking duration, so adjust its end time if necessary. Then cancel the original pool booking.