Note
Access to this page requires authorization. You can try signing in or changing directories.
Access to this page requires authorization. You can try changing directories.
Push notifications are messages sent to customers who installed your mobile app. Push messages let you quickly convey offers, messages, or other information directly to users of your app.
You can send push messages as part of your journeys, similar to other outbound messages like text messages.
Set up push notifications
To set up push notifications, you need administrator privileges. First, create a mobile app configuration. Then complete developer setup in your mobile app.
Create push notification messages
After you create your mobile app configuration, you can start creating push notification messages by going to Customer Insights - Journeys > Channels > Push notifications and selecting +New push notification in the top ribbon. +New push notification takes you to the push notification message editor.
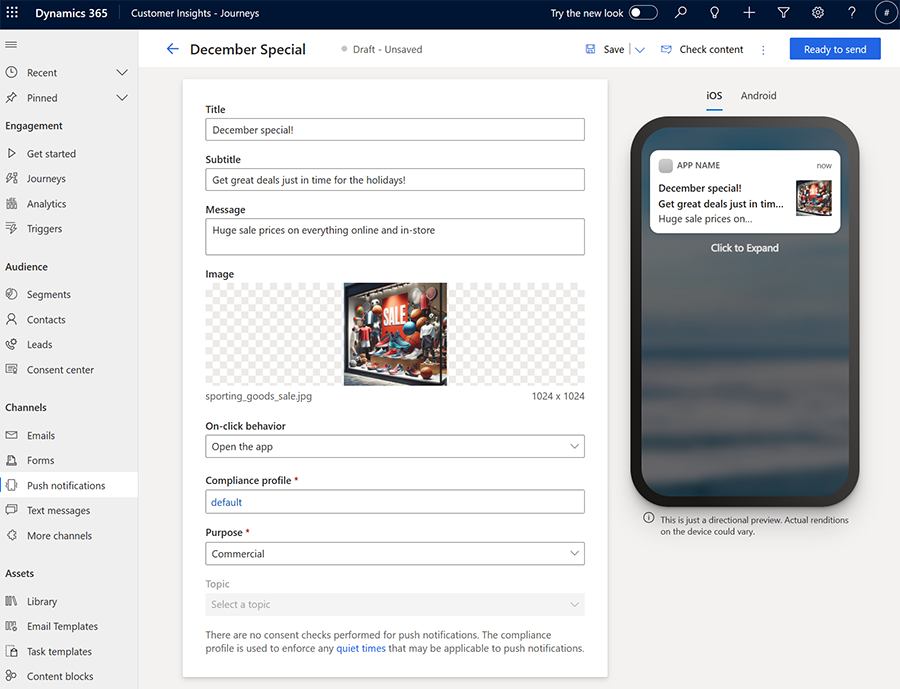
In the push notification message editor, you can enter a title, a subtitle, a message, an image, and preview how your message appears in iOS and Android.
Use the On-click behavior field to choose what happens when recipients tap the notification on their mobile devices.
- Open the app: Opens the mobile application.
- Open the browser: Opens a specified URL.
Send a test push notification to your mobile app configuration, or add the message to a journey to see how it works. To stop messages from being sent, you can deactivate or delete them.
Push notification images
To add images to push notifications, select any image from the library or upload a new one by selecting the Choose an image field on the push notification message editor. When you add images, Copilot suggests images that match your content.
There are some other considerations for images in push notifications:
- Images might be subject to platform size limits for iOS and Android.
- The image ratio should be 2:1 for best viewing in push notifications.
- You can preview the message and image in both iOS and Android.
Personalize your push notifications
As with the email editor, you can personalize push notifications to insert dynamic data that's unique to each notification recipient.
To personalize a push notification:
- Select the Personalization
 button in the Message field.
 - Choose a data source by selecting Select a data field. Your data source can be based on an Audience, a Trigger, or Compliance.
- After choosing the data source, search for the specific attribute or trigger you want.
- Add a Label to quickly identify your token in the message content.
When you send the push notification from a journey, it automatically populates the token according to the attribute you selected.
Conditional content for push notifications
To add inline conditions in a push notification message:
Add the conditional (if-then-else) statement in the push notification message editor:
{{#if placeholderName}}
  Content displayed when the expression is true
{{else if placeholderName2}}
  Content displayed when the first expression is false and the second one is true
.
.
.
{{else}}
  Content displayed when all expressions are false
{{/if}}
To set up the condition, select the placeholder name to configure (for example, "placeholderName") and select the personalization icon.
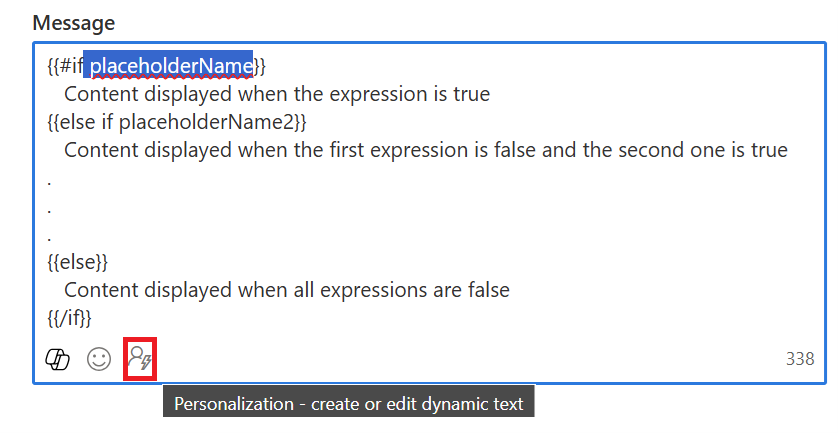
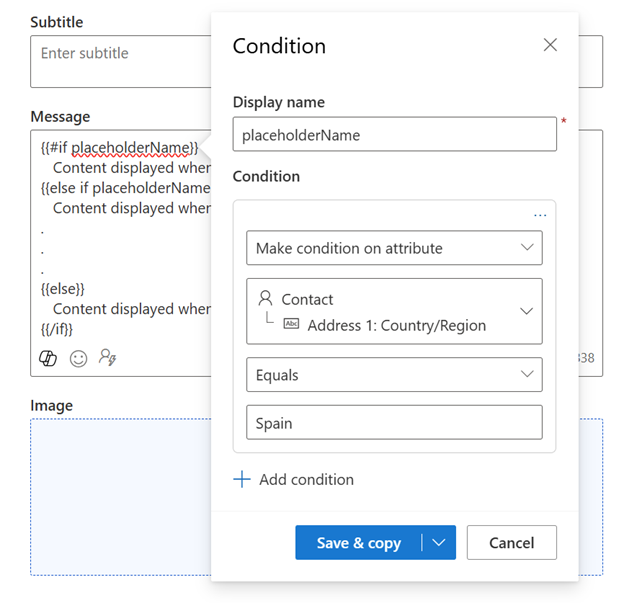
Select the condition you want. In this example, the first placeholder activates the condition if the contact's address is in Spain.
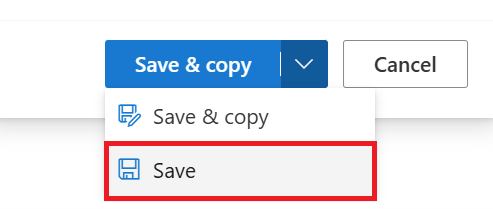
Once done, select Save.
Repeat these steps for each condition you add.
Add a Customer Voice survey to a push notification
Adding a Customer Voice survey link to a push notification or text message lets you collect feedback from customers on the channels they use most.
To add a Customer Voice survey to a push notification:
- Select the Customer Voice survey button
 in the Message field.
 - Choose a Customer Voice survey in the lookup field.
- Select whether you want the survey to be anonymous and whether you want to track the survey link after customers select it. If you select the Survey is anonymous option, no user data is saved with the answers.
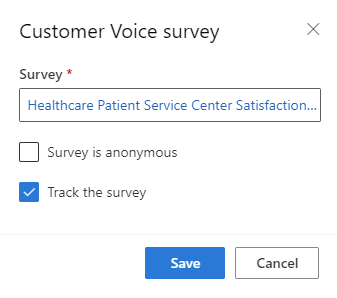
- Select Save.
When you send the push notification from a journey, it automatically populates the token with the survey and options you selected.
Consent and compliance in push notifications
Set a compliance profile and purpose for each push notification. Push notifications don't perform consent checks, but the compliance profile enforces any applicable quiet times.
Send push notification messages in a journey
When creating a Customer Insights - Journeys, you can send push notification messages by:
- Specifying the mobile application configuration.
- Then choosing the push notification message you want to send from the journey.
Track your push notification messaging metrics from channel insights
You can see how customers reacted to your push messages by checking the push notification analytics in the message itself and within journeys.