Note
Access to this page requires authorization. You can try signing in or changing directories.
Access to this page requires authorization. You can try changing directories.
You can choose whether the session is disconnected or the remote lock screen is shown when a remote session is locked, either by the user or by policy. When the session lock behavior is set to disconnect, a dialog is shown to let users know they were disconnected. Users can choose the Reconnect option from the dialog when they're ready to connect again.
When used with single sign-on using Microsoft Entra ID, disconnecting the session provides the following benefits:
A consistent sign-in experience through Microsoft Entra ID when needed.
A single sign-on experience and reconnection without authentication prompt, when allowed by conditional access policies.
Support for passwordless authentication like passkeys and FIDO2 devices, contrary to the remote lock screen. Disconnecting the session is necessary to ensure full support of passwordless authentication.
Conditional access policies, including multifactor authentication and sign-in frequency, are reevaluated when the user reconnects to their session.
You can require multifactor authentication to return to the session and prevent users from unlocking with a simple username and password.
For scenarios that rely on legacy authentication, including NTLM, CredSSP, RDSTLS, TLS, and RDP basic authentication protocols, users are prompted to re-enter their credentials when they reconnect or start a new connection.
The default session lock behavior is different depending on whether you're using single sign-on with Microsoft Entra ID or legacy authentication. The following table shows the default configuration for each scenario:
| Scenario | Default configuration |
|---|---|
| Single sign-on using Microsoft Entra ID | Disconnect the session |
| Legacy authentication protocols | Show the remote lock screen |
This article shows you how to change the session lock behavior from its default configuration using Microsoft Intune or Group Policy.
Prerequisites
Select the relevant tab for your configuration method.
Before you can configure the session lock behavior, you need to meet the following prerequisites:
An existing host pool with session hosts.
Your session hosts must be running one of the following operating systems with the relevant cumulative update installed:
- Windows 11 single or multi-session with the 2024-05 Cumulative Updates for Windows 11 (KB5037770) or later installed.
- Windows 10 single or multi-session, versions 21H2 or later with the 2024-06 Cumulative Updates for Windows 10 (KB5039211) or later installed.
- Windows Server 2022 with the 2024-05 Cumulative Update for Microsoft server operating system (KB5037782) or later installed.
To configure Intune, you need:
- A Microsoft Entra ID account that is assigned the Policy and Profile manager built-in RBAC role.
- A group containing the devices you want to configure.
Configure the session lock behavior
Select the relevant tab for your configuration method.
To configure the session lock experience using Intune:
Sign in to the Microsoft Intune admin center.
Create or edit a configuration profile for Windows 10 and later devices, with the Settings catalog profile type.
In the settings picker, browse to Administrative templates > Windows Components > Remote Desktop Services > Remote Desktop Session Host > Security.
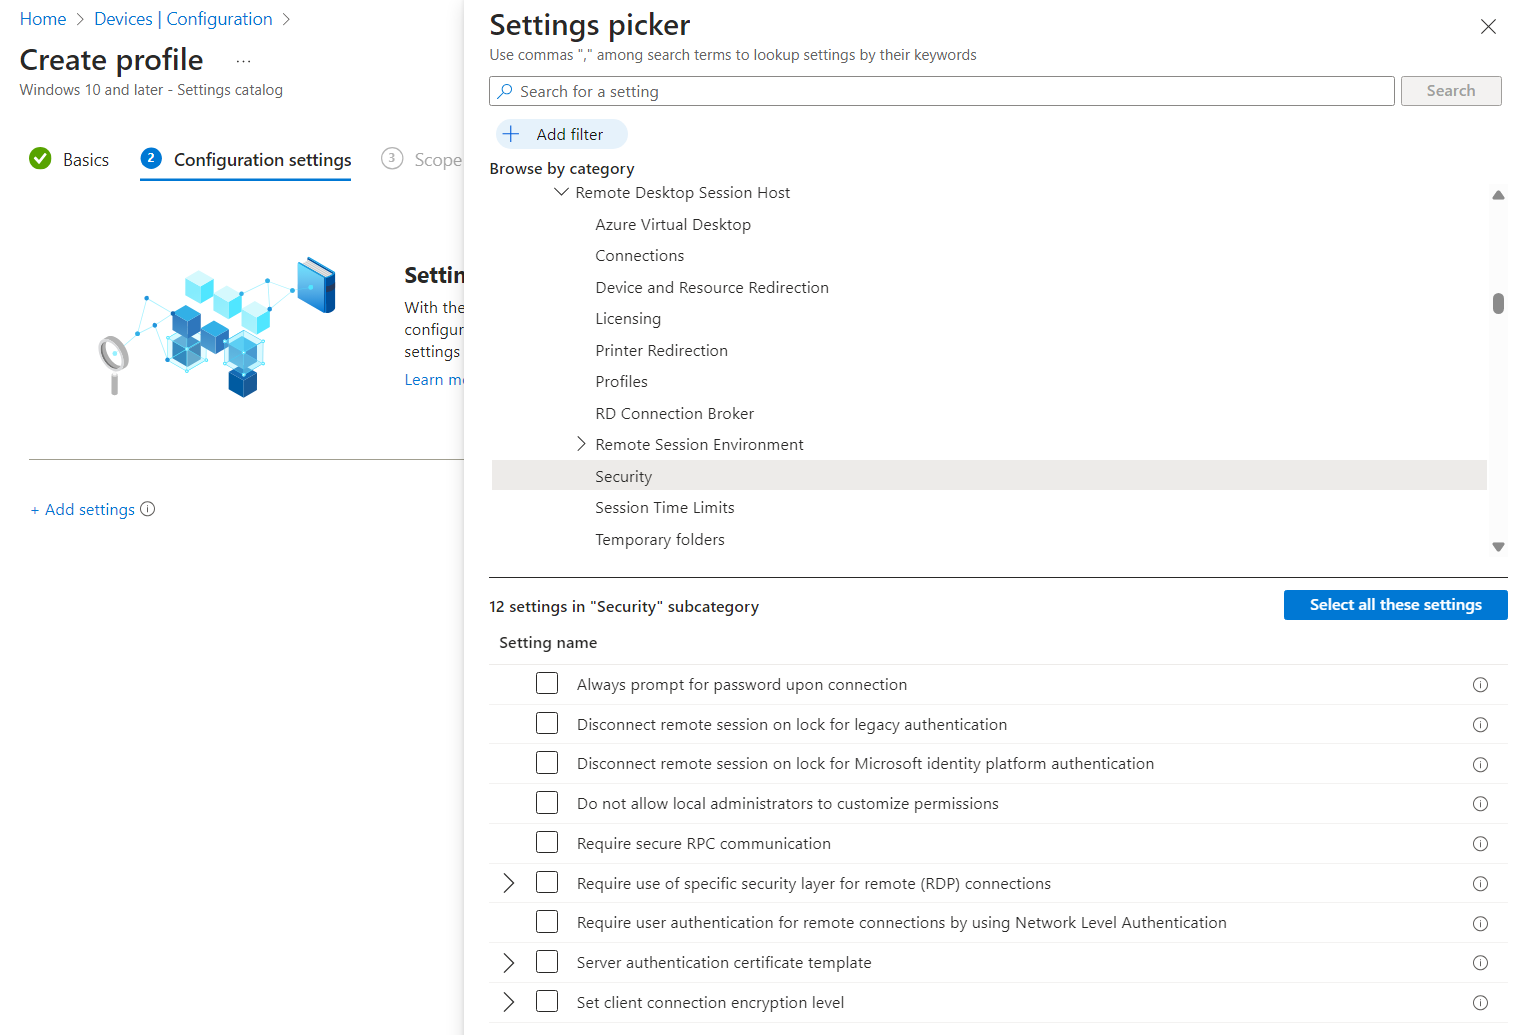
Check the box for one of the following settings, depending on your requirements:
For single sign-on using Microsoft Entra ID:
Check the box for Disconnect remote session on lock for Microsoft identity platform authentication, then close the settings picker.
Expand the Administrative templates category, then toggle the switch for Disconnect remote session on lock for Microsoft identity platform authentication to Enabled or Disabled:
To disconnect the remote session when the session locks, toggle the switch to Enabled.
To show the remote lock screen when the session locks, toggle the switch to Disabled.
For legacy authentication protocols:
Check the box for Disconnect remote session on lock for legacy authentication, then close the settings picker.
Expand the Administrative templates category, then toggle the switch for Disconnect remote session on lock for legacy authentication to Enabled or Disabled:
To disconnect the remote session when the session locks, toggle the switch to Enabled.
To show the remote lock screen when the session locks, toggle the switch to Disabled.
Select Next.
Optional: On the Scope tags tab, select a scope tag to filter the profile. For more information about scope tags, see Use role-based access control (RBAC) and scope tags for distributed IT.
On the Assignments tab, select the group containing the computers providing a remote session you want to configure, then select Next.
On the Review + create tab, review the settings, then select Create.
Once the policy applies to the session hosts, restart them for the settings to take effect.
To test the configuration, connect to a remote session, then lock the remote session. Verify that the session either disconnects or the remote lock screen is shown, depending on your configuration.

