Note
Access to this page requires authorization. You can try signing in or changing directories.
Access to this page requires authorization. You can try changing directories.
In Azure AI Search, a vectorizer converts text or images into vectors during query execution, allowing you to submit plain-text queries against vector fields without computing embeddings yourself.
A vectorizer is defined in a search index and assigned to vector fields through a vector profile. At query time, the vectorizer calls an embedding model to generate a vector from your query input. For more information, see Using integrated vectorization in queries.
To add a vectorizer to an index, use the import wizard or index designer in the Azure portal, Indexes - Create Or Update (REST API), or an Azure SDK package. This article uses REST for illustration.
Tip
A vectorizer handles query-time vectorization. To also vectorize content during indexing, set up an indexer and skillset with an embedding skill. For more information, see Using integrated vectorization during indexing.
Prerequisites
An index with searchable vector fields on your search service.
(Optional) Diagnostic logging enabled on your search service to confirm vector query execution.
A supported embedding model deployment for your vectorizer.
Permissions to update and query the index. This article uses the recommended keyless authentication. Assign the Search Service Contributor and Search Index Data Reader roles to your user account, sign in to Azure, and get an access token. If you use API keys instead, get an admin key for update operations and a query key for search operations.
Permissions to use the embedding model. For example, with Azure OpenAI, the caller must have Cognitive Services OpenAI User permissions. You can also use an API key.
Visual Studio Code with the REST Client extension. Create a
.restor.httpfile to send each REST request in this article directly from the editor.
Supported embedding models
Azure AI Search offers several types of vectorizers, each paired with a corresponding skill. The skill generates embeddings during indexing, while the vectorizer generates embeddings at query time. You must use the same embedding model for both, so choose a vectorizer–skill pair that points to the same model deployment.
The following table lists the vectorizers and their supported models and associated skills.
| Vectorizer | Supported models | Associated skill |
|---|---|---|
| Azure OpenAI | text-embedding-ada-002 text-embedding-3-large text-embedding-3-small |
Azure OpenAI Embedding |
| Microsoft Foundry model catalog | Cohere-embed-v3-english Cohere-embed-v3-multilingual Cohere-embed-v4 1 |
AML |
| Azure Vision | Multimodal embeddings 4.0 API | Azure Vision multimodal embeddings |
| Custom Web API | Any embedding model (hosted externally) | Custom Web API |
1 You can only specify embed-v-4-0 programmatically through the AML skill or Microsoft Foundry model catalog vectorizer, not through the Azure portal. However, you can use the portal to manage the skillset or vectorizer afterward.
Note
Vectorizers are generally available as long as you use a generally available skill–vectorizer pair. For the latest availability information, see the documentation for each vectorizer and skill in the previous table.
Define a vectorizer using a wizard
The Import data wizard in the Azure portal can read files from Azure Blob Storage, create an index with chunked and vectorized fields, and add a vectorizer. By design, the wizard-generated vectorizer is set to the same embedding model used to index the blob content.
To create a sample index with a vectorizer using the wizard:
Upload files to a container in Azure Storage. We used small text files from NASA's Earth at Night e-book to test these instructions on a free search service.
Run the Import data wizard. Choose the blob container for the data source.
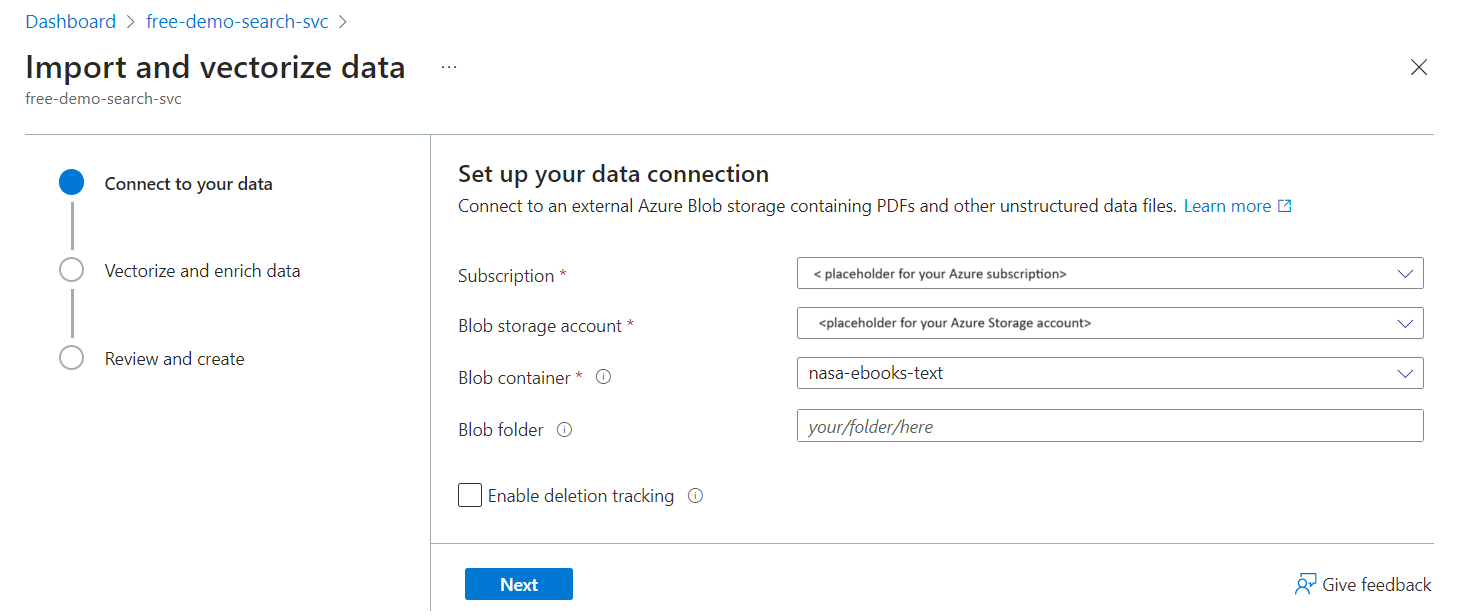
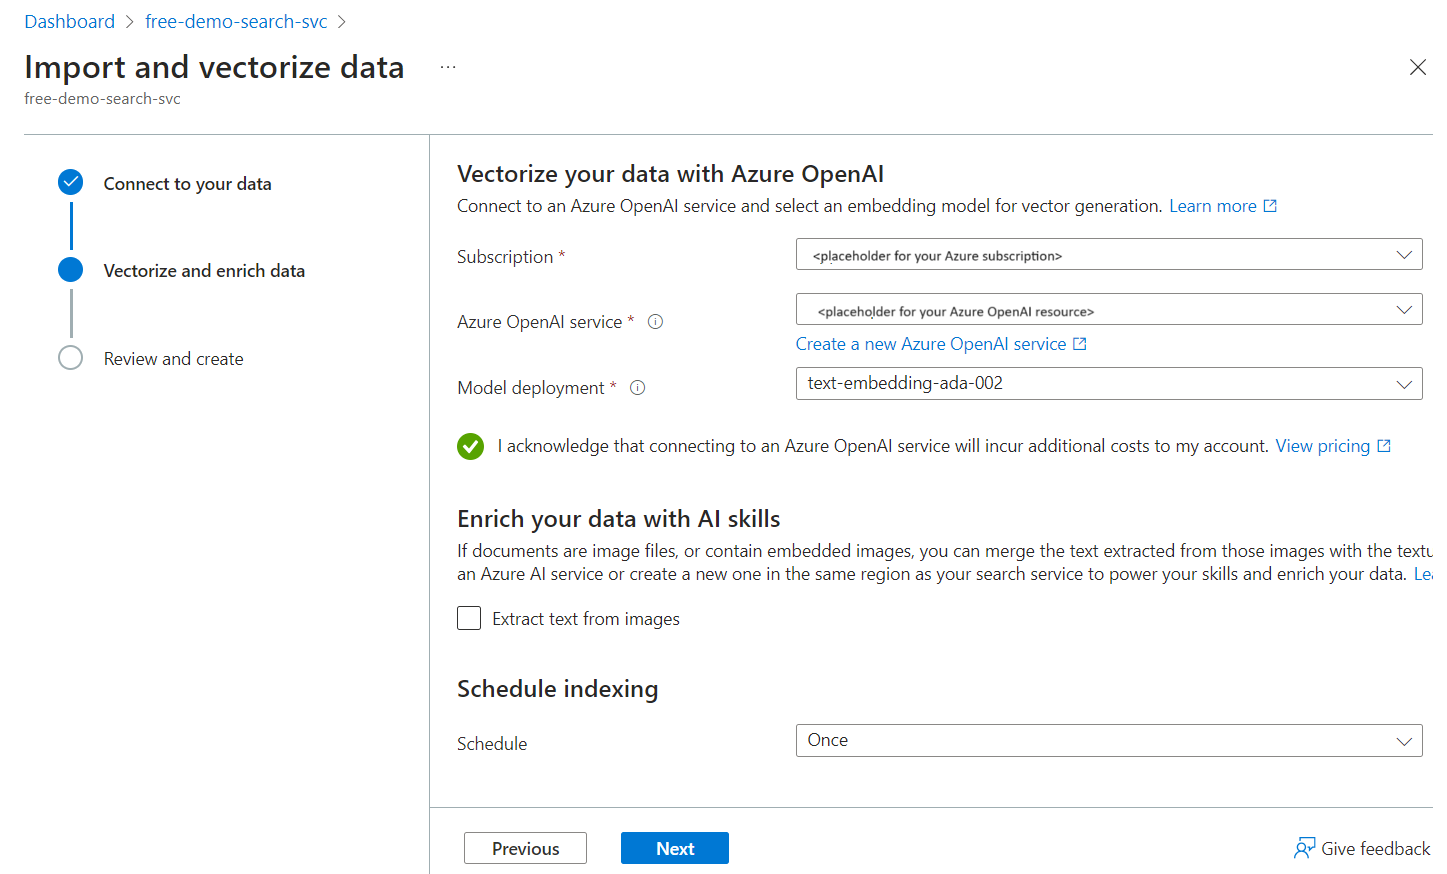
Choose a vectorizer kind and, if applicable, a model deployment. This example uses Azure OpenAI and a text-embedding-ada-002 deployment.
After the wizard finishes and all indexer processing is complete, you should have an index with a searchable vector field. The field's JSON definition looks like this:
 {
   "name": "text_vector",
   "type": "Collection(Edm.Single)",
   "searchable": true,
   "filterable": false,
   "retrievable": true,
   "stored": true,
   "sortable": false,
   "facetable": false,
   "key": false,
   "dimensions": 1536,
   "vectorSearchProfile": "vector-nasa-ebook-text-profile",
   "synonymMaps": []
 }
You should also have a vector profile, vector search algorithm, and vectorizer. Their JSON definitions look like this:
 "algorithms": [
   {
     "name": "vector-nasa-ebook-text-algorithm",
     "kind": "hnsw",
     "hnswParameters": {
       "metric": "cosine",
       "m": 4,
       "efConstruction": 400,
       "efSearch": 500
     }
   }
 ],
"profiles": [
   {
     "name": "vector-nasa-ebook-text-profile",
     "algorithm": "vector-nasa-ebook-text-algorithm",
     "vectorizer": "vector-nasa-ebook-text-vectorizer"
   }
 ],
 "vectorizers": [
   {
     "name": "vector-nasa-ebook-text-vectorizer",
     "kind": "azureOpenAI",
     "azureOpenAIParameters": {
       "resourceUri": "https://my-azure-openai-resource.openai.azure.com",
       "deploymentId": "text-embedding-ada-002",
       "modelName": "text-embedding-ada-002",
     },
   }
 ]


Define a vectorizer programmatically
If you didn't use the portal wizard or want to add a vectorizer to an existing index, you can define a vectorizer and vector profile programmatically. A vector profile links a vectorizer to one or more vector fields and specifies the vector search algorithm used for navigation structures.
To define a vectorizer and vector profile in an existing index:
Retrieve the index definition using Indexes - Get (REST API). Replace the service name, index name, and access token with your own values.
### Get index definition
GET https://my-search-service.search.windows.net/indexes/my-index?api-version=2025-09-01 HTTP/1.1
Authorization: Bearer <your-access-token> // For API keys, replace this line with api-key: <your-admin-api-key>
Use Indexes - Create Or Update (REST API) to update the index definition. Paste the full index definition in the request body.
### Update index definition
PUT https://my-search-service.search.windows.net/indexes/my-index?api-version=2025-09-01 HTTP/1.1
Content-Type: application/json
Authorization: Bearer <your-access-token> // For API keys, replace this line with api-key: <your-admin-api-key>

// Paste your index definition here
Add a
vectorizerssection tovectorSearchobject. This section specifies connection information to a deployed embedding model. The following example includes both Azure OpenAI and Custom Web API for comparison."vectorSearch": { "vectorizers": [ { "name": "my_azure_open_ai_vectorizer", "kind": "azureOpenAI", "azureOpenAIParameters": { "resourceUri": "https://url.openai.azure.com", "deploymentId": "text-embedding-ada-002", "modelName": "text-embedding-ada-002", "apiKey": "mytopsecretkey" } }, { "name": "my_custom_vectorizer", "kind": "customWebApi", "customVectorizerParameters": { "uri": "https://my-endpoint", "authResourceId": null, "authIdentity": null } } ] }Add an
algorithmssection tovectorSearch. This section defines a vector search algorithm used for navigation structures."algorithms": [ { "name": "my_hnsw_algorithm", "kind": "hnsw", "hnswParameters": { "m": 4, "efConstruction": 400, "efSearch": 500, "metric": "cosine" } } ]Add a
profilessection tovectorSearch. This section references the vectorizer and vector search algorithm defined in the previous steps."profiles": [ { "name": "my_vector_profile", "algorithm": "my_hnsw_algorithm", "vectorizer": "my_azure_open_ai_vectorizer" } ]In the
fieldsarray, assign the vector profile to one or more vector fields by specifying thevectorSearchProfileproperty."fields": [ ... // Trimmed for brevity { "name": "vector", "type": "Collection(Edm.Single)", "dimensions": 1536, "vectorSearchProfile": "my_vector_profile", "searchable": true, "retrievable": true }, { "name": "my_second_vector", "type": "Collection(Edm.Single)", "dimensions": 1536, "vectorSearchProfile": "my_vector_profile", "searchable": true, "retrievable": true } ]Send the PUT request to update the index definition. If the request is successful, you should receive a
204 No Contentresponse.To verify the vectorizer and vector profile, rerun the GET request from the first step. Confirm that:
The
vectorSearch.vectorizersarray contains your vectorizer definition with the correctkindand connection parameters.The
vectorSearch.profilesarray includes a profile that references your vectorizer by name.The
vectorSearch.algorithmsarray includes the vector search algorithm referenced by your profile.The
vectorSearchProfileproperty on your vector field(s) in thefieldsarray matches the profile name.
Test a vectorizer
To confirm a vectorizer works, send a vector query that passes a text string instead of a vector. The following example targets the sample index from Define a vectorizer using a wizard, but you can test your own index by adjusting the field names and query parameters.
Use Documents - Search Post (REST API) to send the request. Replace the service name, index name, and access token with your own values.
### Test a vectorizer with a vector query
POST https://my-search-service.search.windows.net/indexes/vector-nasa-ebook-txt/docs/search?api-version=2025-09-01 HTTP/1.1
Content-Type: application/json
Authorization: Bearer <your-access-token> // For API keys, replace this line with api-key: <your-query-api-key>

{
    "count": true,
    "select": "title, chunk",
    "vectorQueries": [
        {
            "kind": "text",
            "text": "what cloud formations exist in the troposphere",
            "fields": "text_vector",
            "k": 3,
            "exhaustive": true
        }
    ]
}
Key points:
"kind": "text"tells the search engine that the input is a text string and to use the vectorizer associated with the search field."text"is the plain-language string to vectorize."fields": "text_vector"is the name of the field to query over. If you use the sample index produced by the wizard, the generated vector field is namedtext_vector."exhaustive": truebypasses the HNSW graph and performs a brute-force search over all vectors. This setting is useful for testing accuracy but is slower than the default approximate search. Remove this parameter in production queries for better performance.The query doesn't set any vectorizer properties. The search engine reads them automatically from the vector profile assigned to the field.
If the vectorizer is configured correctly, the response returns matching documents ranked by similarity. You should get three results (k: 3), the first of which is the most relevant.
{
    "@odata.count": 3,
    "value": [
        {
            "@search.score": 0.66195244,
            "chunk": "Cloud Shadow\tGermany\nIn November 2012, the Earth Observing...",
            "title": "page-25.txt"
        },
        ... // Trimmed for brevity
    ]
}
Troubleshooting
If your vectorizer isn't working as expected, start with the common errors table and then check your diagnostic logs for more detail.
Common errors
The following table lists common vectorizer errors and how to resolve them.
| Error | Cause | Resolution |
|---|---|---|
| Authentication failure (401/403) | Invalid API key or missing RBAC role assignment for the embedding model. | Verify your API key or confirm that the search service identity has the Cognitive Services OpenAI User role on the Azure OpenAI resource. |
| Dimension mismatch | The vectorizer model produces embeddings with a different dimension count than the vector field expects. | Ensure the dimensions property on the vector field matches the output dimensions of the embedding model (for example, 1536 for text-embedding-ada-002). |
| Rate limiting (429) | The embedding model provider is throttling requests. | Review Azure OpenAI quota limits and consider increasing your tokens-per-minute (TPM) allocation or reducing batch size. |
| Vectorizer not found | The vector profile references a vectorizer name that doesn't exist in the index. | Confirm that the vectorizer property in the vector profile matches the name of a vectorizer in the vectorizers array. |
| Empty results | Text-to-vector conversion succeeded but the query returns no matches. | Verify the fields parameter in the vector query matches the name of a searchable vector field. Increase k to return more results. |
Check logs
If you enabled diagnostic logging for your search service, run the following Kusto query to confirm query execution on your vector field.
OperationEvent
| where TIMESTAMP > ago(30m)
| where Name == "Query.Search" and AdditionalInfo["QueryMetadata"]["Vectors"] has "TextLength"
Best practices
Use a managed identity instead of API keys in production. Managed identities are more secure and avoid key rotation overhead. For more information, see Configure a search service to connect using a managed identity.
Deploy the embedding model in the same region as your search service. Colocation reduces latency and improves the speed of data transfer between services. Vectorizers are available in all regions where Azure AI Search is available, but model availability varies by provider.
Use separate deployments of the same embedding model for indexing and queries. Dedicated deployments let you allocate TPM quota independently for each workload and make it easier to identify traffic sources.
Monitor your Azure OpenAI TPM quota. If you're hitting your TPM limit, review the quota limits and consider requesting a higher limit through a support case.
Review best practices for the Azure OpenAI embedding skill. The same guidance applies to the Azure OpenAI vectorizer.