Note
Access to this page requires authorization. You can try signing in or changing directories.
Access to this page requires authorization. You can try changing directories.
Applies to: ✔️ Fleet Manager ✔️ Fleet Manager with hub cluster
Cross-cluster networking for Azure Kubernetes Fleet Manager provides managed Cilium multi-cluster that extends Cilium's eBPF-based networking and observability across multiple clusters.
Fleet Manager supports creation of multiple cross-cluster networking profiles with each supporting up to 255 member clusters. Clusters in a profile participate in a managed federated network with access to global services and service discovery and observability via Hubble.
Platform engineers label member clusters that should participate in a single cross-cluster network, specifying the label in a selector when defining the network profile. To allow for bulk membership management and avoid unintended interruptions, the cross-cluster network is only updated when explicitly requested by an authorized user.
This article provides instructions on how to configure a cross-cluster networking profile, add member clusters and how to expose global services.
Important
Azure Kubernetes Fleet Manager preview features are available on a self-service, opt-in basis. Previews are provided "as is" and "as available," and they're excluded from the service-level agreements and limited warranty. Azure Kubernetes Fleet Manager previews are partially covered by customer support on a best-effort basis. As such, these features aren't meant for production use.
Prerequisites and limitations
- A cross-cluster network can have up to 255 member clusters.
- Fleet Manager member clusters can only participate in a single cross-cluster network at any time.
- Clusters must run Kubernetes v1.32 or later and have Advanced Container Networking Services (ACNS) with Cilium enabled.
- Clusters must be connected to a single flat network (virtual network or multiple peered networks).
- Overlay networking with tunnels isn't currently supported.
- Self-managed Cilium multi-cluster can't be deployed at the same time.
- ACNS sets the Cilium version and enabled features which are read-only and can't be modified by users.
Before you begin
If you don't have an Azure account, create a free account before you begin.
Install the Cilium CLI so you can verify the cross-cluster network in a later step.
Set up your environment
If you're not currently using Fleet Manager and want to try out cross-cluster networking, follow the steps in this section.
If you already have a configured environment, you can skip to Create a cross-cluster network.
Set the following environment variables:
export CLUSTER_RESOURCE_GROUP=<cluster-resource-group>
export FLEET_RESOURCE_GROUP=<fleet-resource-group>
export RESOURCE_LOCATION=<azure-region-name>
export FLEET=<fleet-name>
export MEMBER_CLUSTER_1=aks-member-1
export MEMBER_CLUSTER_2=aks-member-2
export NETWORK_NAME=<network-name>
export FLEET_NETWORK_PROFILE_NAME=fccnp-demo-01
export CC_NETWORK_NAME=demo-01
Create network and subnets
Create a new Azure Virtual Network.
az network vnet create \
    --resource-group ${CLUSTER_RESOURCE_GROUP} \
    --location ${RESOURCE_LOCATION} \
    --name ${NETWORK_NAME} \
    --address-prefixes 10.0.0.0/8 \
    --output none
Then create four subnets that you can use to connect the two clusters.
# Subnets for cluster 1

SUBNET_ID_1=$(az network vnet subnet create \
    --resource-group ${CLUSTER_RESOURCE_GROUP} \
    --vnet-name ${NETWORK_NAME} \
    --name ${NETWORK_NAME}-01 \
    --address-prefixes 10.240.0.0/16 \
    --output tsv \
    --query id)

SUBNET_ID_2=$(az network vnet subnet create \
    --resource-group ${CLUSTER_RESOURCE_GROUP} \
    --vnet-name ${NETWORK_NAME} \
    --name ${NETWORK_NAME}-02 \
    --address-prefixes 10.241.0.0/16 \
    --output tsv \
    --query id)

# Subnets for cluster 2

SUBNET_ID_3=$(az network vnet subnet create \
    --resource-group ${CLUSTER_RESOURCE_GROUP} \
    --vnet-name ${NETWORK_NAME} \
    --name ${NETWORK_NAME}-03 \
    --address-prefixes 10.242.0.0/16 \
    --output tsv \
    --query id)

SUBNET_ID_4=$(az network vnet subnet create \
    --resource-group ${CLUSTER_RESOURCE_GROUP} \
    --vnet-name ${NETWORK_NAME} \
    --name ${NETWORK_NAME}-04 \
    --address-prefixes 10.243.0.0/16 \
    --output tsv \
    --query id)
Create AKS clusters
Create two AKS clusters with ACNS enabled, using a flat network such as the one you created in the previous section.
For the first cluster, select the appropriate subnets.
    CLUSTER_ID_1=$(az aks create \
        --name ${MEMBER_CLUSTER_1} \
        --resource-group ${CLUSTER_RESOURCE_GROUP} \
        --location ${RESOURCE_LOCATION} \
        --node-count 1 \
        --vnet-subnet-id ${SUBNET_ID_1} \
        --pod-subnet-id ${SUBNET_ID_2} \
        --network-plugin azure \
        --network-dataplane cilium \
        --enable-acns \
        --generate-ssh-keys \
        --output tsv \
        --query id)
Use the remaining subnets for the second cluster as shown.
CLUSTER_ID_2=$(az aks create \
    --name ${MEMBER_CLUSTER_2} \
    --resource-group ${CLUSTER_RESOURCE_GROUP} \
    --location ${RESOURCE_LOCATION} \
    --node-count 1 \
    --vnet-subnet-id ${SUBNET_ID_3} \
    --pod-subnet-id ${SUBNET_ID_4} \
    --network-plugin azure \
    --network-dataplane cilium \
    --enable-acns \
    --generate-ssh-keys \
    --output tsv \
    --query id)
Create a Fleet Manager and join clusters
In this guide, you create a new Fleet Manager. You don't need a hub cluster.
az fleet create \
    --name ${FLEET} \
    --resource-group ${FLEET_RESOURCE_GROUP} \
    --location ${RESOURCE_LOCATION}
Next, add your two clusters. Make sure you add a label that you can use to select the cluster to join the cross-cluster network.
az fleet member create \
    --fleet-name ${FLEET} \
    --resource-group ${FLEET_RESOURCE_GROUP} \
    --name mbr-${MEMBER_CLUSTER_1} \
    --member-cluster-id ${CLUSTER_ID_1} \
    --labels "network=${CC_NETWORK_NAME}"
Repeat this step for the second cluster.
az fleet member create \
    --fleet-name ${FLEET} \
    --resource-group ${FLEET_RESOURCE_GROUP} \
    --name mbr-${MEMBER_CLUSTER_2} \
    --member-cluster-id ${CLUSTER_ID_2} \
    --labels "network=${CC_NETWORK_NAME}"
You can follow the existing quickstart Create an Azure Kubernetes Fleet Manager and join member clusters using the Azure portal.
Make sure you add a label such as network=demo01 that you can use to select the cluster to join the cross-cluster network.
Create a cross-cluster network
Fleet Manager supports multiple cross-cluster networks, with each network configuration defined in a cross-cluster network profile.
Let's set up a new cross-cluster network by using the AKS clusters you provisioned.
Create a cross-cluster network profile by using the
az fleet clustermeshprofile createcommand.az fleet clustermeshprofile create \ --fleet-name ${FLEET} \ --resource-group ${FLEET_RESOURCE_GROUP} \ --name ${NETWORK_PROFILE_NAME} \ --member-selector "network=${CC_NETWORK_NAME}"The profile defines the labels that pick the member clusters to join the network, but it doesn't apply any configuration to clusters until you apply it.
Validate which clusters are included in the cross-cluster network by using the
az fleet clustermeshprofile applycommand with thewhat-ifparameter.az fleet clustermeshprofile apply \ --what-if \ --fleet-name ${FLEET} \ --resource-group ${GROUP} \ --name ${NETWORK_PROFILE_NAME} \ --output tableAs you're creating a new cross-cluster network, both clusters have an
Addaction.Action ClusterResourceId ETag MeshMembershipState Name -------- ---------------------------------- ---------- --------------------- ---------------- Add /subscription/…/…/mbr-aks-member-1 "fd009cd9" - mbr-aks-member-1 Add /subscription/…/…/mbr-aks-member-2 "a400f86e" - mbr-aks-member-2Create the network by applying the cross-cluster networking changes by using the
az fleet clustermeshprofile applycommand without thewhat-ifparameter.az fleet clustermeshprofile apply \ --fleet-name ${FLEET} \ --resource-group ${GROUP} \ --name ${NETWORK_PROFILE_NAME}The cross-cluster network creation starts with the Cilium components being configured on the selected member clusters. The creation process is asynchronous, and the overall duration depends on the number of clusters being joined.
Monitor the status of the overall cross-cluster network provisioning as follows.
az fleet clustermeshprofile show \
    --fleet-name ${FLEET} \
    --resource-group ${GROUP} \
    --name ${NETWORK_PROFILE_NAME} \
    --query "properties.status.state" \
    -o tsv
The output should look similar to the following.
Result
--------
Applying
The apply operation runs to completion and can't be interrupted. While it's running, you can monitor the network status of each member.
az fleet clustermeshprofile list-members \
    --fleet-name ${FLEET} \
    --resource-group ${GROUP} \
    --name ${NETWORK_PROFILE_NAME} \
    --query "[].{name: name, state: meshProperties.status.state}" \
    -o table
The output should look similar to the following.
Name              State
----------------  ----------
mbr-aks-member-1  Connecting
mbr-aks-member-2  Connecting
In the Azure portal, go to your Azure Kubernetes Fleet Manager.
From the service menu, under Settings, select Cross-cluster networking > + Create.
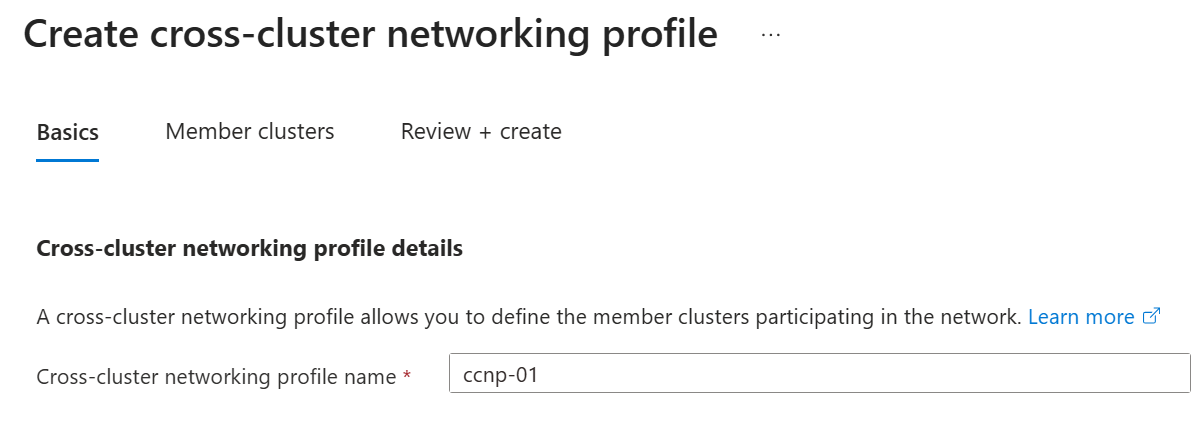
Enter a name for the cross-cluster networking profile.
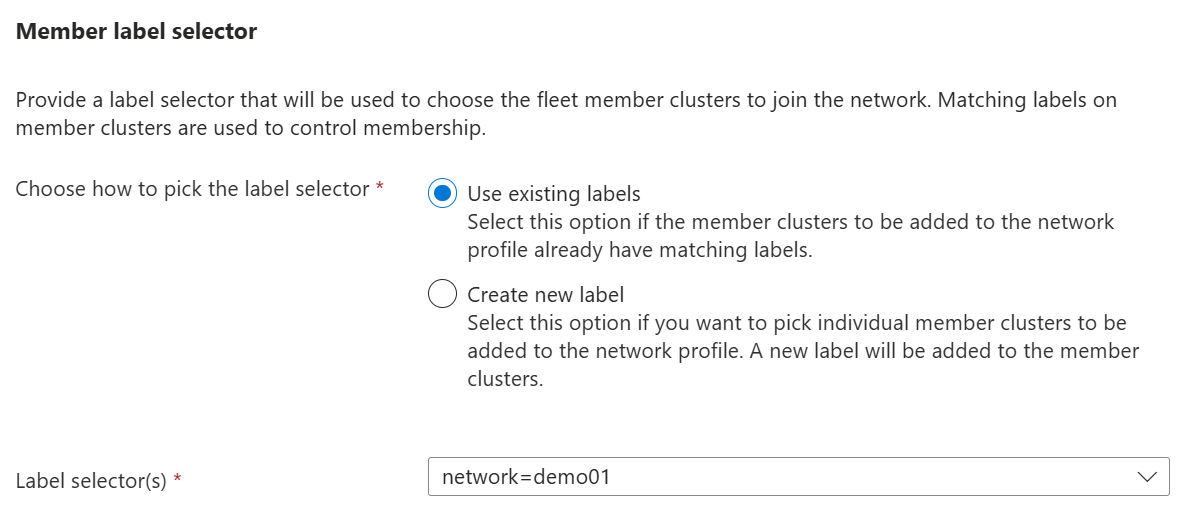
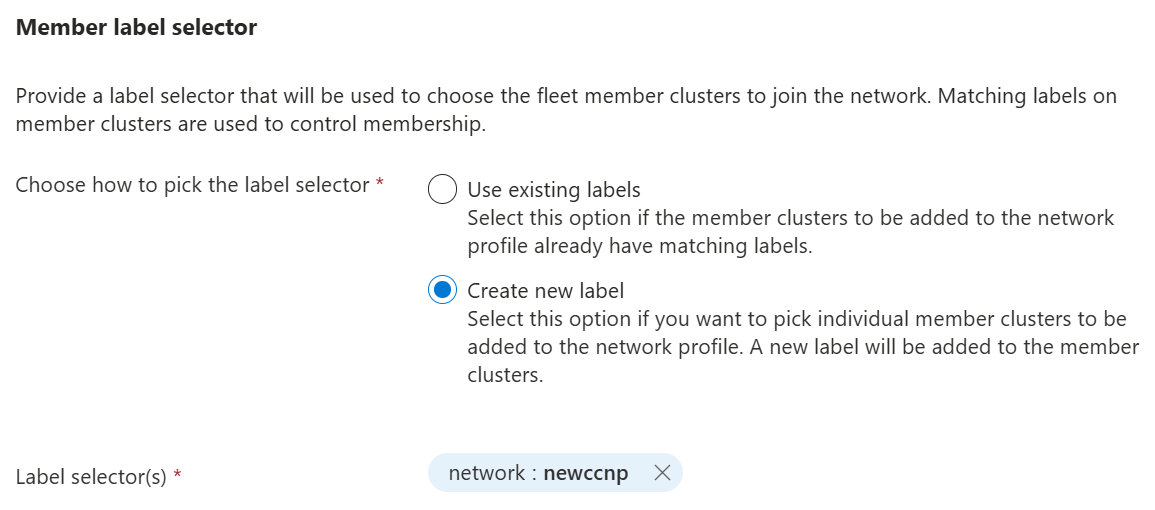
Select one of the following options for the Member label selector, then select Next.
- Choose how to pick the label selector: Use existing member cluster labels. Select one or more existing labels from the Label selector(s) dropdown.
- Create new label: Define a new label that you apply to member clusters you select. Create the label by selecting + Create new label and completing the form.
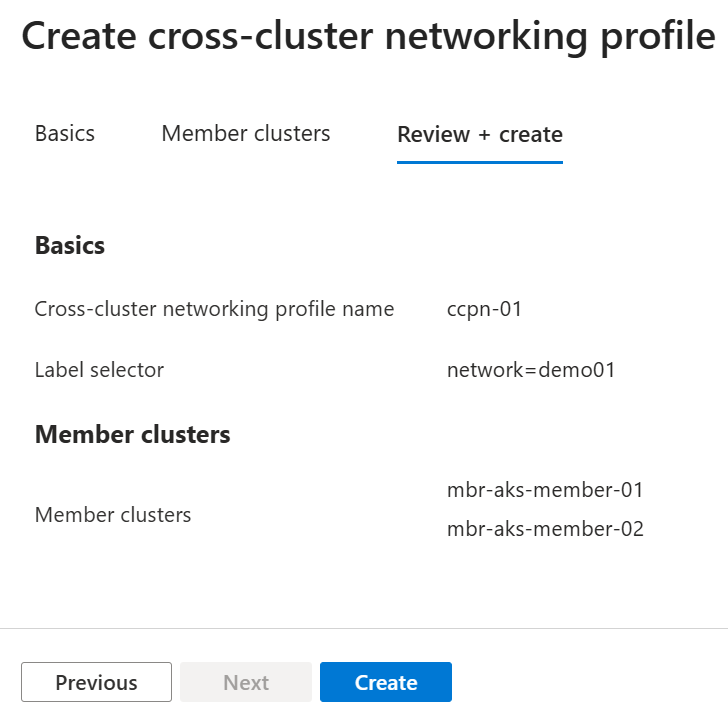
Validate which clusters will be included in the cross-cluster network. Select Next or Review.
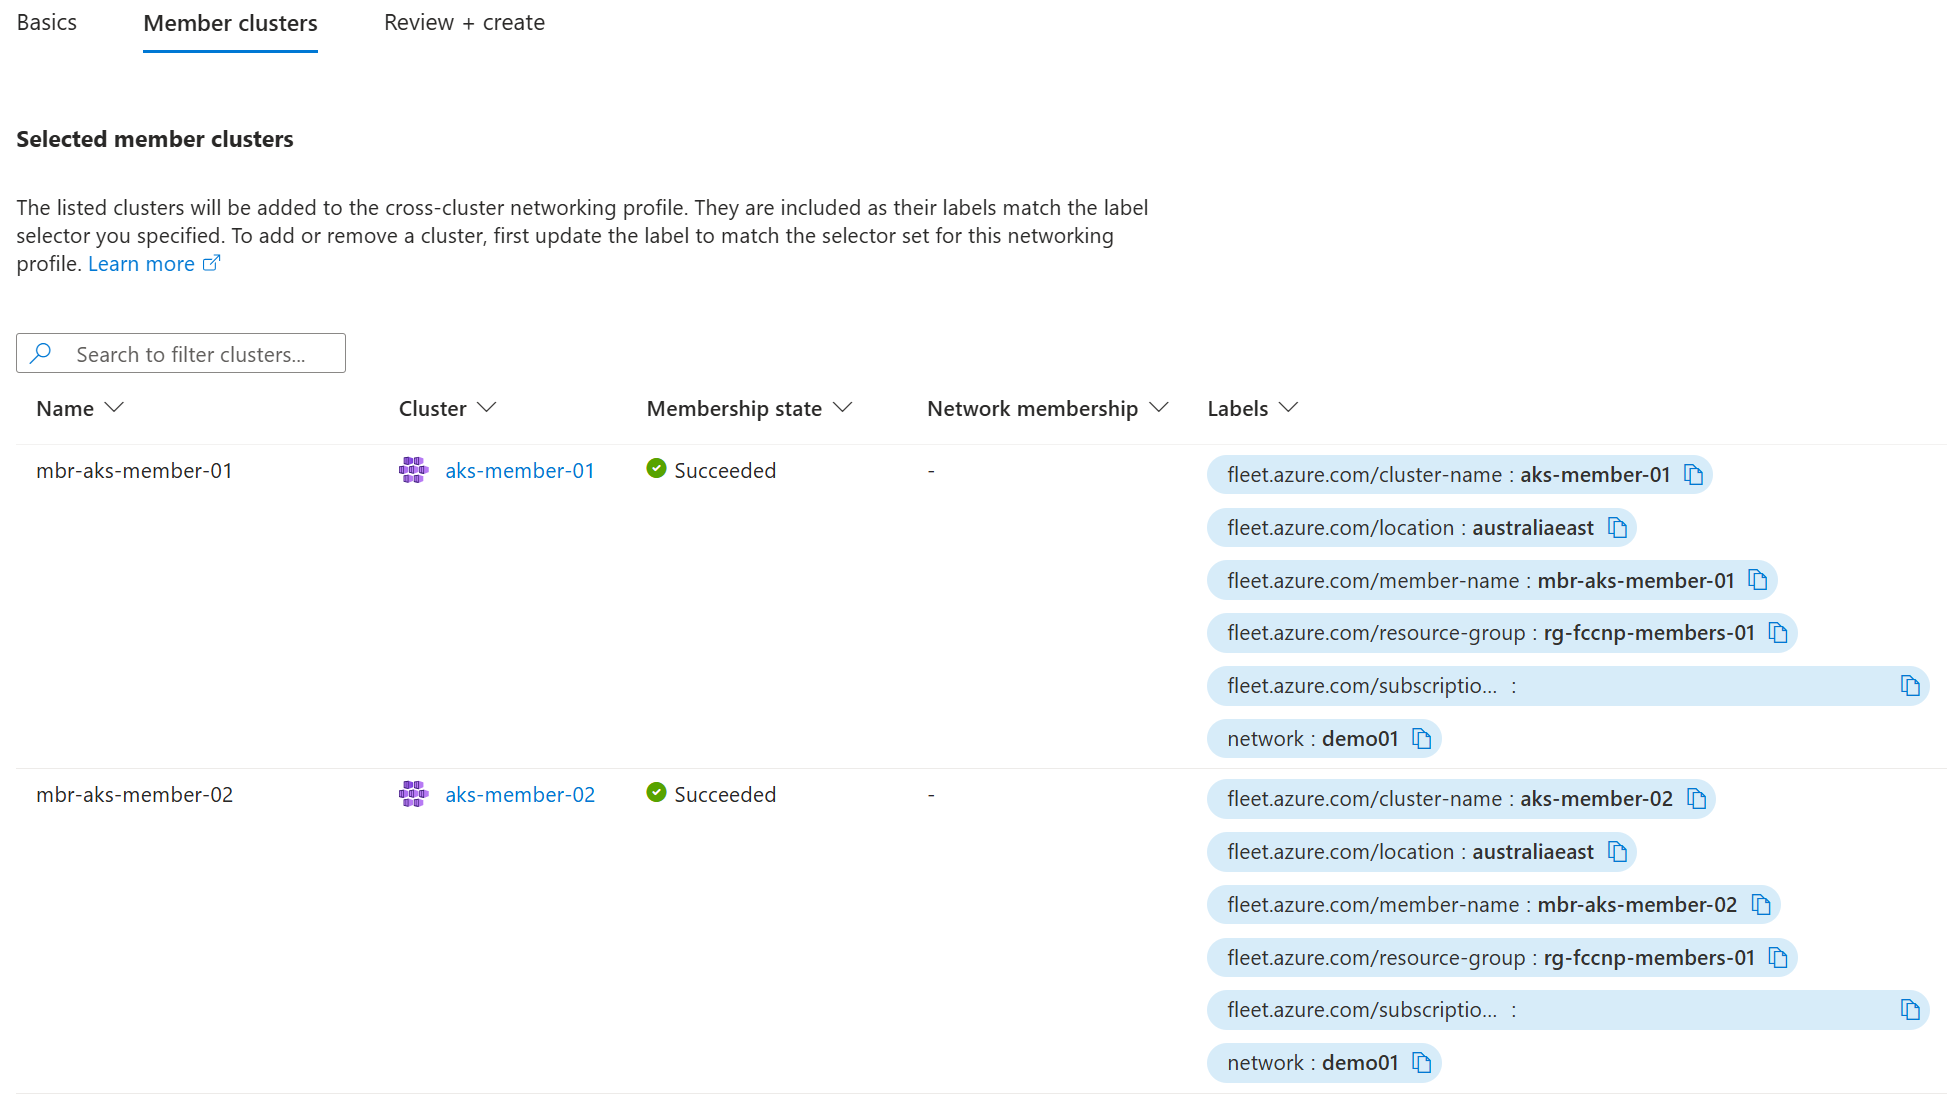
If any clusters are missing, ensure they are labelled to match the cross-cluster network profile's label selector.
Review the proposed cross-cluster network and select Create to start the creation process.
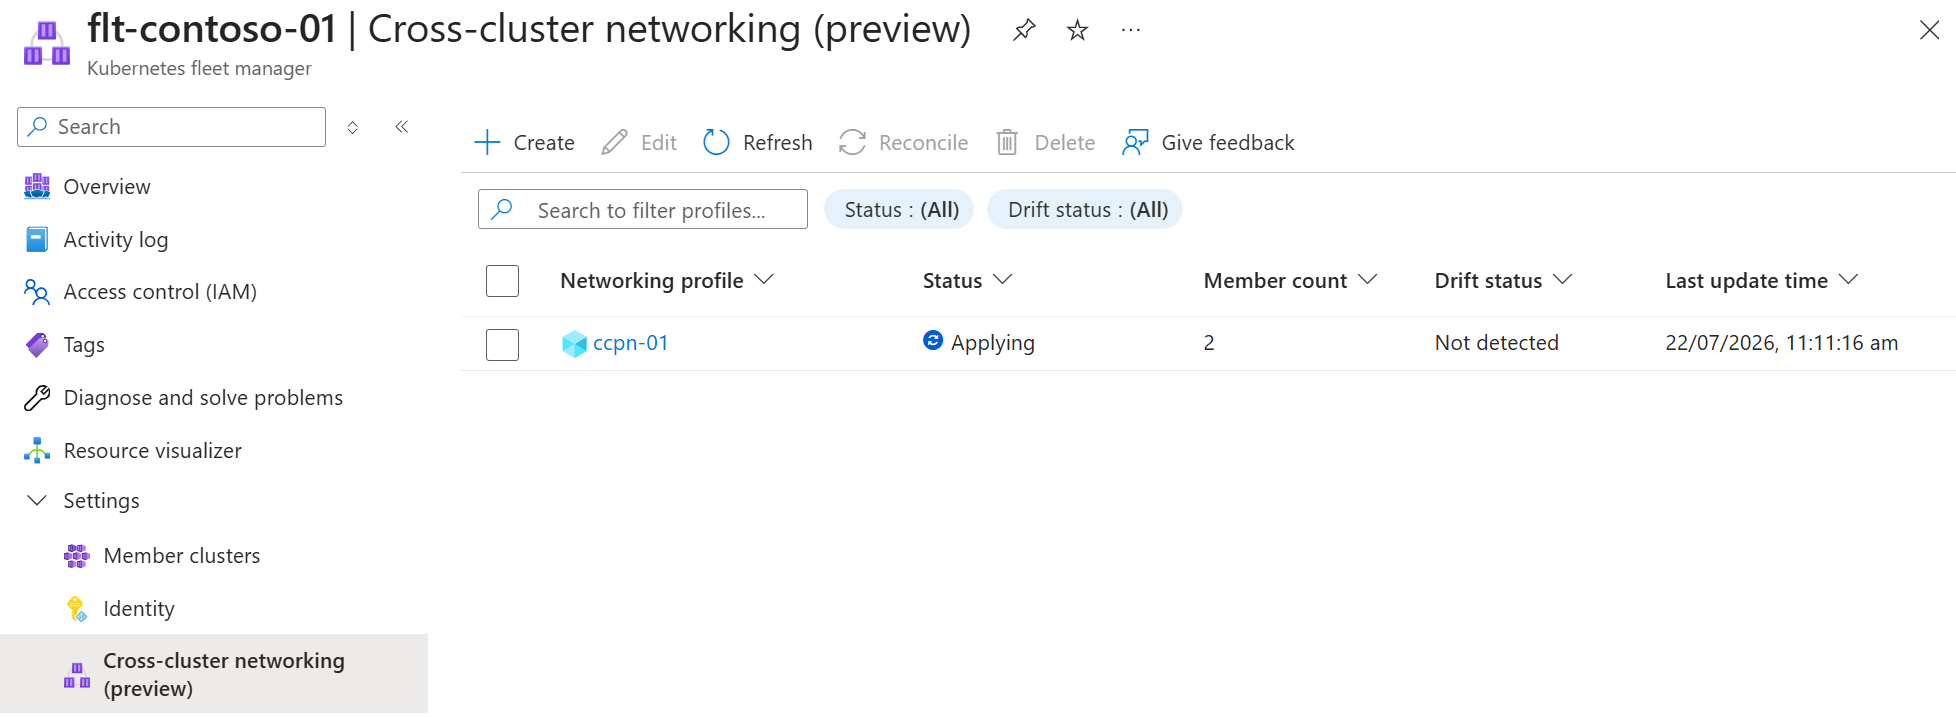
The cross-cluster networking list is displayed, with the new network showing the status Applying.
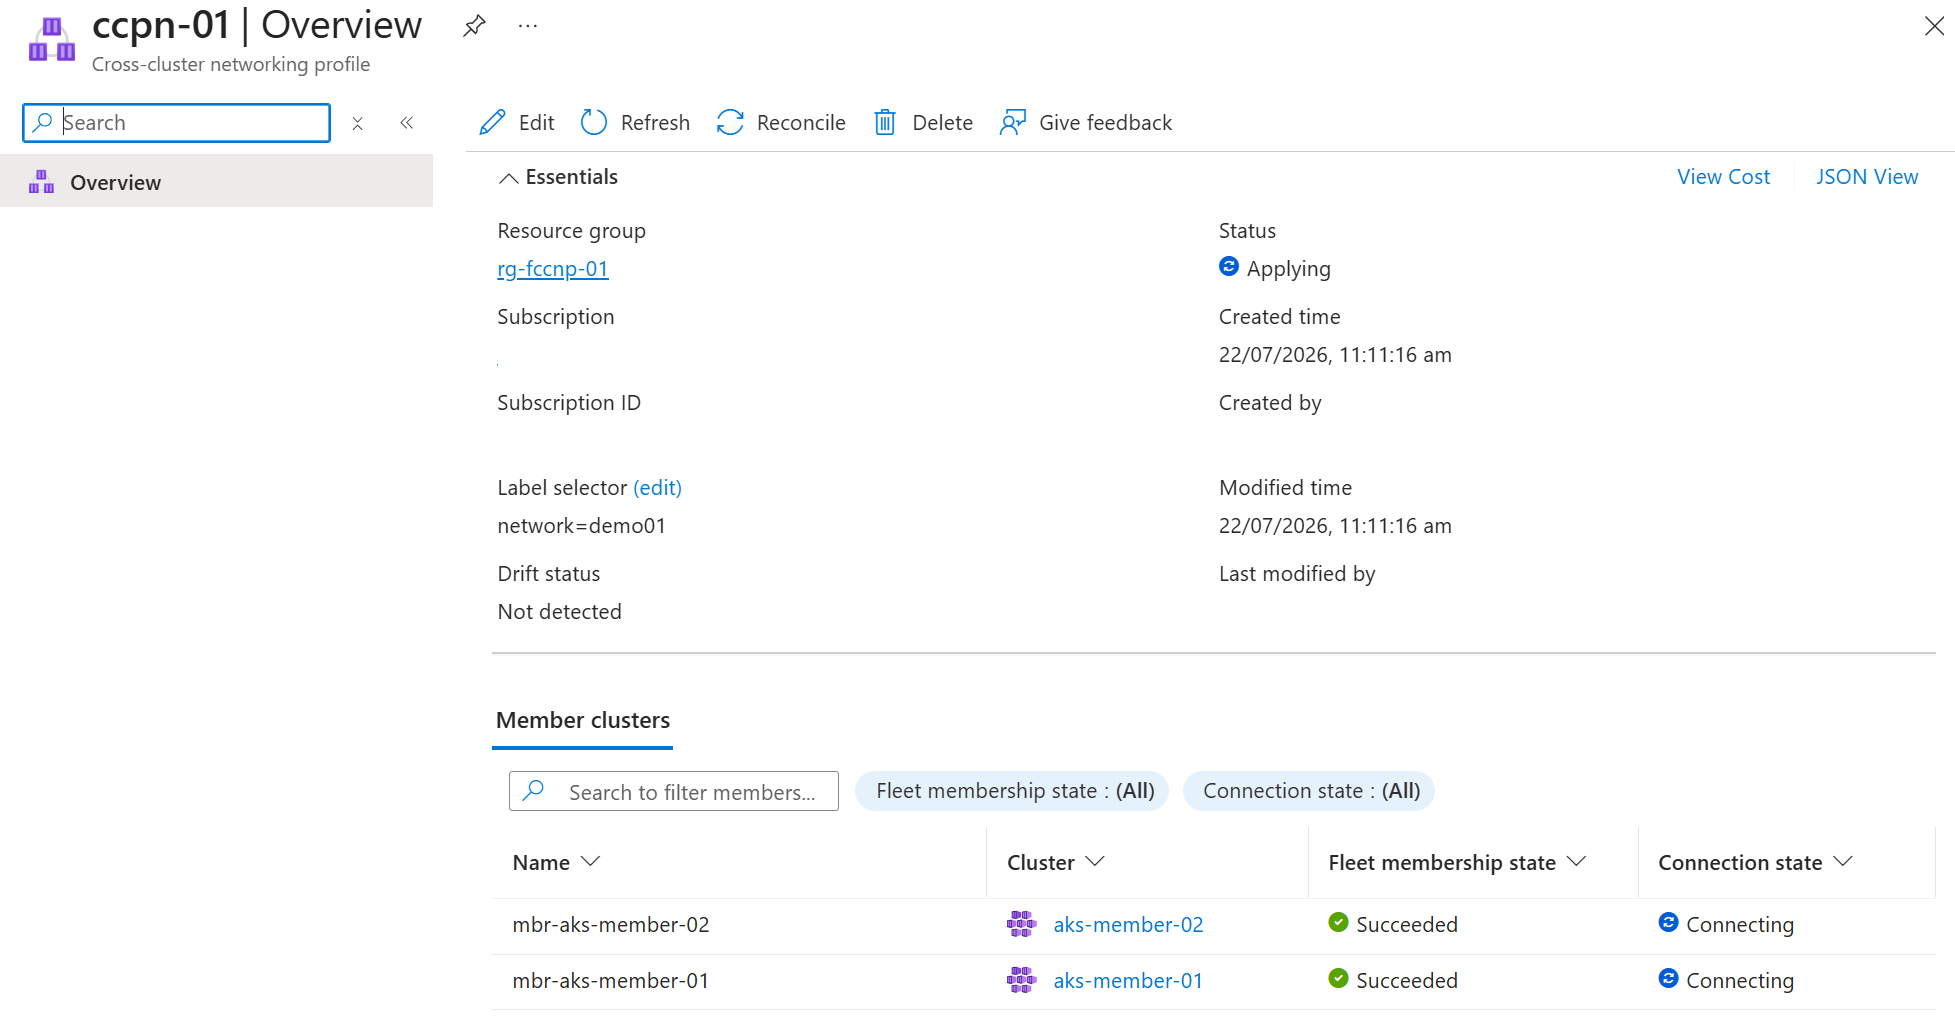
Open the cross-cluster networking profile to view the details for each member cluster.
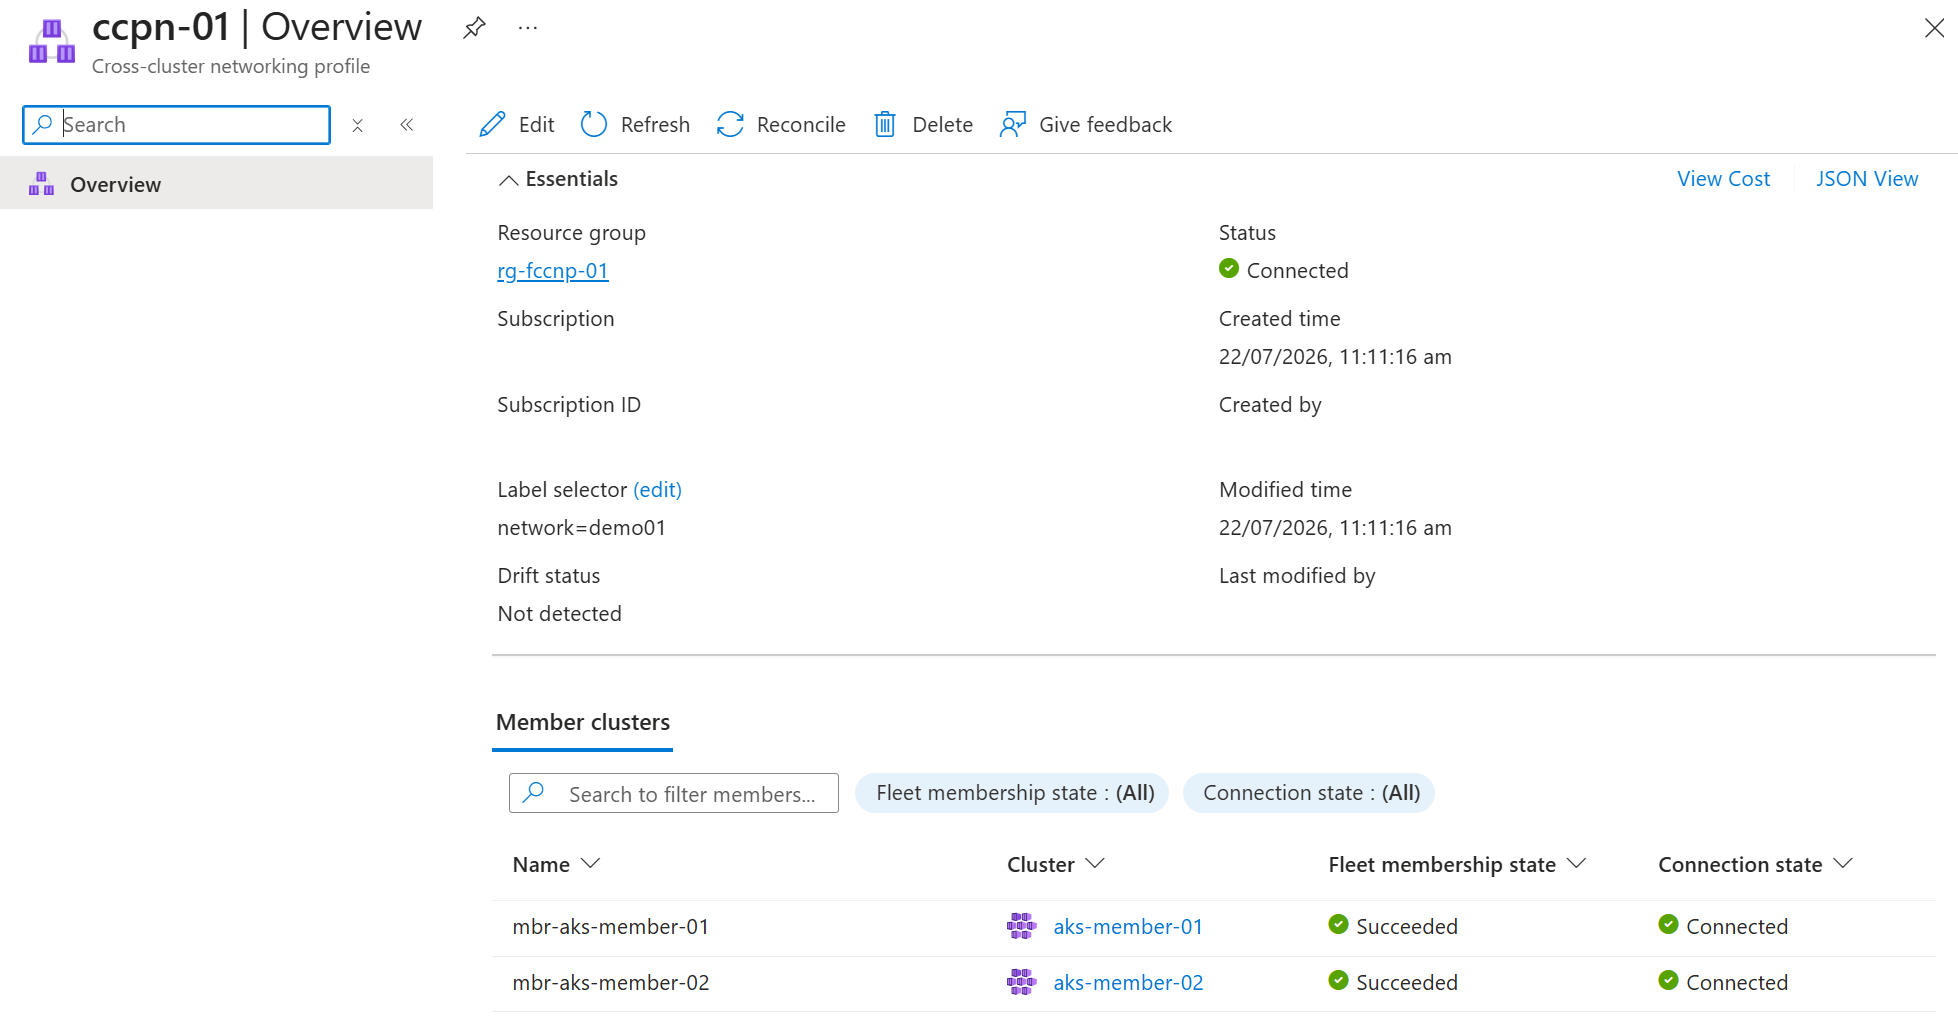
When the cross-cluster network is created, both the network and members show as Connected.
Note
Cluster connection attempts time out after 15 minutes. After this timeout, the connection state shows as Failed. See the Troubleshooting section for tips to identify the cause and resolve.
Confirm cross-cluster network connection
When the member cluster states show as Connected, the cross-cluster network is established.
Get the Kubernetes access credentials for both member clusters by using
az aks get-credentialsand setcontextappropriately.az aks get-credentials \ --resource-group ${GROUP} \ --name ${MEMBER_CLUSTER_1} \ --context cluster1az aks get-credentials \ --resource-group ${GROUP} \ --name ${MEMBER_CLUSTER_2} \ --context cluster2Use the Cilium CLI status command to see that all member clusters are connected:
cilium clustermesh status --context cluster1✅ Service "clustermesh-apiserver" of type "LoadBalancer" found ✅ Cluster access information is available: - 10.240.0.5:2379 ✅ Deployment clustermesh-apiserver is ready ℹ️ KVStoreMesh is enabled ✅ All 1 nodes are connected to all clusters [min:1 / avg:1.0 / max:1] ✅ All 1 KVStoreMesh replicas are connected to all clusters [min:1 / avg:1.0 / max:1] 🔌 Cluster Connections: - mbr-aks-member-021: 1/1 configured, 1/1 connected - KVStoreMesh: 1/1 configured, 1/1 connectedNote
Fleet Manager cross-cluster networking appends the Cilium cluster ID to the Fleet Manager member cluster name when registering it with the network. This registration adds a number to the peer in
Cluster Connections. For example, the peer appears as<fleet-member-name>followed by a number, such asmbr-aks-member-22.
Setup and test global services
After you create the cross-cluster network, test load balancing by following the official Cilium multi-cluster example or using the steps shown next. The steps in this article provide extra guidance on working with AKS clusters and Fleet Manager.
Note
Fleet Manager's cross-cluster networking sets Cilium's clustermesh-default-global-namespace to false, which differs from the Cilium default. You must set the annotation to true on a namespace to use it with cross-cluster service sharing.
On
mbr-aks-member-1create a dedicated namespace and annotate it so Services within it are eligible to be shared across the cross-cluster network. Then apply theDeploymentandServiceresources using thecluster1.yamlmanifest.kubectl --context=cluster1 create namespace rebel-base-demo kubectl --context=cluster1 annotate namespace rebel-base-demo clustermesh.cilium.io/global="true" --overwrite kubectl --context=cluster1 -n rebel-base-demo apply -f https://raw.githubusercontent.com/cilium/cilium/refs/heads/main/examples/kubernetes/clustermesh/cluster1.yaml kubectl --context=cluster1 -n rebel-base-demo apply -f https://raw.githubusercontent.com/cilium/cilium/refs/heads/main/examples/kubernetes/clustermesh/global-service-example.yamlNote
The example Cilium manifests use container images from public registries (
docker.ioandquay.io). If your environment uses Azure Policy or similar admission controls to restrict container image sources, the example Deployments might generate policy warnings or be blocked. In that case, mirror the images to a registry that is allowed by your policy and update the manifests accordingly.On
mbr-aks-member-2apply the equivalent, but this time use thecluster2.yamlmanifest.kubectl --context=cluster2 create namespace rebel-base-demo kubectl --context=cluster2 annotate namespace rebel-base-demo clustermesh.cilium.io/global="true" --overwrite kubectl --context=cluster2 -n rebel-base-demo apply -f https://raw.githubusercontent.com/cilium/cilium/refs/heads/main/examples/kubernetes/clustermesh/cluster2.yaml kubectl --context=cluster2 -n rebel-base-demo apply -f https://raw.githubusercontent.com/cilium/cilium/refs/heads/main/examples/kubernetes/clustermesh/global-service-example.yamlRun the following command multiple times on each cluster. Observe the serving cluster changes, demonstrating the request is being served by multiple clusters despite calling the service on only one.
kubectl --context=cluster1 -n rebel-base-demo exec -ti deployment/x-wing -- curl rebel-base{"Galaxy": "Alderaan", "Cluster": "Cluster-1"} {"Galaxy": "Alderaan", "Cluster": "Cluster-1"} {"Galaxy": "Alderaan", "Cluster": "Cluster-2"}Set the
clustermesh.cilium.io/globalannotation on therebel-base-demoNamespace onmbr-aks-member-1(cluster 1) to"false"so Services in that Namespace are no longer shared across the cross-cluster network from cluster 1.kubectl --context=cluster1 annotate namespace rebel-base-demo clustermesh.cilium.io/global="false" --overwriteNote
After changing the Namespace-level
clustermesh.cilium.io/globalannotation, reconciling each Service within that Namespace is necessary to put the new configuration into effect (e.g. withkubectl --context=cluster1 -n rebel-base-demo apply -f <service-manifest>.yaml). The per-Serviceservice.cilium.io/globalannotation, by contrast, takes effect on both clusters within a few seconds.Let's validate
mbr-aks-member-1(cluster 1) can reach therebel-baseService on cluster 1, andmbr-aks-member-2(cluster 2) can't.kubectl --context=cluster1 -n rebel-base-demo exec -ti deployment/x-wing -- curl rebel-baseOn cluster 1, we only see local responses because the Namespace is no longer global and remote endpoints aren't imported.
{"Galaxy": "Alderaan", "Cluster": "Cluster-1"}
{"Galaxy": "Alderaan", "Cluster": "Cluster-1"}
{"Galaxy": "Alderaan", "Cluster": "Cluster-1"}
Repeat the command on cluster 2.
kubectl --context=cluster2 -n rebel-base-demo exec -ti deployment/x-wing -- curl rebel-baseOn cluster 2, we only see local responses because the Service on cluster 1 is no longer shared.
{"Galaxy": "Alderaan", "Cluster": "Cluster-2"}
{"Galaxy": "Alderaan", "Cluster": "Cluster-2"}
{"Galaxy": "Alderaan", "Cluster": "Cluster-2"}
Updating a cross-cluster network
The process of adding or removing clusters from a cross-cluster network follows this process.
Modify the labels on the clusters to be added or removed.
az fleet member update \
    --fleet-name ${FLEET} \
    --resource-group ${GROUP} \
    --name ${MEMBER_CLUSTER_1} \
    --labels "network=none"
Review cross-cluster networking changes with the
az fleet clustermeshprofile applycommand by using thewhat-ifparameter.az fleet clustermeshprofile apply \ --what-if \ --fleet-name ${FLEET} \ --resource-group ${GROUP} \ --name ${NETWORK_PROFILE_NAME} \ --output tableAs you're creating a new cross-cluster network, both clusters have an
Addaction.Action ClusterResourceId ETag MeshMembershipState Name -------- ---------------------------------- ---------- --------------------- ---------------- Remove /subscription/…/…/mbr-aks-member-1 "fd009cd9" - mbr-aks-member-1 - /subscription/…/…/mbr-aks-member-2 "a400f86e" - mbr-aks-member-2Reviewing the changes is optional, but recommended, especially for larger cross-cluster networks where any change can take some time to complete.
Once satisfied with the changes, apply to the network by running the same command, omitting the
what-ifparameter.az fleet clustermeshprofile apply \ --fleet-name ${FLEET} \ --resource-group ${GROUP} \ --name ${NETWORK_PROFILE_NAME} \ --output table
From the service menu, under Settings, select Member clusters.
Use the Member clusters list to modify the labels on clusters to be added or removed from the cross-cluster network.
From the service menu, under Settings, select Cross-cluster networking. The cross-cluster network Drift status shows
Detected.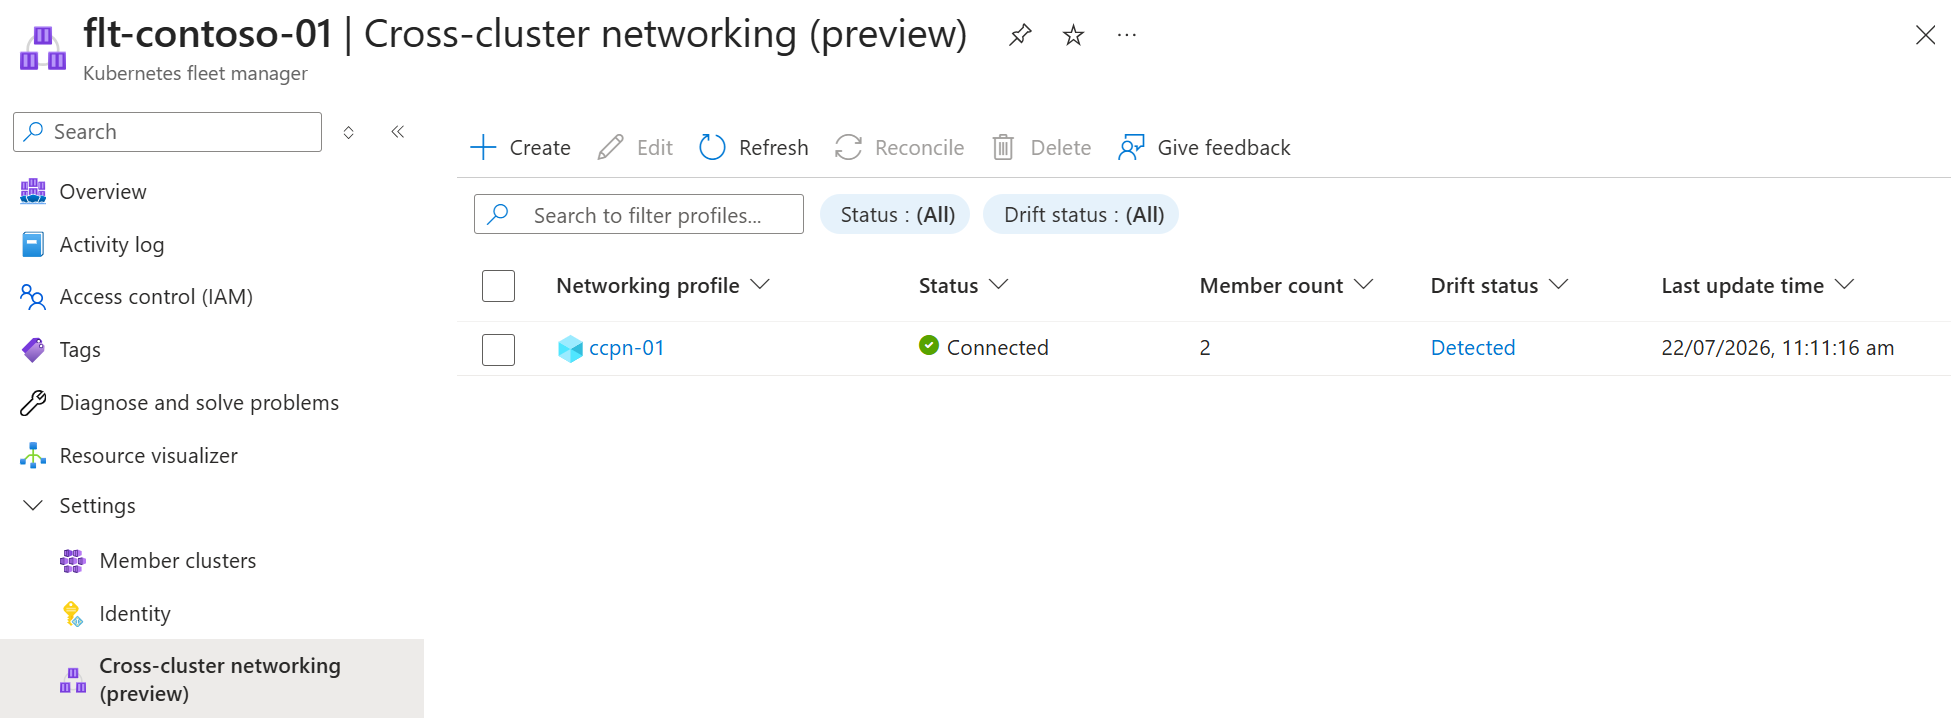
Select the
Detecteddrift status which opens the Reconcile dialog.
Review the proposed changes, selecting Apply to proceed.

Delete a cross-cluster network
To delete a cross-cluster network, first remove the members from the cross-cluster network by removing the labels used in the cross-cluster network profile.
Important
To prevent unexpected outages, you can't delete a cross-cluster network when it still contains member clusters. Additionally, you can't remove member clusters joined to a cross-cluster network from a Fleet Manager.
Change the cross-cluster network profile's member selector to a value that no member cluster has, then apply the change so all members are disconnected from the cross-cluster network.
az fleet clustermeshprofile create \
    --fleet-name ${FLEET} \
    --resource-group ${FLEET_RESOURCE_GROUP} \
    --name ${NETWORK_PROFILE_NAME} \
    --member-selector "network=none"

az fleet clustermeshprofile apply \
    --fleet-name ${FLEET} \
    --resource-group ${FLEET_RESOURCE_GROUP} \
    --name ${NETWORK_PROFILE_NAME}
Confirm the profile reports no members before continuing.
az fleet clustermeshprofile list-members \ --fleet-name ${FLEET} \ --resource-group ${FLEET_RESOURCE_GROUP} \ --name ${NETWORK_PROFILE_NAME}[]Delete the cross-cluster network profile.
az fleet clustermeshprofile delete \
    --fleet-name ${FLEET} \
    --resource-group ${FLEET_RESOURCE_GROUP} \
    --name ${NETWORK_PROFILE_NAME} \
    --yes
Delete the member clusters from the fleet resource (or delete the fleet resource entirely with
az fleet delete) and, when no longer needed, delete the AKS clusters and resource group.
In the Azure portal, go to your Azure Kubernetes Fleet Manager.
From the service menu, under Settings, select Member clusters.
Select the desired cluster in the list, select Edit labels.
In the Edit labels dialog, delete the label used for the cross-cluster network and choose Apply. Repeat for each cluster.
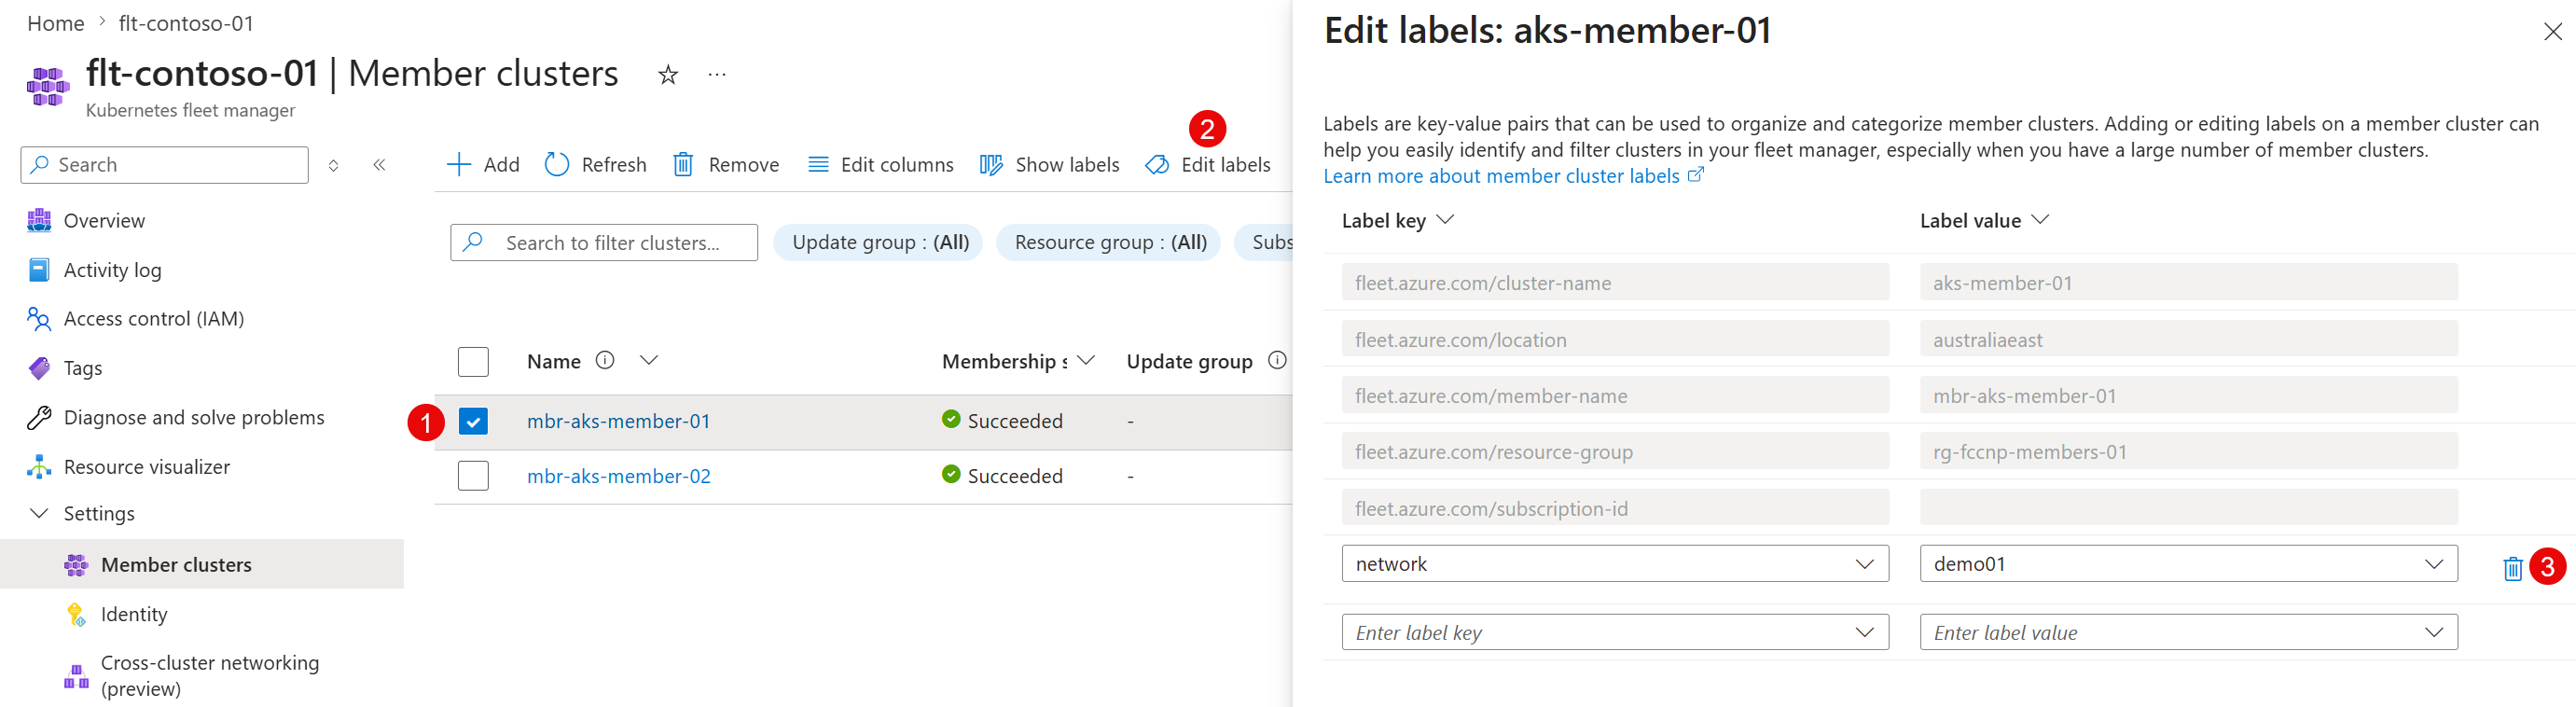
From the service menu, under Settings, select Cross-cluster networking.
Select the desired cross-cluster networking profile in the list, and then select Reconcile.
In the Reconcile dialog, review the member cluster list and check that all clusters have Remove as their Action. Select Apply.
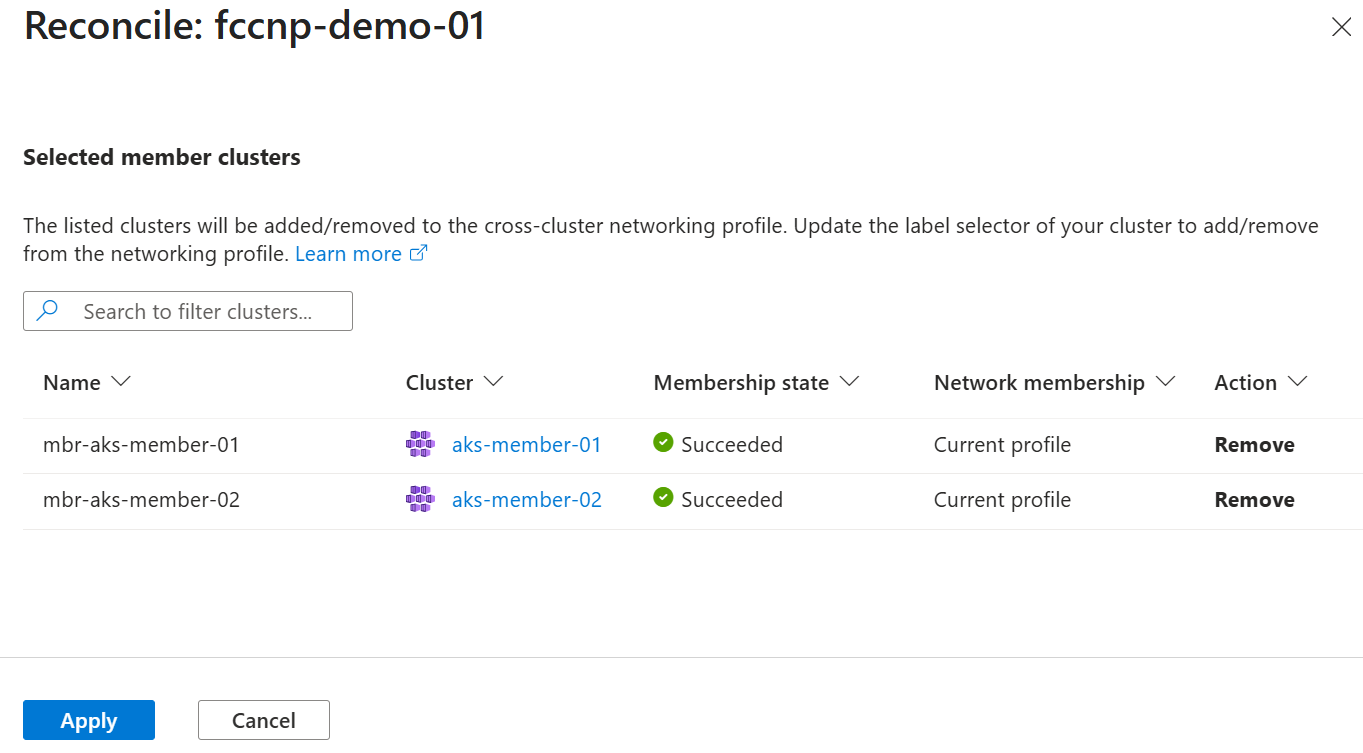
The cross-cluster networking profile status changes to Applying. Once reconciliation completes, the network shows status Not connected.
Select the networking profile, and then select Delete.
In the Delete cross-cluster networking profile dialog, validate the profile is the correct one, then select Delete.
Troubleshooting
When members fail to connect, the clustermesh-apiserver LoadBalancer Service on the cluster has no external IP.
Check the clustermesh-apiserver Service on each affected member cluster:
kubectl --context=cluster1 -n kube-system get svc clustermesh-apiserver
If EXTERNAL-IP shows as <pending>, the Service isn't assigned an internal load balancer IP.
NAME                    TYPE           CLUSTER-IP     EXTERNAL-IP   PORT(S)          AGE
clustermesh-apiserver   LoadBalancer   10.0.221.162   <pending>     2379:31640/TCP   31s
Inspect the Service events to identify the underlying cause:
kubectl --context=cluster1 -n kube-system describe svc clustermesh-apiserver
A common cause is an AuthorizationFailed (HTTP 403) error, which indicates that the AKS cluster identity doesn't have permission to manage the subnet the cluster connects to.
Events:
  Type     Reason                  Age   From                Message
  ----     ------                  ----  ----                -------
  Normal   EnsuringLoadBalancer    6s    service-controller  Ensuring load balancer
  Warning  SyncLoadBalancerFailed  6s    service-controller  Error syncing load balancer: failed to ensure load balancer: ...
                                                             RESPONSE 403: 403 Forbidden
                                                             ERROR CODE: AuthorizationFailed
                                                             {
                                                               "error": {
                                                                 "code": "AuthorizationFailed",
                                                                 "message": "The client '...' with object id '...' does not have authorization to perform action 'Microsoft.Network/virtualNetworks/subnets/read' over scope '/subscriptions/.../virtualNetworks/<vnet>/subnets/<subnet>' or the scope is invalid..."
                                                               }
                                                             }
Without this permission, the AKS load balancer controller can't assign an internal IP to the clustermesh-apiserver Service, and the cross-cluster network can't complete the connection.
The AKS cluster identity normally receives a Network Contributor role assignment on the virtual network or subnet when the cluster is created, but in some configurations this assignment isn't created. Manually grant the AKS cluster identity the Network Contributor role on the virtual network for every affected member cluster, then force a reconcile on the cluster using the az aks update command so the new role takes effect.
AKS_IDENTITY=$(az aks show --resource-group ${GROUP} --name ${MEMBER_CLUSTER_1} --query "identity.principalId" -o tsv)
VNET_ID=$(az network vnet show --resource-group ${GROUP} --name <vnet-name> --query id -o tsv)

az role assignment create \
    --assignee-object-id ${AKS_IDENTITY} \
    --assignee-principal-type ServicePrincipal \
    --role "Network Contributor" \
    --scope ${VNET_ID}

az aks update --resource-group ${GROUP} --name ${MEMBER_CLUSTER_1}
Once the cluster is updated with the role assignment, run az fleet clustermeshprofile apply again.
Note
During preview, the status of a cross-cluster network profile might continue to show as Failed even when member clusters show as Connected.