Note
Access to this page requires authorization. You can try signing in or changing directories.
Access to this page requires authorization. You can try changing directories.
Azure CycleCloud is a free application that provides a simple, secure, and scalable way to manage compute and storage resources for HPC and Big Compute workloads. In this quickstart, you install CycleCloud on Azure resources using the Marketplace image.
The CycleCloud Marketplace image is the easiest and recommended way to install CycleCloud. It helps you quickly start and scale clusters. You can also install CycleCloud manually, which gives you greater control over the installation and configuration process. For more information, see the Manual CycleCloud Installation Quickstart.
Prerequisites
For this quickstart, you need:
- An Azure account with an active subscription.
- An SSH key
Open Azure Cloud Shell
Azure Cloud Shell is a free, interactive shell that you can use to run the steps in this article. Common Azure tools are preinstalled and configured in Cloud Shell for you to use with your account. Just select the Copy button to copy the code, paste it in Cloud Shell, and then press Enter to run it. There are a few ways to open Cloud Shell:
| Select the green Try It button in the upper-right corner of a code block. |  |
|---|---|
| Open Cloud Shell in your browser. | Launch Cloud Shell |
| Select the Cloud Shell button on the menu in the upper-right corner of the Azure portal. |  |
SSH keypair
You need an SSH key to sign in to the CycleCloud VM and clusters. Generate an SSH keypair with the following code:
ssh-keygen -f ~/.ssh/id_rsa -m pem -t rsa -N "" -b 4096
Get the SSH public key with:
cat ~/.ssh/id_rsa.pub
The output starts with ssh-rsa and is followed by a long string of characters. Copy and save this key for reference.
On Linux, follow these instructions on GitHub to generate a new SSH keypair.
Create virtual machine
- Sign in to the Azure portal.
- In the search bar, enter "CycleCloud" and select "Azure CycleCloud" from under the Marketplace category.
- Select Create to open the form for creating a virtual machine.

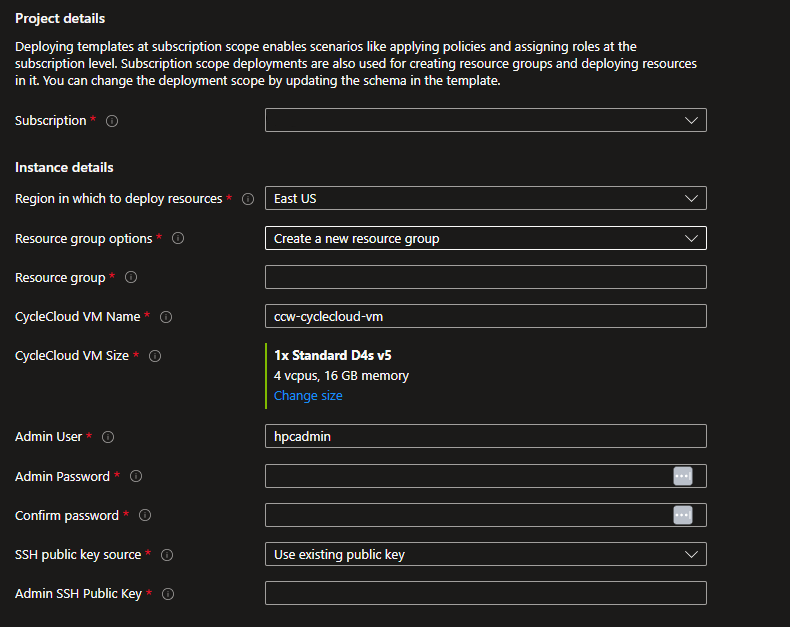
Customize CycleCloud instance
- Choose your subscription from the Subscription dropdown.
- Select or create a new Resource Group for your CycleCloud instance.
- Enter a name for your CycleCloud instance using Virtual Machine name.
- Select the Region.
- Create the Username to sign in to the instance.
- Add your SSH public key.
- Select the Management tab and enable System assigned managed identity if you plan to use Managed Identities (recommended).
- Select Review and then Create.
The image has many recommended default settings, including Size and built-in Network Security Groups. You can modify these settings if necessary.
Assign managed identity
If you use Managed Identities for authentication, follow the Managed Identities Guide to assign the system assigned or user defined managed identity to the new application VM.
Log into the CycleCloud application server
To connect to the CycleCloud webserver, get the public IP address of the CycleServer VM from the Azure portal.

Browse to https://<public IP>/. The installation uses a self-signed SSL certificate, which might cause a warning in your browser.
Create a Site Name for your installation. You can use any name you want:


The Azure CycleCloud End User License Agreement is displayed - accept it.


Create a CycleCloud admin user for the application server. Use the same username you entered earlier, if possible. Make sure the password meets the listed requirements. Select Done to continue.


After you create your user, set your SSH key so you can more easily access any Linux VMs that CycleCloud creates. To add an SSH key, edit your profile by selecting your name in the upper right corner of the screen.
You now have a running CycleCloud application that lets you create and run clusters.
Note
You can customize the default CycleCloud configuration for specific environments by using settings in the $CS_HOME/config/cycle_server.properties file.