Note
Access to this page requires authorization. You can try signing in or changing directories.
Access to this page requires authorization. You can try changing directories.
This article describes how to back up an Azure Database for PostgreSQL server using Azure portal. You can also configure backup using Azure PowerShell, Azure CLI, and REST API for PostgreSQL databases.
Before you begin, review the supported configurations, feature considerations, and known limitations, along with frequently asked questions.
Configure a backup on PostgreSQL databases
You can configure a backup on multiple PostgreSQL databases across multiple Azure Database for PostgreSQL servers. To configure this kind of backup by using Azure Backup, follow these steps:
Go to Backup vault, select a vault, and then select Backup.

Alternatively, you can go to this page from the Backup center.
On the Basics tab, enter the required information.

On the Backup policy tab, select or create a policy that defines the backup schedule and the retention duration.

On the Datasources tab, select Add/Edit.

On the Select resources to backup pane, choose one of the Azure Database for PostgreSQL servers across subscriptions if they're in the same region as that of the vault. Select the arrow to show the list of databases within a server.

Note
You don't need to back up the databases azure_maintenance and azure_sys. Additionally, you can't back up a database that's already backed up to a Backup vault.
You can back up private endpoint-enabled Azure Database for PostgreSQL servers by allowing trusted Microsoft services in the network settings.
Select Assign key vault to select a key vault that stores the credentials for connecting to the selected database. You should have already created the relevant secrets in the key vault.
To assign the key vault at the individual row level, click Select a key vault and secret. You can also assign the key vault by selecting multiple rows and then selecting Assign key vault on the action menu.

To specify the secret information, use one of the following options:
Enter secret URI: Use this option if the secret URI is shared or known to you. You can get the secret URI from the key vault by selecting a secret and then copying the Secret Identifier value.

However, with this option, Azure Backup has no visibility into the key vault that you referenced. Access permissions on the key vault can't be granted inline. For the backup operation to succeed, the backup admin, along with the PostgreSQL and/or key vault admin, needs to ensure that the Backup vault's access on the key vault is granted manually outside the configure backup flow.
Select from key vault: Use this option if you know the key vault and secret names. Then click Select a key vault and secret and enter the details.


With this option, you (as a backup admin with write access on the key vault) can grant the access permissions on the key vault inline. The key vault and the secret could preexist or be created on the go.
Ensure that the secret is the Azure Database for PostgreSQL server's connection string in ADO.NET format. The string must be updated with the credentials of the database user who has backup privileges on the server. Learn more about how to create secrets in the key vault.
After you finish updating the information for the key vault and the secret, the validation starts.
The Azure Backup service validates that it has all the necessary access permissions to read secret details from the key vault and connect to the database. During this process, the status of the chosen data sources on the Configure Backup pane appears as Validating.

If one or more access permissions are missing, the service displays one of the following error messages:
User cannot assign roles: This message appears when you (as the backup admin) don't have the write access on the Azure Database for PostgreSQL server and/or key vault to assign missing permissions as listed under View details.
Download the assignment template by selecting the Download role assignment template button on the action menu, and then have the PostgreSQL and/or key vault admin run it. It's an Azure Resource Manager template that helps you assign the necessary permissions on the required resources.

After the template is run successfully, select Re-validate on the Configure Backup pane.
Role assignment not done: This message appears when you (as the backup admin) have write access on the Azure Database for PostgreSQL server and/or key vault to assign missing permissions as listed under View details. Use the Assign missing roles button on the action menu to grant permissions on the Azure Database for PostgreSQL server and/or the key vault inline.

Select Assign missing roles on the action menu and assign roles. After the process starts, the missing access permissions on the key vault and/or the Azure Database for PostgreSQL server are granted to the Backup vault. In the Scope area, you can define the scope at which the access permissions should be granted. When the action is complete, revalidation starts.


The Backup vault accesses secrets from the key vault and runs a test connection to the database to validate that the credentials were entered correctly. The privileges of the database user are also checked to see if the database user has backup-related permissions on the database.
If a low-privileged user doesn't have backup/restore permissions on the database, the validations fail. A PowerShell script is dynamically generated for each record or selected database. Run the PowerShell script to grant these privileges to the database user on the database. Alternatively, you can assign these privileges by using the pgAdmin or PSQL tool.


When Backup readiness shows Success, select the Review and configure tab to proceed to the last step of submitting the operation.


Select Configure backup. Then, track the progress on the Backup instances pane.


Create a backup policy
You can create a backup policy during the flow for configuring a backup. Alternatively, go to Backup center > Backup policies > Add. You can also create a backup policy for PostgreSQL databases using REST API.
On the Create Backup Policy pane, on the Basics tab, enter a name for the new policy.

On the Schedule and retention tab, define the backup schedule.
Currently, only the weekly backup option is available. However, you can schedule the backups on multiple days of the week.
Select Add retention rule to define retention settings.
You can add one or more retention rules. Each retention rule assumes inputs for specific backups, along with the datastore and retention duration for those backups.
To store your backups in one of the two datastores (or tiers), select Vault-standard or Vault-archive (preview).
To move the backup to the archive datastore upon its expiry in the backup datastore, select On-expiry.

Note
The Default retention rule is applied in the absence of any other retention rule. It has a default value of three months.
In the backup datastore, retention duration ranges from seven days to 10 years.
In the archive datastore, retention duration ranges from six months to 10 years.
Select Add, and then finish the process of reviewing and creating the policy.


Retention rules are evaluated in a predetermined order of priority. The priority is the highest for the yearly rule, followed by the monthly rule, and then the weekly rule.
Default retention settings apply when no other rules qualify. For example, the same recovery point might be the first successful backup taken every week, along with the first successful backup taken every month. However, because the priority of the monthly rule is higher than the priority of the weekly rule, the retention that corresponds to the first successful backup taken every month applies.
Create a secret in the key vault
The secret is the Azure Database for PostgreSQL server connection string in ADO.NET format. It's updated with the credentials of the database user who's granted the backup privileges on the server.

Copy the connection string from the Azure Database for PostgreSQL server. Use a text editor to update the user ID and password.

Run the PowerShell script to grant privileges to database users
The PowerShell script that's dynamically generated during the process of configuring a backup accepts the database user as the input, along with the PostgreSQL admin credentials, to grant the backup-related privileges to the database user on the database.
To run the script, make sure that the PSQL tool is on the machine. Also make sure that the PATH environment variable is set appropriately to the PSQL tool's path:
Open Edit the system environment variables in Control Panel.

In System Properties > Advanced, select Environment Variables.

The default environment variables appear.
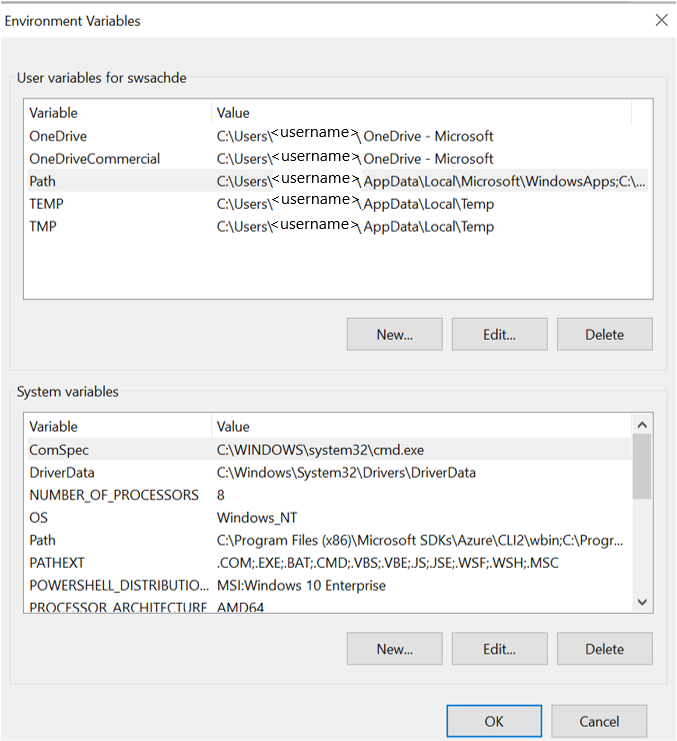
Use the Edit button to set the variables that you need.


To allow network connectivity, ensure that Connection Security settings in the Azure Database for PostgreSQL instance includes the IP address of the machine in the allowlist.
Run an on-demand backup
To trigger a backup that's not in the schedule specified in the policy:
Go to Backup instances and select Backup Now.

Choose from the list of retention rules that the associated backup policy defined.


Track a backup job
The Azure Backup service creates a job for scheduled backups or if you trigger an on-demand backup operation for tracking. To view the backup job's status:
Go to the Backup instances pane. It shows the Jobs dashboard with the operations and statuses for the past seven days.

Select View All to display ongoing and past jobs of this backup instance.

Review the list of backup and restore jobs and their statuses. Select a job to view its details.


Related content
- Restore a PostgreSQL database using Azure portal.
- Restore a PostgreSQL database using Azure PowerShell, Azure CLI, and REST API.
- Azure Backup pricing.
- Troubleshoot PostgreSQL database backup by using Azure Backup.
- Manage an Azure Database for PostgreSQL server by using the Azure portal.