Note
Access to this page requires authorization. You can try signing in or changing directories.
Access to this page requires authorization. You can try changing directories.
Applies to: Hyperconverged deployments of Azure Local
This article describes how to use simplified machine provisioning to set up machines for an Azure Local instance. You can install the OS on your Azure Local machines in two distinct ways: you can manually install the OS using ISO images, or you can use the simplified machine provisioning process.
This article covers only the installation and registration process by using simplified machine provisioning, which is currently in preview. To install the OS manually, see Install OS on your Azure Local machines using ISO images.
About simplified machine provisioning process
At a high level, the process has three key stages:

Prepare the machines: In this stage, you install the maintenance environment on the machine and generate an ownership voucher. These artifacts meet the FIDO Device Onboarding (FDO) standards and are sent to the customer.
Anyone can prepare the machines, a machine manufacturer, an integrator, or even a customer, but the approach is most valuable when someone other than the on-site staff prepares the machines.
Once the on-site staff has the prepared machines, the machines securely connect to the call-home URL. The machines are then provisioned. The OS is installed and the network is configured. While the installation and configuration are in progress, the staff can monitor the process via the Configurator app.
Provision the machines from the Azure portal:
Set up site-level configuration: This configuration applies to all new machines under a site. This configuration includes settings like time zone, time server, proxy server, Key vault for administrator credentials, and more. Site-level configuration eliminates the need for manual configuration for each machine.
Provision the machines: Once the site configurations are done, claim machine ownership by using the ownership voucher generated while preparing the machine. Select the operating system profile for each machine.
Note
Azure Arc gateway isn't supported with simplified machine provisioning in this preview release.
Deploy the cluster by using the provisioned machines: You can now create an Azure Local instance using the provisioned machines.
Important
This feature is currently in PREVIEW. See the Supplemental Terms of Use for Microsoft Azure Previews for legal terms that apply to Azure features that are in beta, preview, or otherwise not yet released into general availability.
Prerequisites
Hardware prerequisites
- Microsoft-validated hardware SKUs:
- Lenovo ThinkAgile MX650 V3 and MX650 V4
- HPE ProLiant DL360 Gen11
- Dell AX-750 and AX-650
- USB port on the machines.
- Windows 11 computer with a reliable internet connection and a USB port.
- USB flash drive with at least 8 GB of space.
On-site prerequisites
Satisfy the Deployment prerequisites.
Prepare your Active Directory environment.
Download software to your Windows 11 computer.
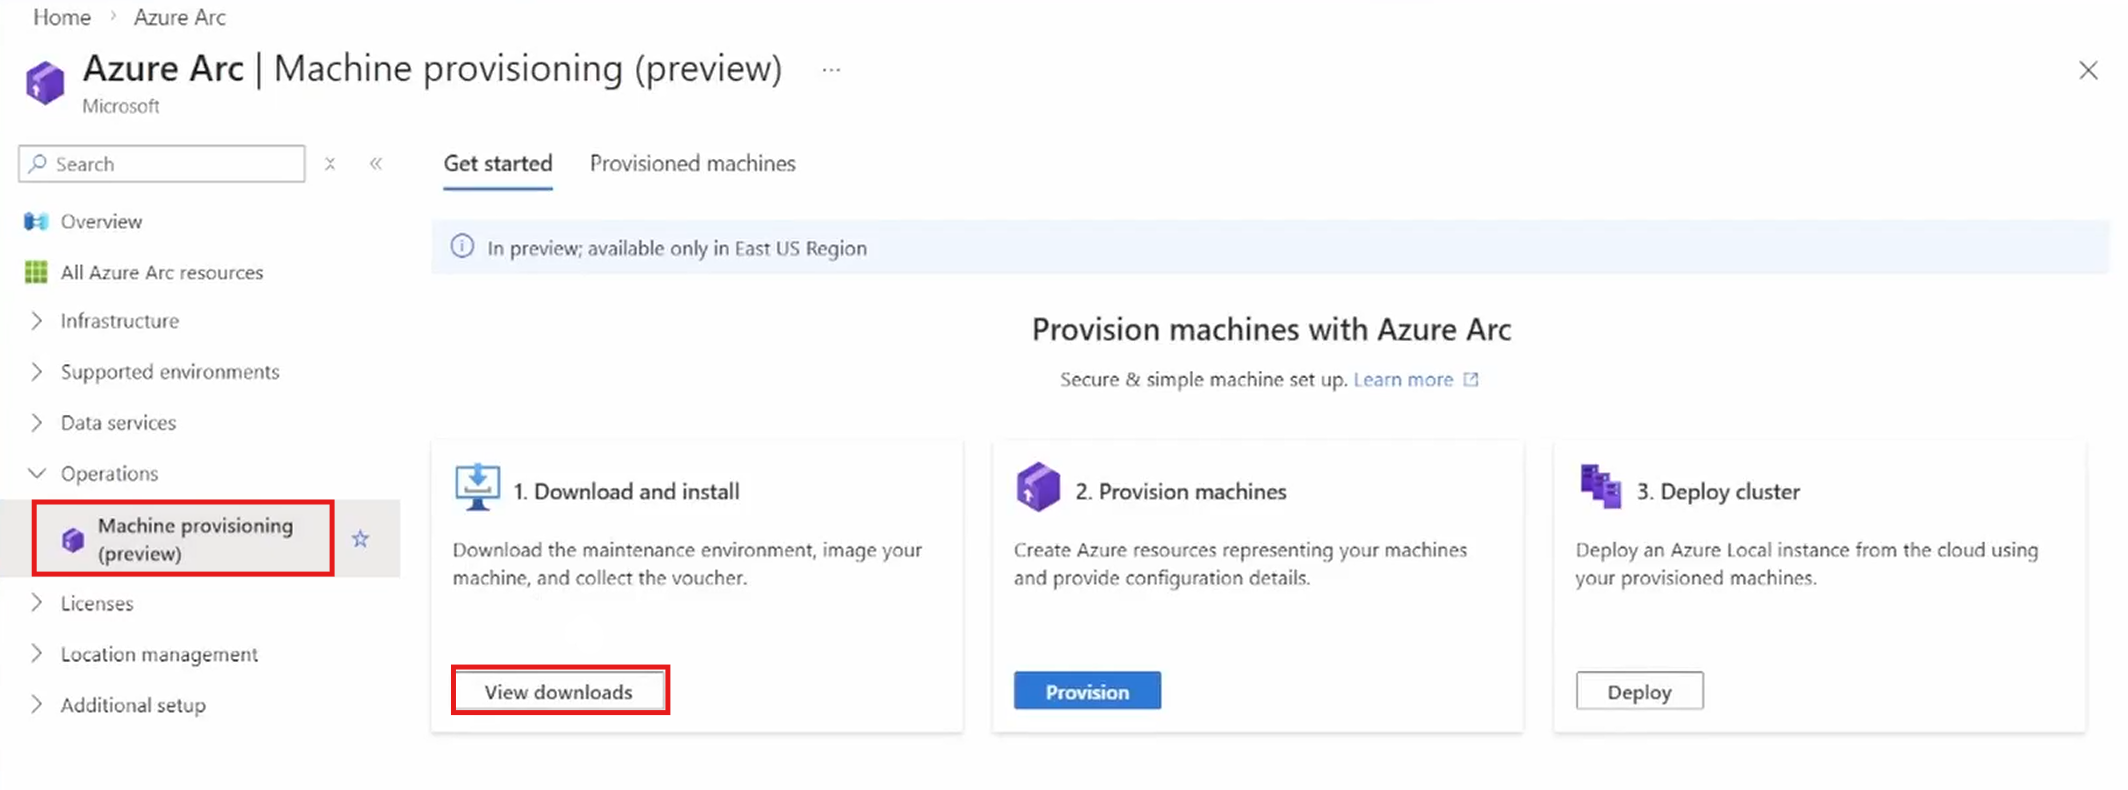
Go to Azure Arc > Azure Local > Get started.
On the Get started page, in the banner at the top of the page, select Try provisioning (preview).

On the Machine provisioning (preview) page, go to the Download and install tile and select View Downloads to download the software to your Windows 11 computer.
The software includes the maintenance environment ISO image, USB preparation tool, and the Configurator app. A maintenance environment is a secure bootable OS that prepares a machine for provisioning by generating the device ID and voucher.
Use the Configurator app to download the ownership voucher, configure static IP address, and track the progress of machine setup.


Azure prerequisites
Register the machine provisioning feature for your subscription by using the following command:
az feature register --subscription <subcriptionid> --namespace Microsoft.DeviceOnboarding --name AzureLocalZTPAfter you register the machine provisioning feature, ensure the following resource providers are registered for your subscription:
- Microsoft.HybridCompute
- Microsoft.AzureStackHCI
- Microsoft.DeviceOnboarding
- Microsoft.Edge
- Microsoft.GuestConfiguration
- Microsoft.HybridCompute
- Microsoft.HybridConnectivity
- Microsoft.KeyVault
- Microsoft.ManagedIdentity
- Microsoft.PolicyInsights
- Microsoft.Storage
- Microsoft.Insights
Ensure that you're either the resource group owner or you have the Contributor and Role Based Access Control Administrator permissions on the resource group where you provision the servers.
In this preview release, only the East US region supports provisioning resource. You can create your resource group in your preferred region.
Step 1: Create USB installation media
Use the USB tool to create a bootable USB drive that contains the required installation and provisioning content needed to start the machine. It provides a Microsoft-supported, repeatable way to generate install-ready media for a more secure and reliable USB creation experience.
Note
The tool erases all the data on the USB. Make sure to either use an empty USB or back up USB data.
Follow these steps to create a USB installation media from your Windows 11 PC:
Download and extract the software package for the maintenance environment and the USB preparation tool. Attach the USB flash drive to your laptop.
Open the terminal. You need to be an administrator to run this tool.
Preapprove the
usb_prep.exein Windows Security.Go to Windows Security > Virus & threat protection and select Manage settings. Scroll to Exclusions > Add an Exclusion > File and select
usb_prep.exe.Alternately, run the command:
Add-MpPreference -ExclusionPath "{PATH_TO_EXTRACTED_FOLDER}\usb_prep.exe
Run the USB preparation tool from the downloaded software package.
When prompted, enter the full path to the folder that contains the maintenance environment image ISO, and press Enter.
Select the USB drive to use from the list of available machines.
Press 'Y' to confirm and begin creating a bootable USB drive. The process deletes any content on the flash drive.
Wait for the tool to complete the media creation process.
When finished, safely eject and disconnect the USB flash drive.
Step 2: Prepare machines
Follow the steps to prepare machines for simplified provisioning. Repeat this step for each machine.
Attach the USB flash drive to the server machine and power on the machine where you want to install Azure Local.
If your server machine doesn't automatically boot from the USB, you might need to open a boot menu or change the boot order in your server machine's BIOS or UEFI settings.
To open a boot menu or change the boot order, press a key (such as F2, F12, Delete, or Esc) immediately after you turn on your machine. For instructions on accessing the boot menu or changing the boot order for your machine, check the documentation that came with your machine or go to the manufacturer's website.
Additionally, ensure that Secure Boot and Trusted Platform Module (TPM) are enabled.
Wait for the maintenance environment setup to complete. The console shows Maintenance environment setup completed successfully. Expect the machine to reboot twice. This process usually takes up to 30 minutes.
You can safely detach the USB flash drive after the maintenance environment setup is complete.
Repeat all the preceding steps on other machines.
Collect the ownership voucher for each of the machines by using either of the two options:
Download voucher via Configurator App:
Open the Start menu and search for Configurator App. Select Configurator App for Azure Local V2, and then select Run as administrator.
Connect to the machine. Use the
<machine serial number>.localor IP address. Enter the local administrator credentials. The default username is edgeuser. The default password is Password1.Download the ownership voucher and share it with your Azure IT administrator to continue machine setup.
Or copy voucher from USB flash drive:
Attach the same USB flash drive from step 1 to the Windows 11 PC, open the USB drive folder, and check for the following files under the USB drive folder.
Collect the ownership voucher, a small
.pemfile named after the machine’s serial number from\vouchers\<serial-number>\folder. Share the ownership voucher with the Azure portal IT administrator.
Disable the USB in BIOS after setting up the machine.
Step 3: Provision machines from Azure
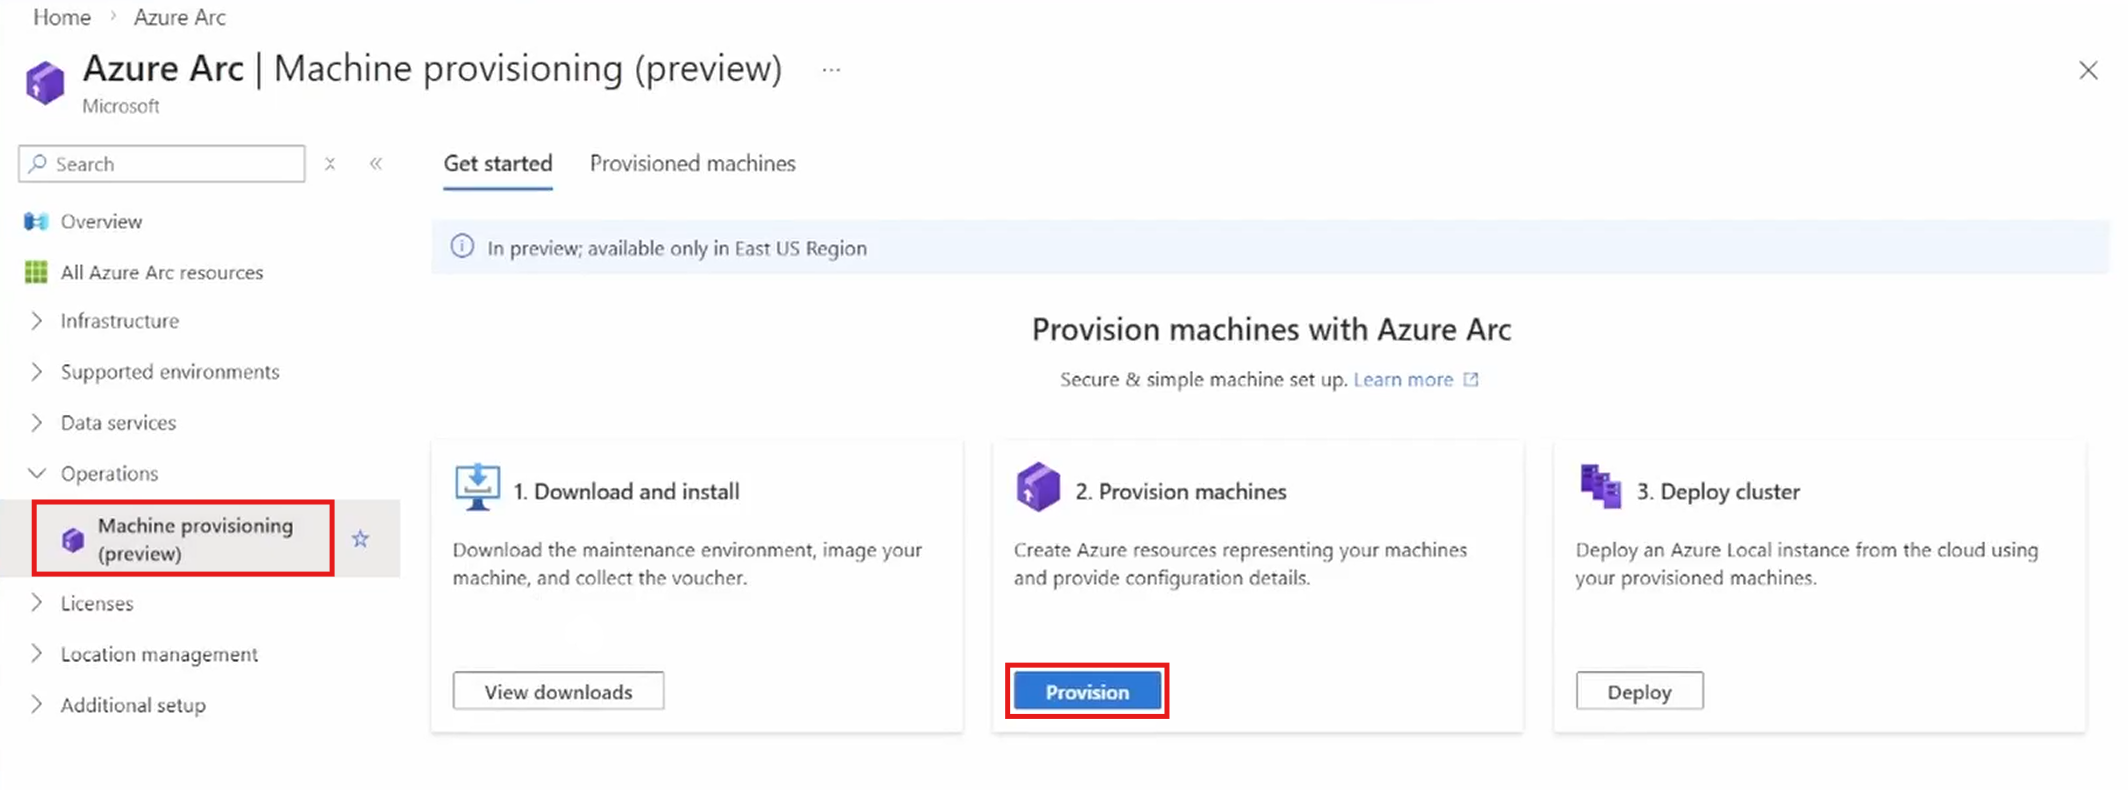
Go to Azure Arc > Azure Local > Get started. On the banner, select Try provisioning (preview). On the Machine provisioning (preview) page, select Provision to provision Azure Local machines.
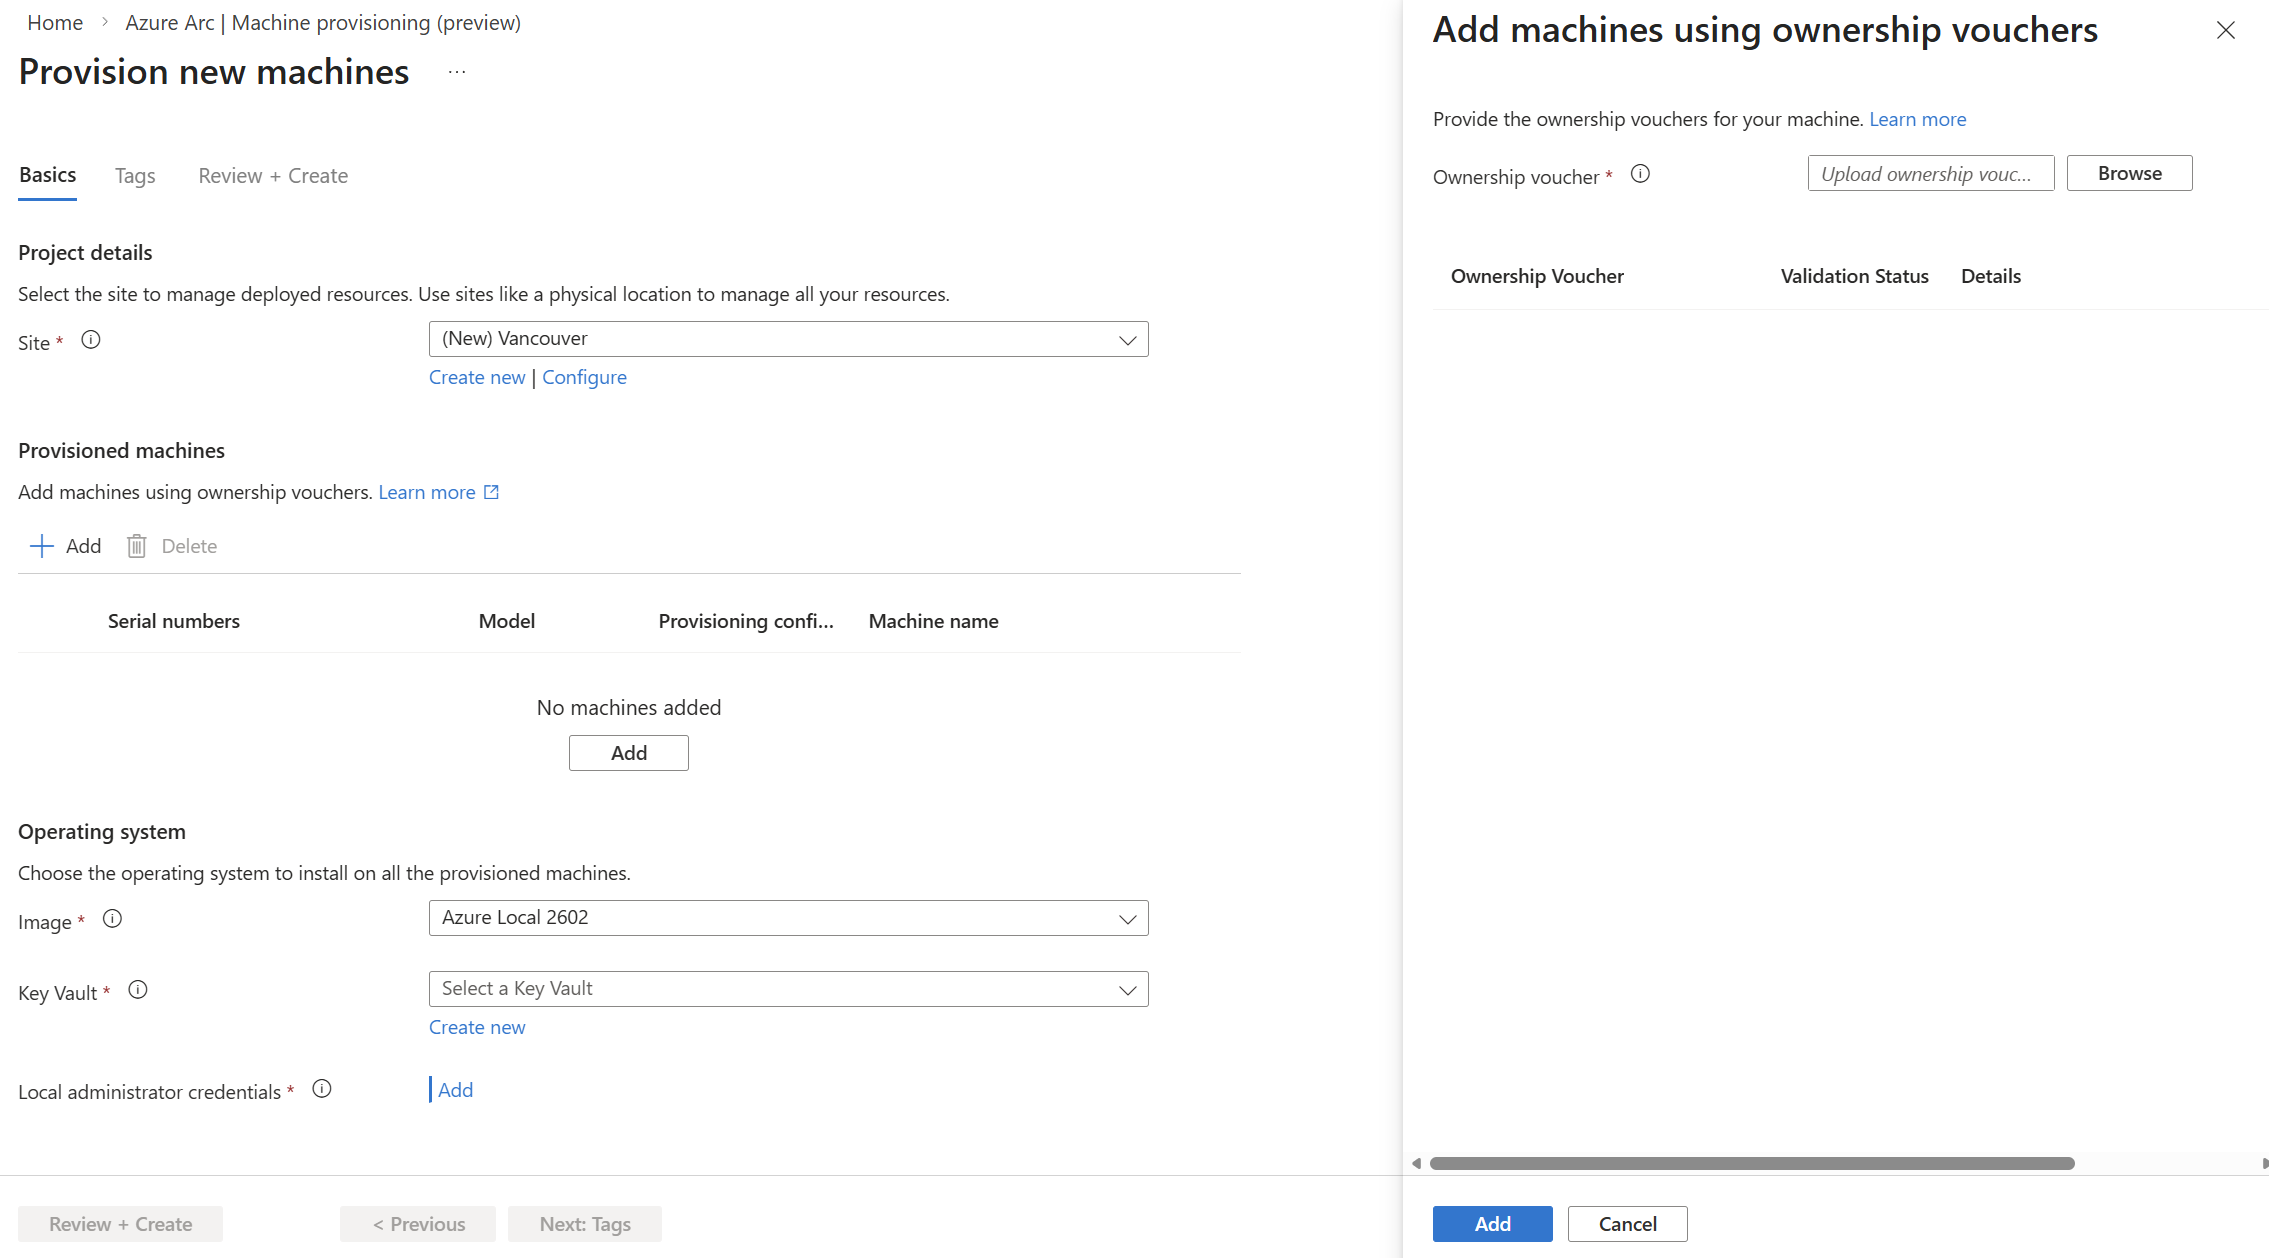
Create site. Make a note of the resource group name.
After creating the site, set up the provisioning configuration for your site. This configuration applies to all new machines under the site.
Parameter Description Time zone Select the common time zone for all the machines under the site. You can change it later. New machines use this time zone, but existing ones don't. Time server Enter the common time server for synchronized system time for all the machines under the site. You can change it later. New machines use this time server, but existing ones don't. Azure Arc gateway isn't supported with simplified machine provisioning in this preview release.
Select the site, add vouchers from Prepare machines, software version, and local administrator credentials. The password must have at least 12 characters including lower and upper-case characters, a digit, and a special character. Once you add machines, select the pencil button to edit. Provide the machine name as the Arc resource name.
On Review + create, review details, and select Create.


In the Azure portal, go to Azure Arc > Operations > Provisioning (preview). On the Provisioned machines tab, you see your machine provisioning status.

Ensure that your on-site staff keeps the machine connected to the network and powered on. The machine automatically connects securely to a call-home URL, then gets fully configured from Azure. This configuration includes download of the Azure Stack HCI operating system, setting up the operating system, connecting the machine to Azure Arc, and installing all the mandatory Azure Arc extensions. The machine is ready for clustering.
This process reduces setup time and expertise needed at remote sites. The configuration is done from Azure. Use Azure Resource Manager templates to provision servers at many remote sites. This makes the process quicker, repeatable, and scalable.
Step 4: Monitor machine set up via app (optional)
Follow these steps to track the installation progress from your Windows 11 PC.
Open the Start menu, type Configurator App, and select Configurator App for Azure Local V2.
Connect to the machine. Use the
<machine serial number>.localor IP address. Enter the local administrator credentials. The default username is edgeuser. The default password is Password1.Wait for the Azure Arc configuration to finish on maintenance environment. After this step, the Azure Stack HCI operating system from Provision machines from Azure installs.
After installing the Azure Stack HCI operating system, use the <machine serial number>.local or IP address. Use the administrator credentials you configured while provisioning the machine. Wait for the configuration to finish and repeat all the steps on the other servers until the Arc configuration succeeds.
Step 5: Verify Azure Arc connectivity
Confirm your machines connect to Azure. To monitor the provisioning machine status, follow these steps:
In the Azure portal, go to Azure Arc > Operations > Provisioning (preview) > select the Provisioned machines tab.
Check your machine's status in the provisioned machines list. Select a machine’s status to view progress details.
Wait for the machine status to show Ready to cluster.

Next steps
- Set up subscription permissions before deployment.
- Skip registration as this step already registered your Azure Local machines.
- Once you set up the permissions, deploy your Azure Local instance by using one of the following options:
- Troubleshoot simplified machine provisioning.