Note
Access to this page requires authorization. You can try signing in or changing directories.
Access to this page requires authorization. You can try changing directories.
Applies to: Azure Local 2502 and later
This article explains how to use the Configurator app to quickly bootstrap and register machines in your Azure Local instance, enabling seamless Azure Arc integration.
You can use the Configurator app or Azure CLI to register your machines. If you plan to deploy a few machines per site, use the Configurator app.
Important
This feature is currently in PREVIEW. See the Supplemental Terms of Use for Microsoft Azure Previews for legal terms that apply to Azure features that are in beta, preview, or otherwise not yet released into general availability.
Prerequisites
Before you begin, make sure that you complete the following prerequisites:
Azure Local machine prerequisites
- Complete prerequisites and complete deployment checklist for your environment.
- Prepare Active Directory environment.
- Download the software and Install the Azure Stack HCI operating system, version 23H2 on each machine.
Download the Configurator App for Azure Local.
Note down:
- The serial number for each machine.
- Local administrator credentials to sign into each machine.
Azure prerequisites
Register required resource providers. Make sure that your Azure subscription is registered against the required resource providers. To register, you must be an owner or contributor on your subscription. You can also ask an administrator to register.
Run the following PowerShell commands to register:
Register-AzResourceProvider -ProviderNamespace "Microsoft.HybridCompute"
Register-AzResourceProvider -ProviderNamespace "Microsoft.GuestConfiguration"
Register-AzResourceProvider -ProviderNamespace "Microsoft.HybridConnectivity"
Register-AzResourceProvider -ProviderNamespace "Microsoft.AzureStackHCI"
Register-AzResourceProvider -ProviderNamespace "Microsoft.Kubernetes"
Register-AzResourceProvider -ProviderNamespace "Microsoft.KubernetesConfiguration"
Register-AzResourceProvider -ProviderNamespace "Microsoft.ExtendedLocation"
Register-AzResourceProvider -ProviderNamespace "Microsoft.ResourceConnector"
Register-AzResourceProvider -ProviderNamespace "Microsoft.HybridContainerService"
Register-AzResourceProvider -ProviderNamespace "Microsoft.Attestation"
Register-AzResourceProvider -ProviderNamespace "Microsoft.Storage"
Register-AzResourceProvider -ProviderNamespace "Microsoft.Insights"
Note
- The assumption is that the person registering the Azure subscription with the resource providers is a different person than the one who is registering the Azure Local machines with Arc.
Microsoft.Insightsresource provider is required for monitoring and logging. If this RP is not registered, the diagnostic account and Key Vault audit logging fails during validation.
Create a resource group. Follow the steps to Create a resource group where you want to register your machines. Make a note of the resource group name and the associated subscription ID.
Get the tenant ID. Follow the steps in Get the tenant ID of your Microsoft Entra tenant through the Azure portal:
In the Azure portal, go to Microsoft Entra ID > Properties.
Scroll down to the Tenant ID section and copy the Tenant ID value to use later.
Verify permissions. As you register machines as Arc resources, make sure that you're either the resource group owner or have the following permissions on the resource group where the machines are provisioned:
Azure Connected Machine Onboarding.Azure Connected Machine Resource Administrator.
To verify that you have these roles, follow these steps in the Azure portal:
Go to the subscription you used for the Azure Local deployment.
Go to the resource group where you plan to register the machine.
In the left-pane, go to Access Control (IAM).
In the right-pane, go to Role assignments. Verify that you have
Azure Connected Machine OnboardingandAzure Connected Machine Resource Administratorroles assigned.
Check your Azure policies. Make sure that:
- The Azure policies aren't blocking the installation of extensions.
- The Azure policies aren't blocking the creation of certain resource types in a resource group.
- The Azure policies aren't blocking the resource deployment in certain locations.
Get Arc gateway ID. Skip this step if you didn't set up Azure Arc gateway. If you Set up an Azure Arc gateway, get the resource ID of the Arc gateway. This is also referred to as the
ArcGatewayID.To get the
ArcGatewayID, run the following command:az connectedmachine gateway listMake a note of the Arc gateway ID to use later.
Step 1: Configure the network and connect to Azure
Follow these steps to configure network settings and connect the machines to Azure. Start this action a few minutes after you turn on the machine.
Open the Configurator app. Right-click the Configurator app exe and run as administrator. Wait a few minutes for the app to open up.
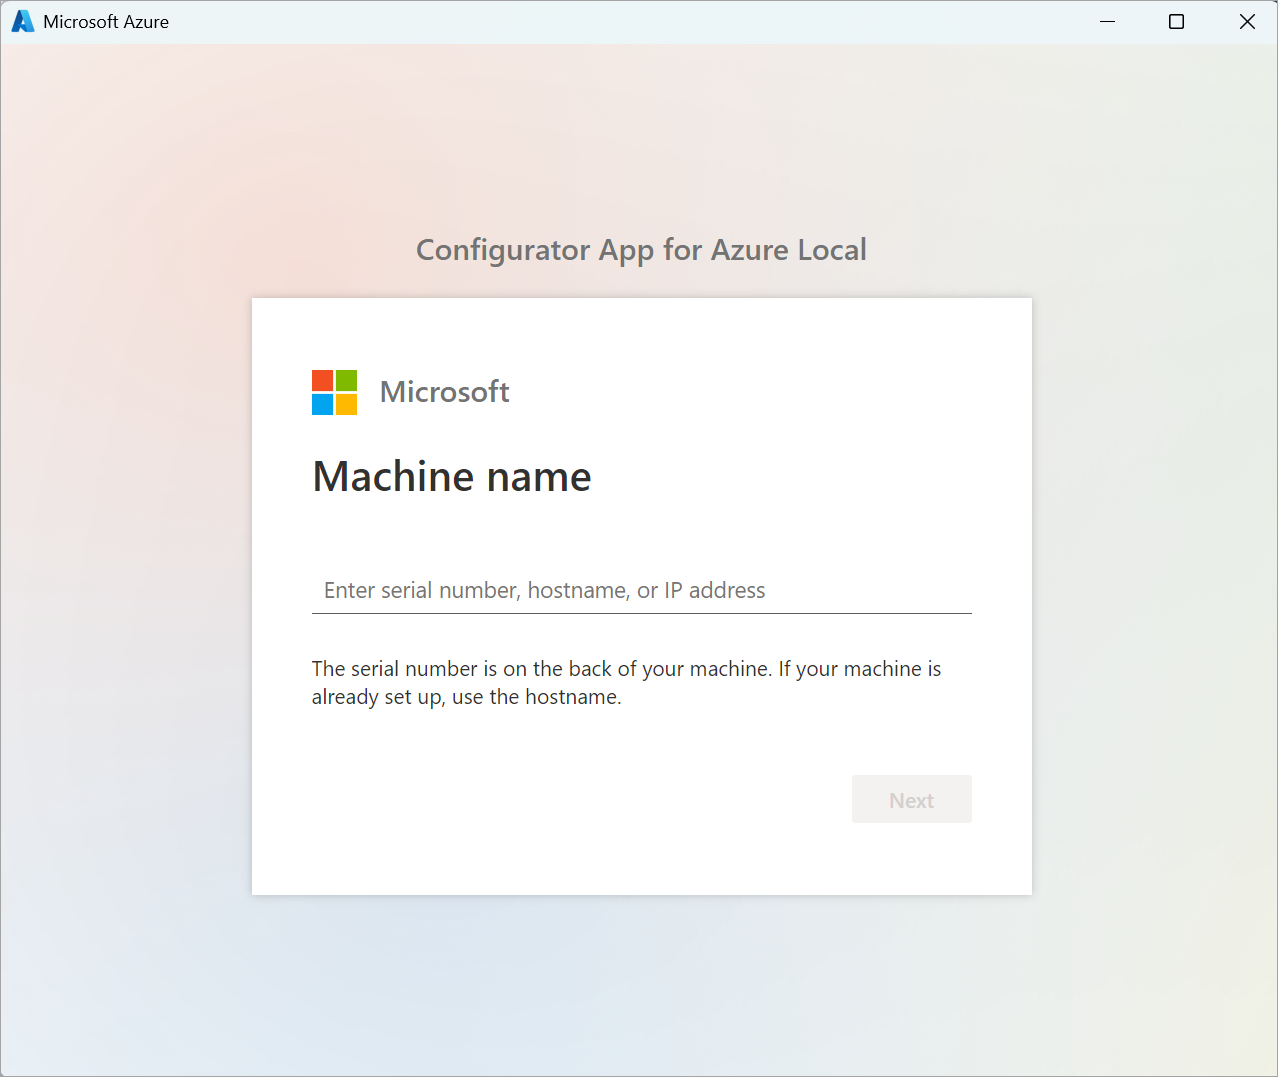
Enter the machine serial number and select Next.
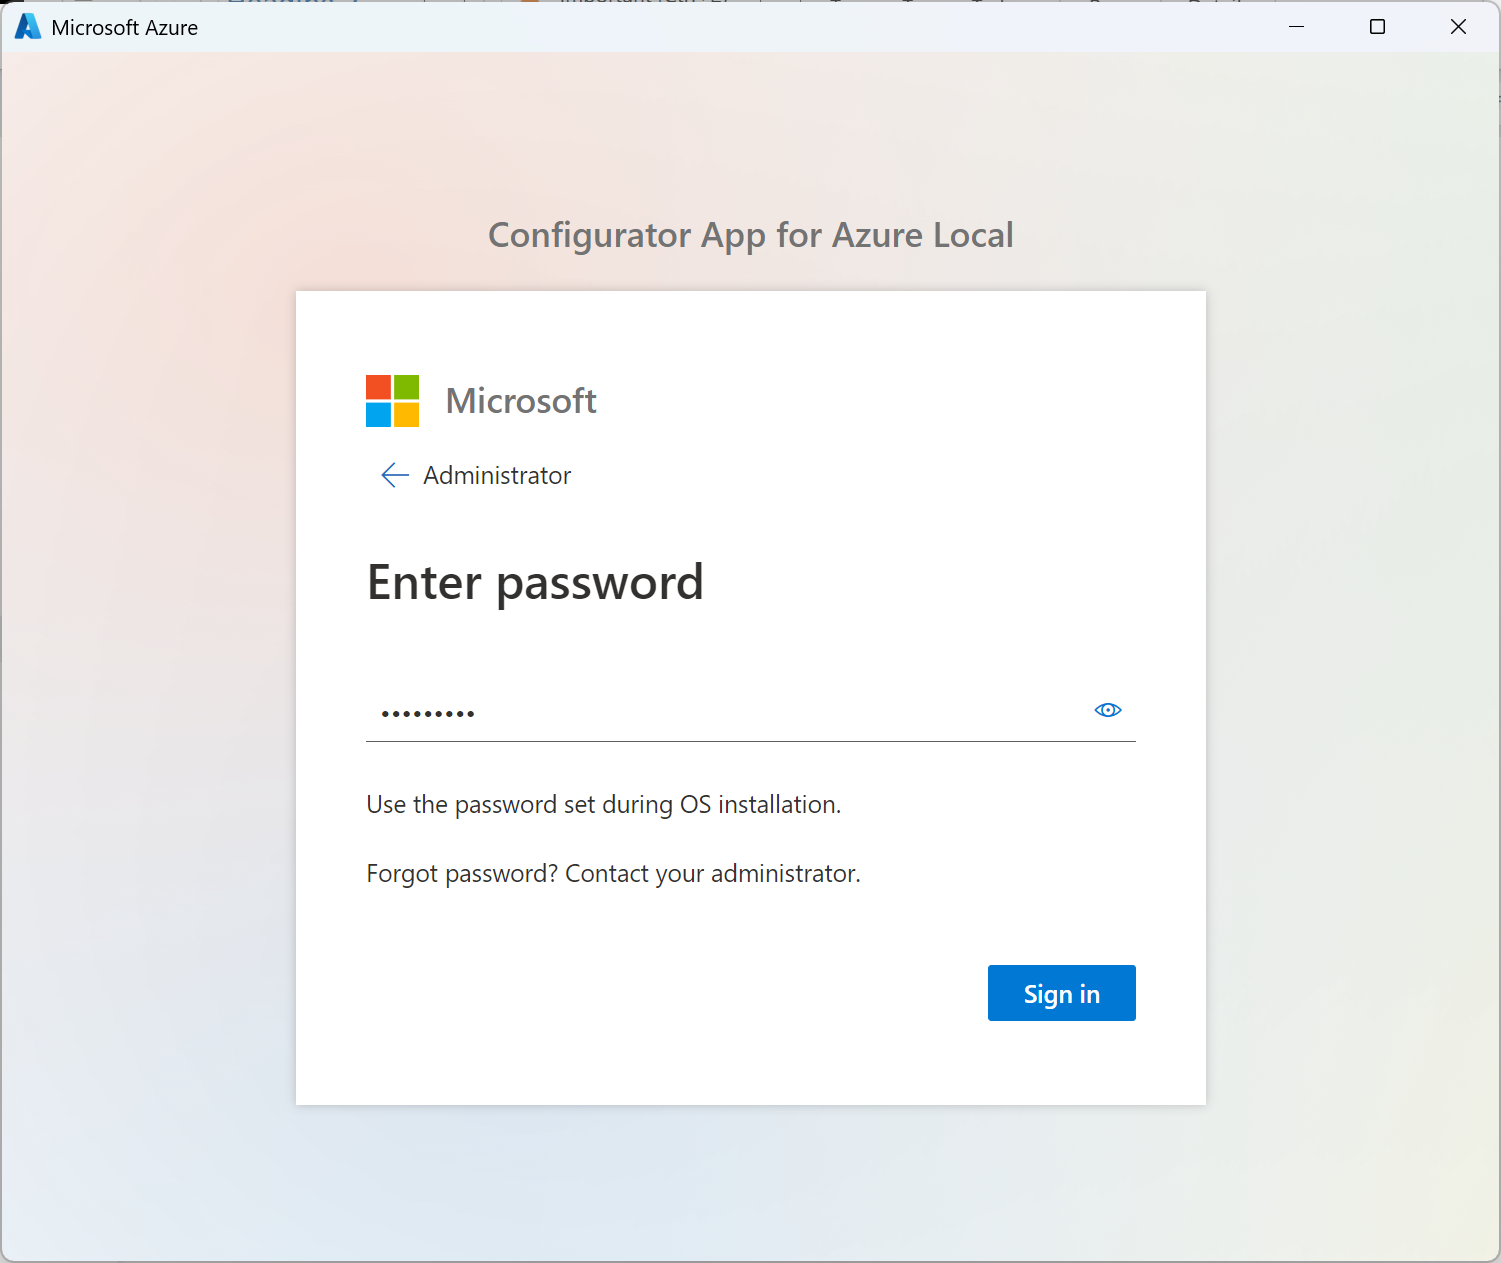
Sign in to the machine with local administrator credentials.
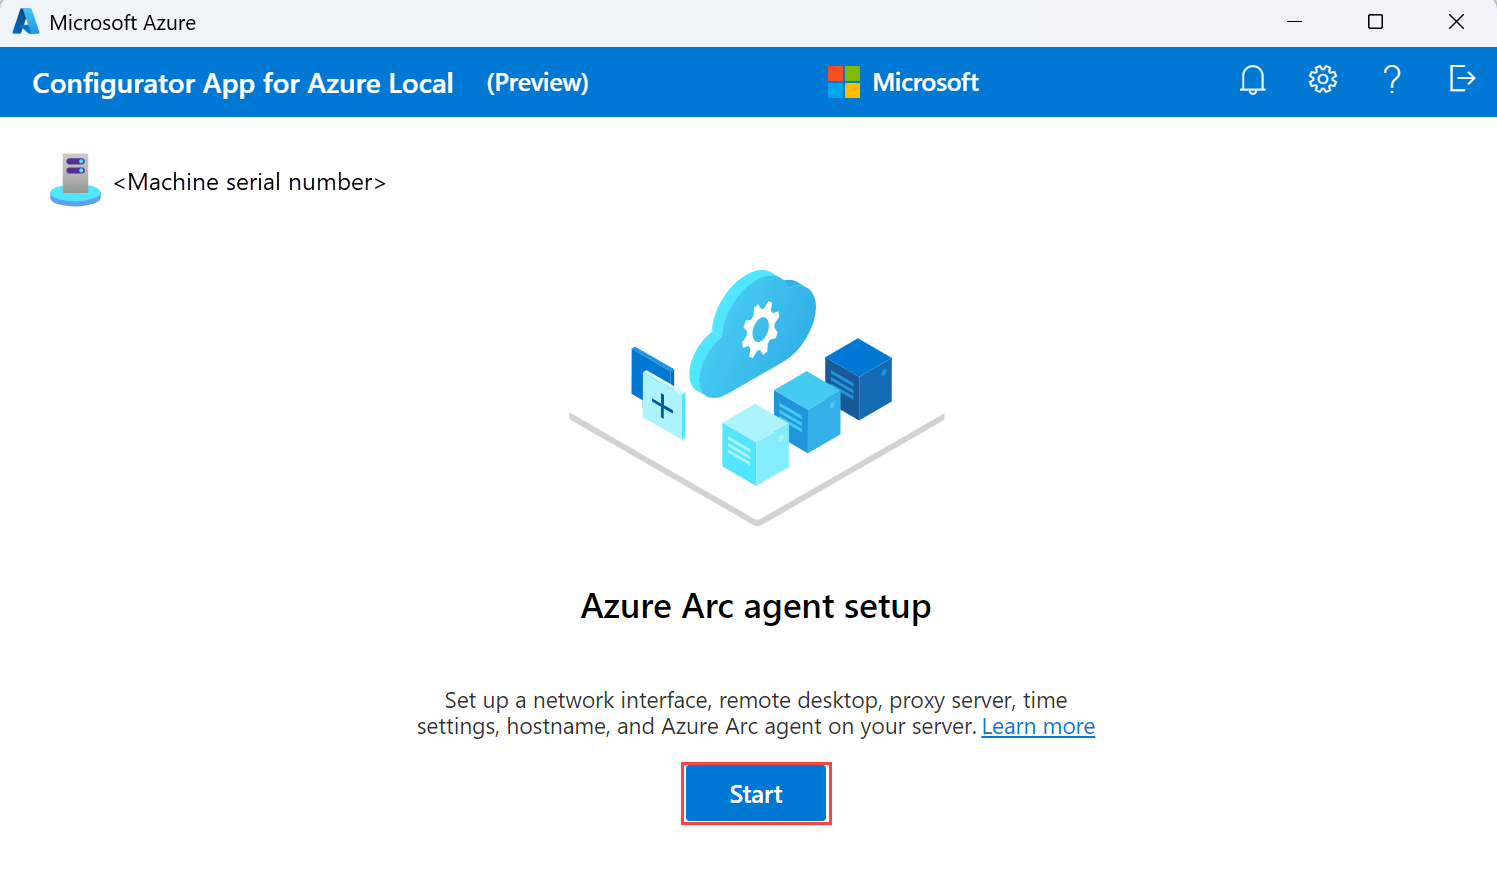
On the Azure Arc agent setup page, select Start.
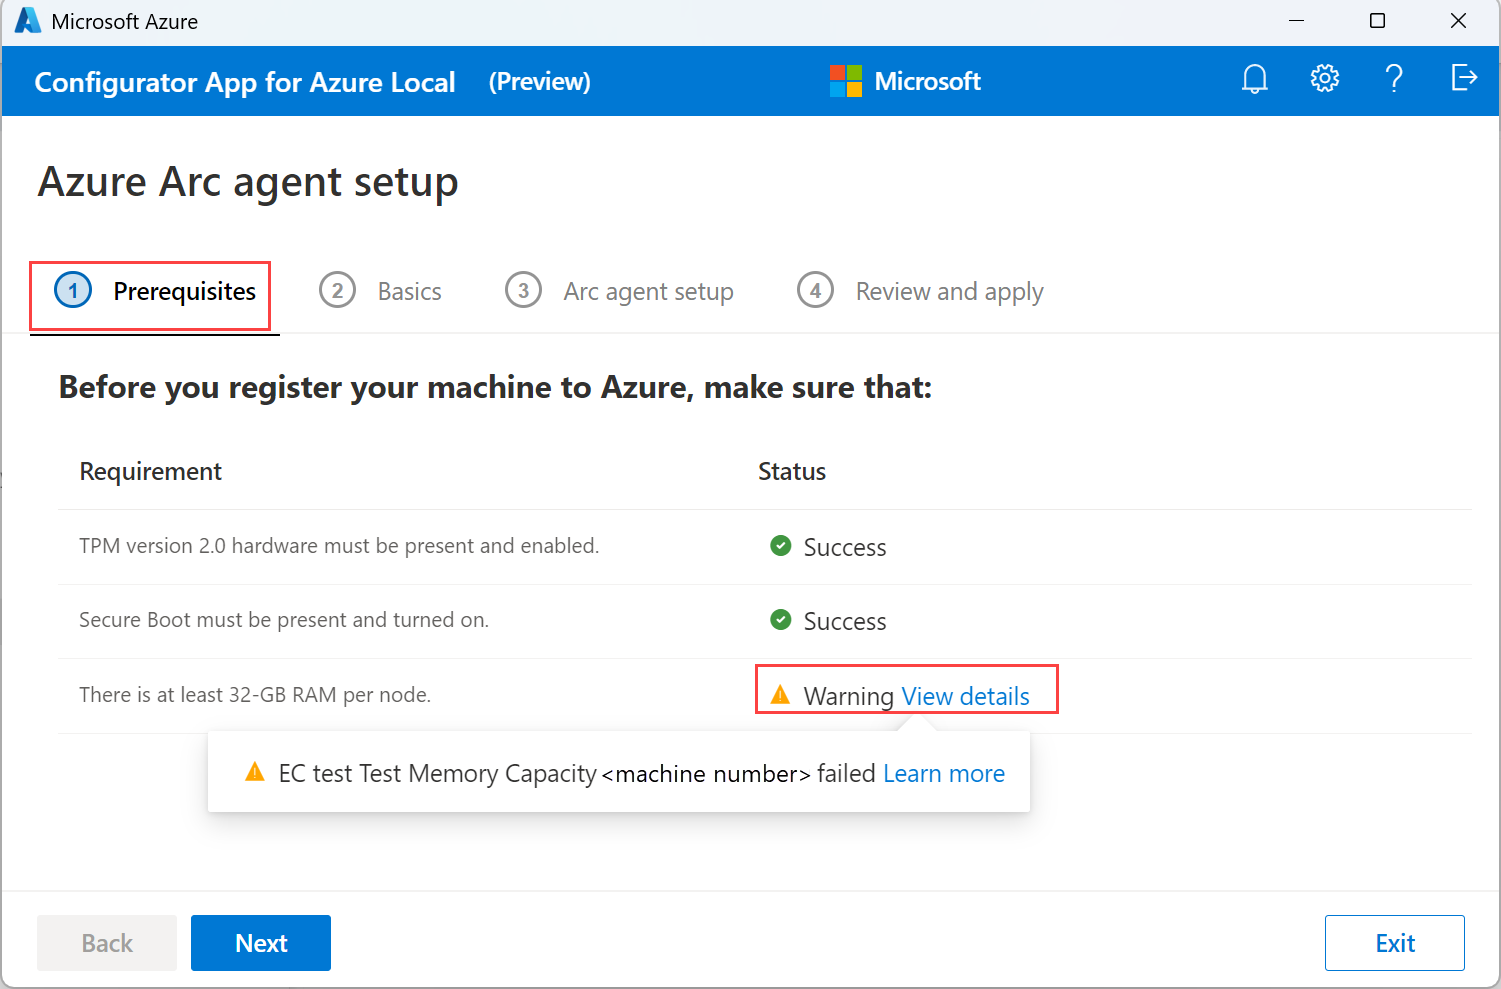
On the Prerequisites tab, verify that the minimum requirements are met and then select Next.
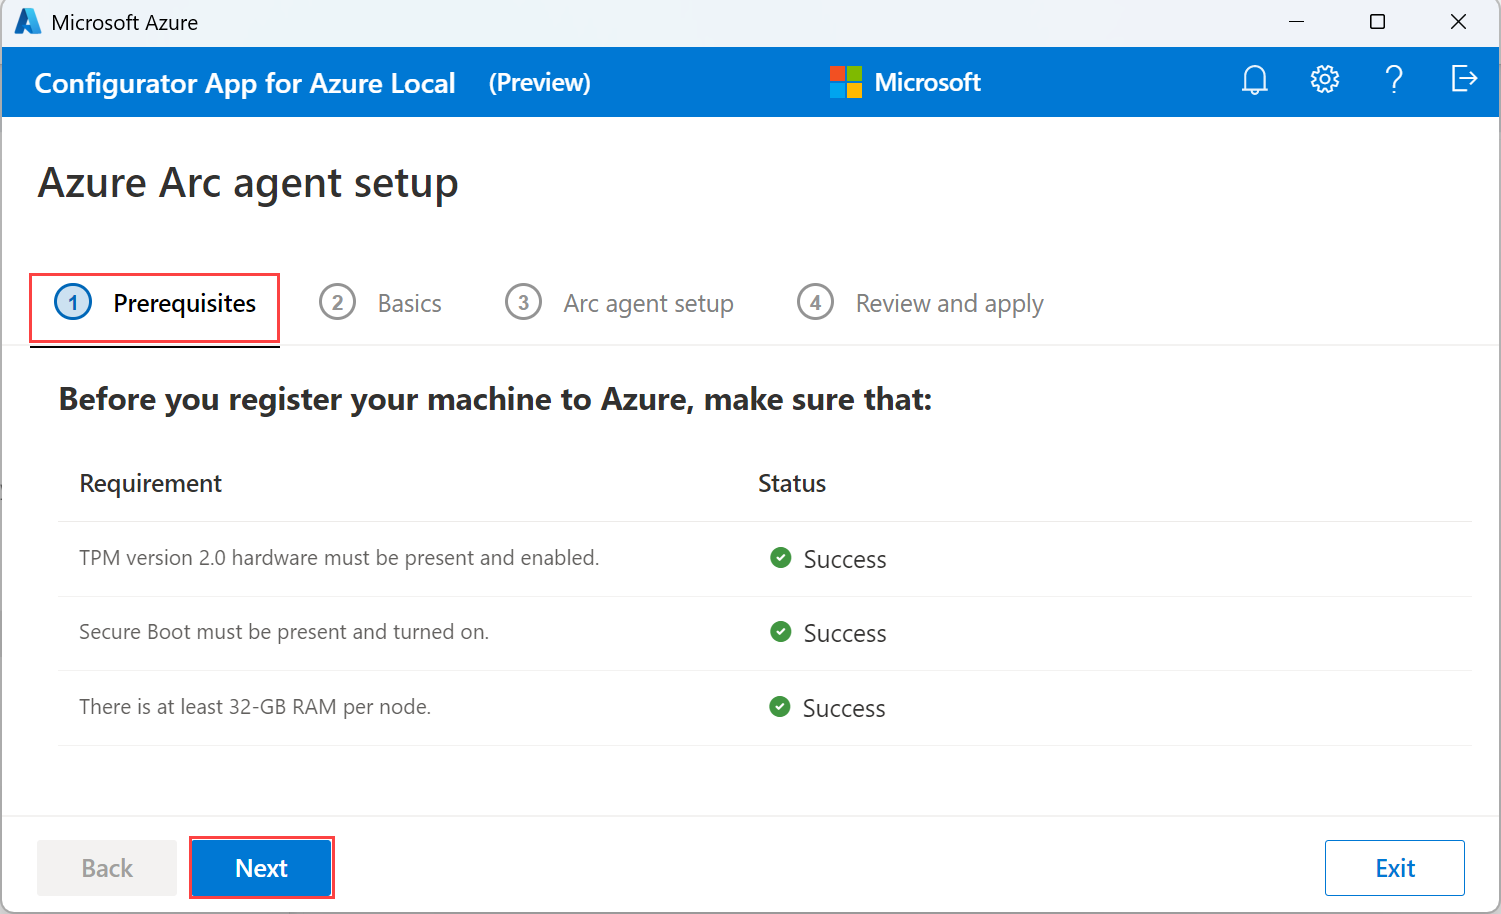
If a requirement isn't met, the app displays a warning or errors. You can't proceed if there are errors though warnings are ignored. Resolve the errors before you proceed. For more information, see Troubleshooting.
On the Basics tab, configure one network interface that is connected to the internet. Select the Pencil icon to modify network interface settings.

Provide the interface name, IP allocation as static or DHCP, IP address, subnet, gateway, and preferred DNS servers. Optionally, enter an alternate DNS server.
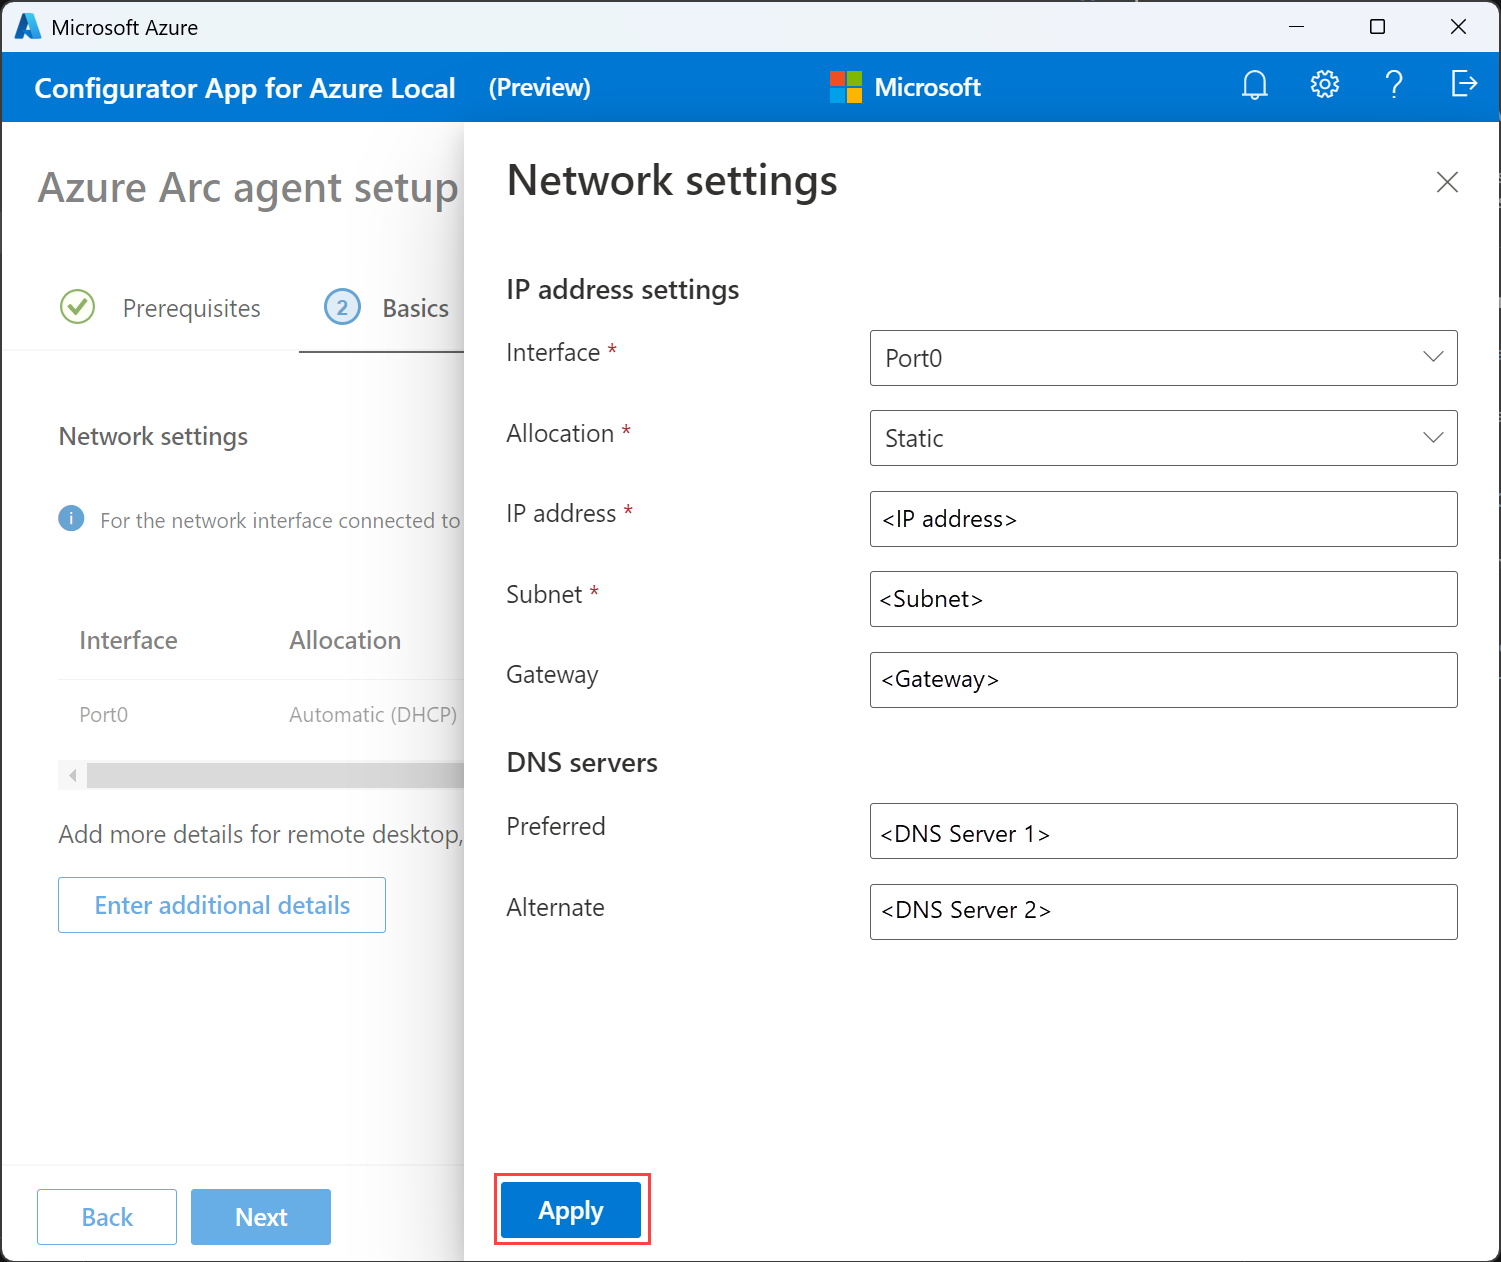
Important
Make sure that the IPs you assign are free and not in use.
To specify more details, select Enter additional details.
On the Additional details page, provide the following inputs and then select Apply.
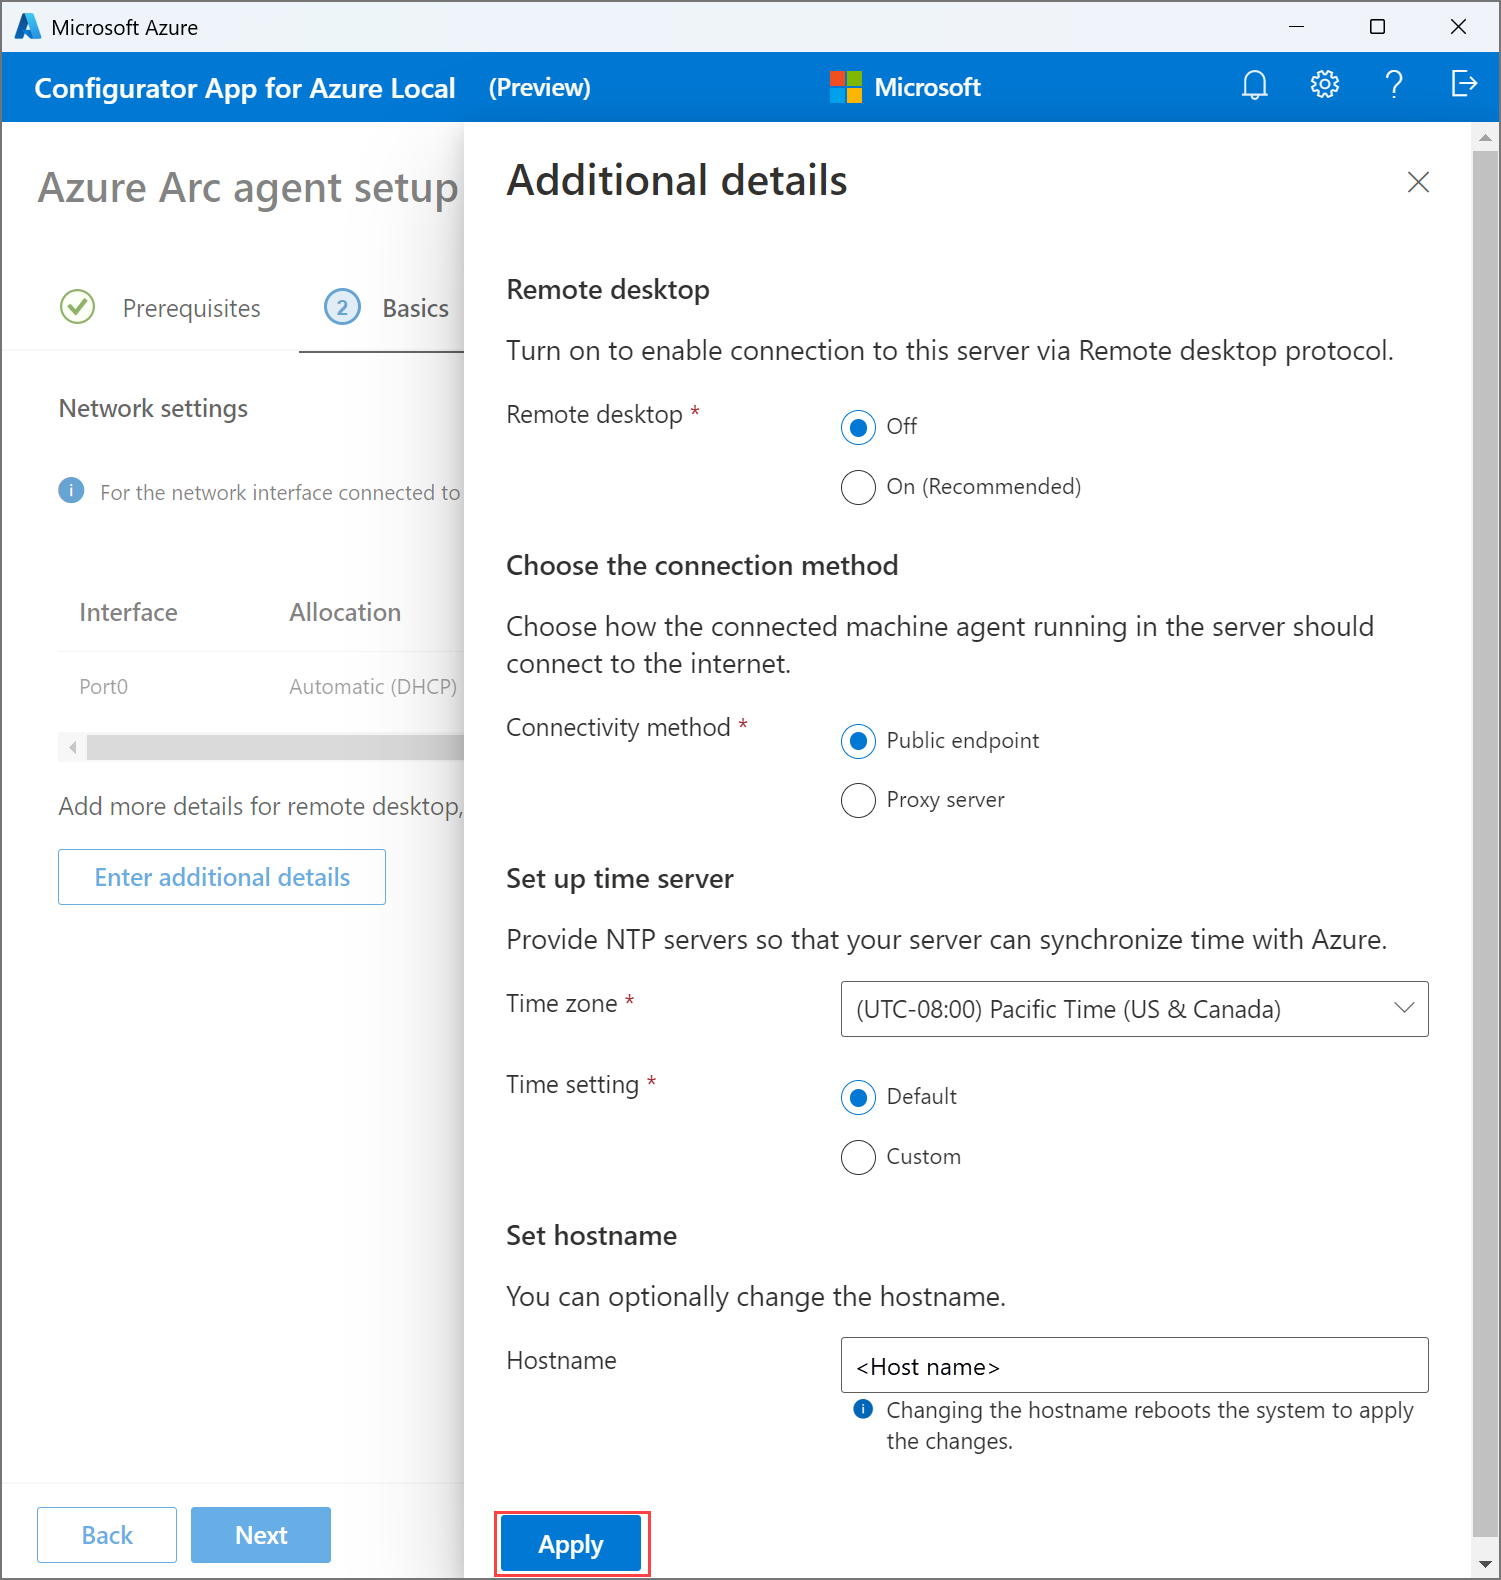
Select ON to enable Remote desktop protocol. Remote desktop protocol is disabled by default.
Select Public endpoint or Proxy server as the connectivity method. If selecting a proxy server, provide the proxy URL and the bypass list. The bypass list is required and can be provided in a comma separated format.
Select a time zone.
Specify a preferred and an alternate NTP server to act as a time server or accept the Default. The default is
time.windows.com.Set the hostname for your machine to what you specified during the preparation of Active Directory. Changing the hostname automatically reboots the system.
Select Next on the Basics tab.
On the Arc agent setup tab, provide the following inputs:
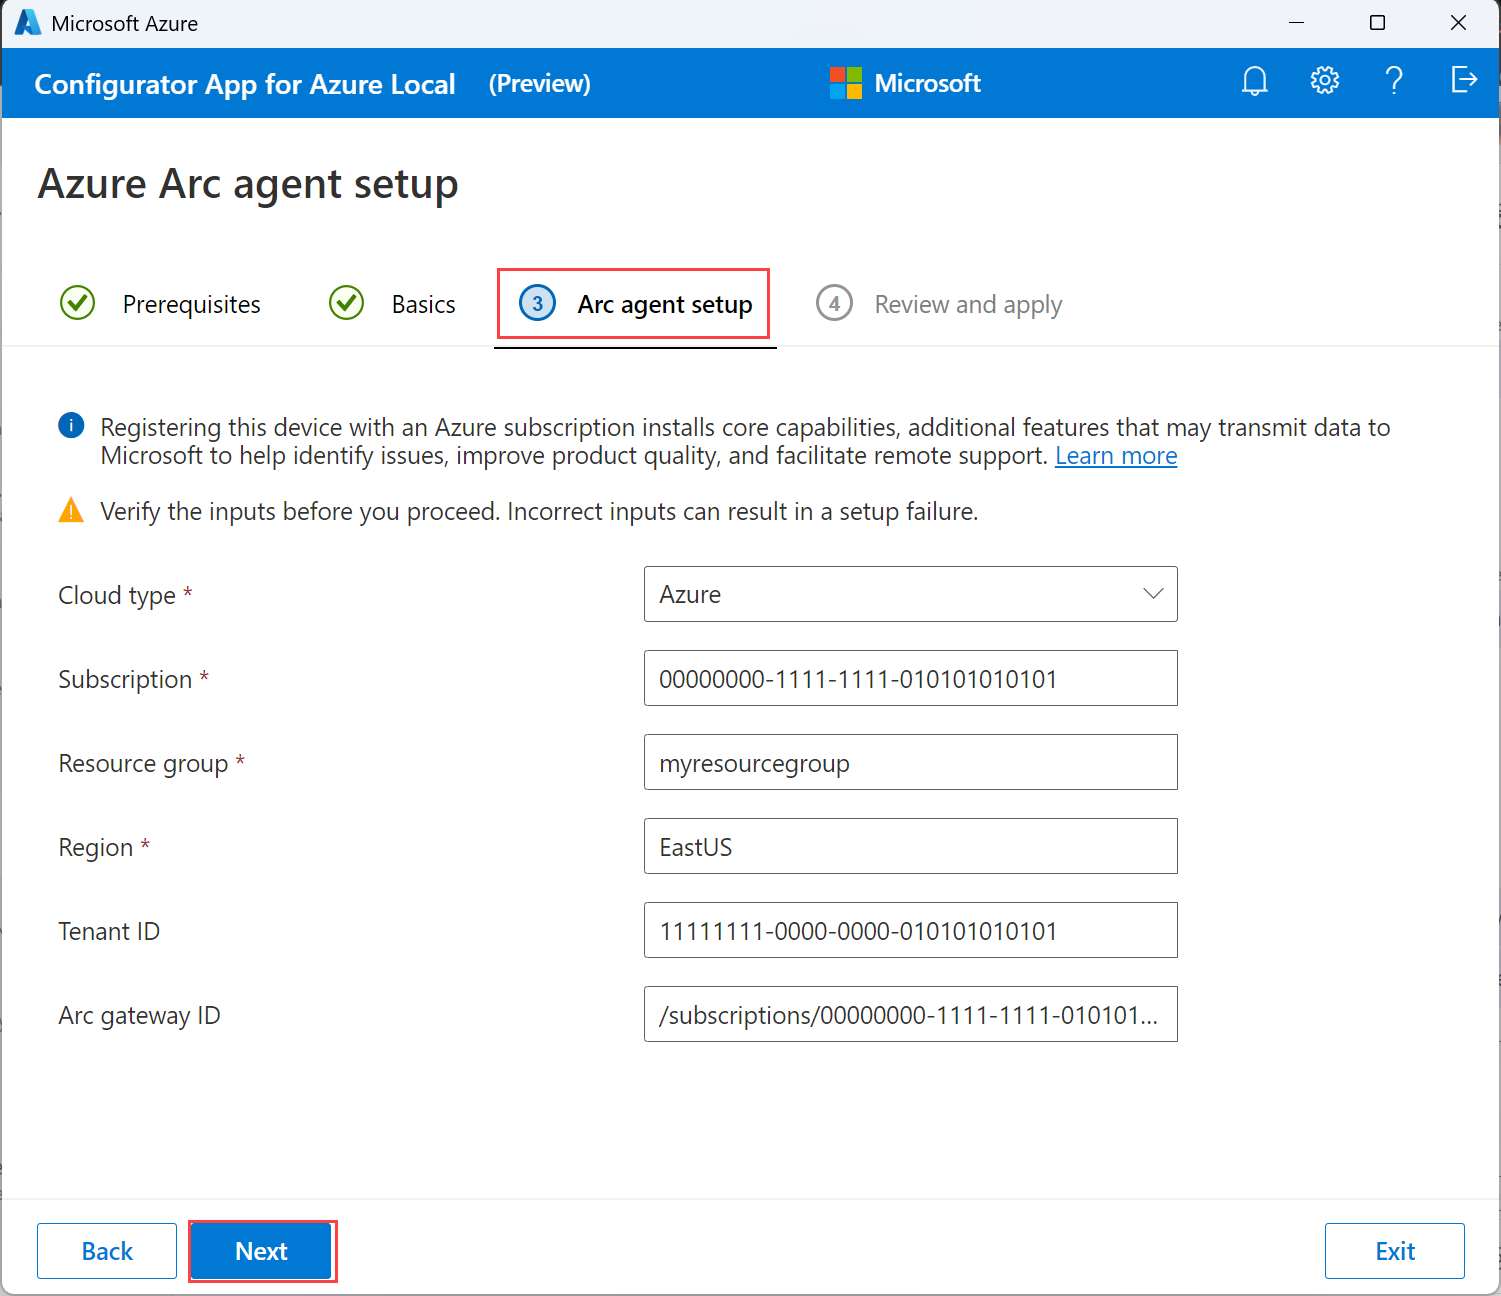
The Cloud type is populated automatically as
Azure.Enter a Subscription ID to register the machine.
Provide a Resource group name. This resource group contains the machine and system resources that you create.
Specify the Region where you want to create the resources. The region should be the same as the region where you want to deploy the Azure Local instance.
Important
Specify the region with spaces removed. For example, specify the East US region as
EastUS.Provide a Tenant ID. The tenant ID is the directory ID of your Microsoft Entra tenant. To get the tenant ID, see Find your Microsoft Entra tenant.
If you set up an Azure Arc gateway, specify the Arc gateway ID. This is the resource ID of the Arc gateway that you set up. For more information, see About Azure Arc gateways.
Important
Make sure to verify all the inputs before you proceed. Any incorrect inputs here might result in a setup failure.
Select Next.
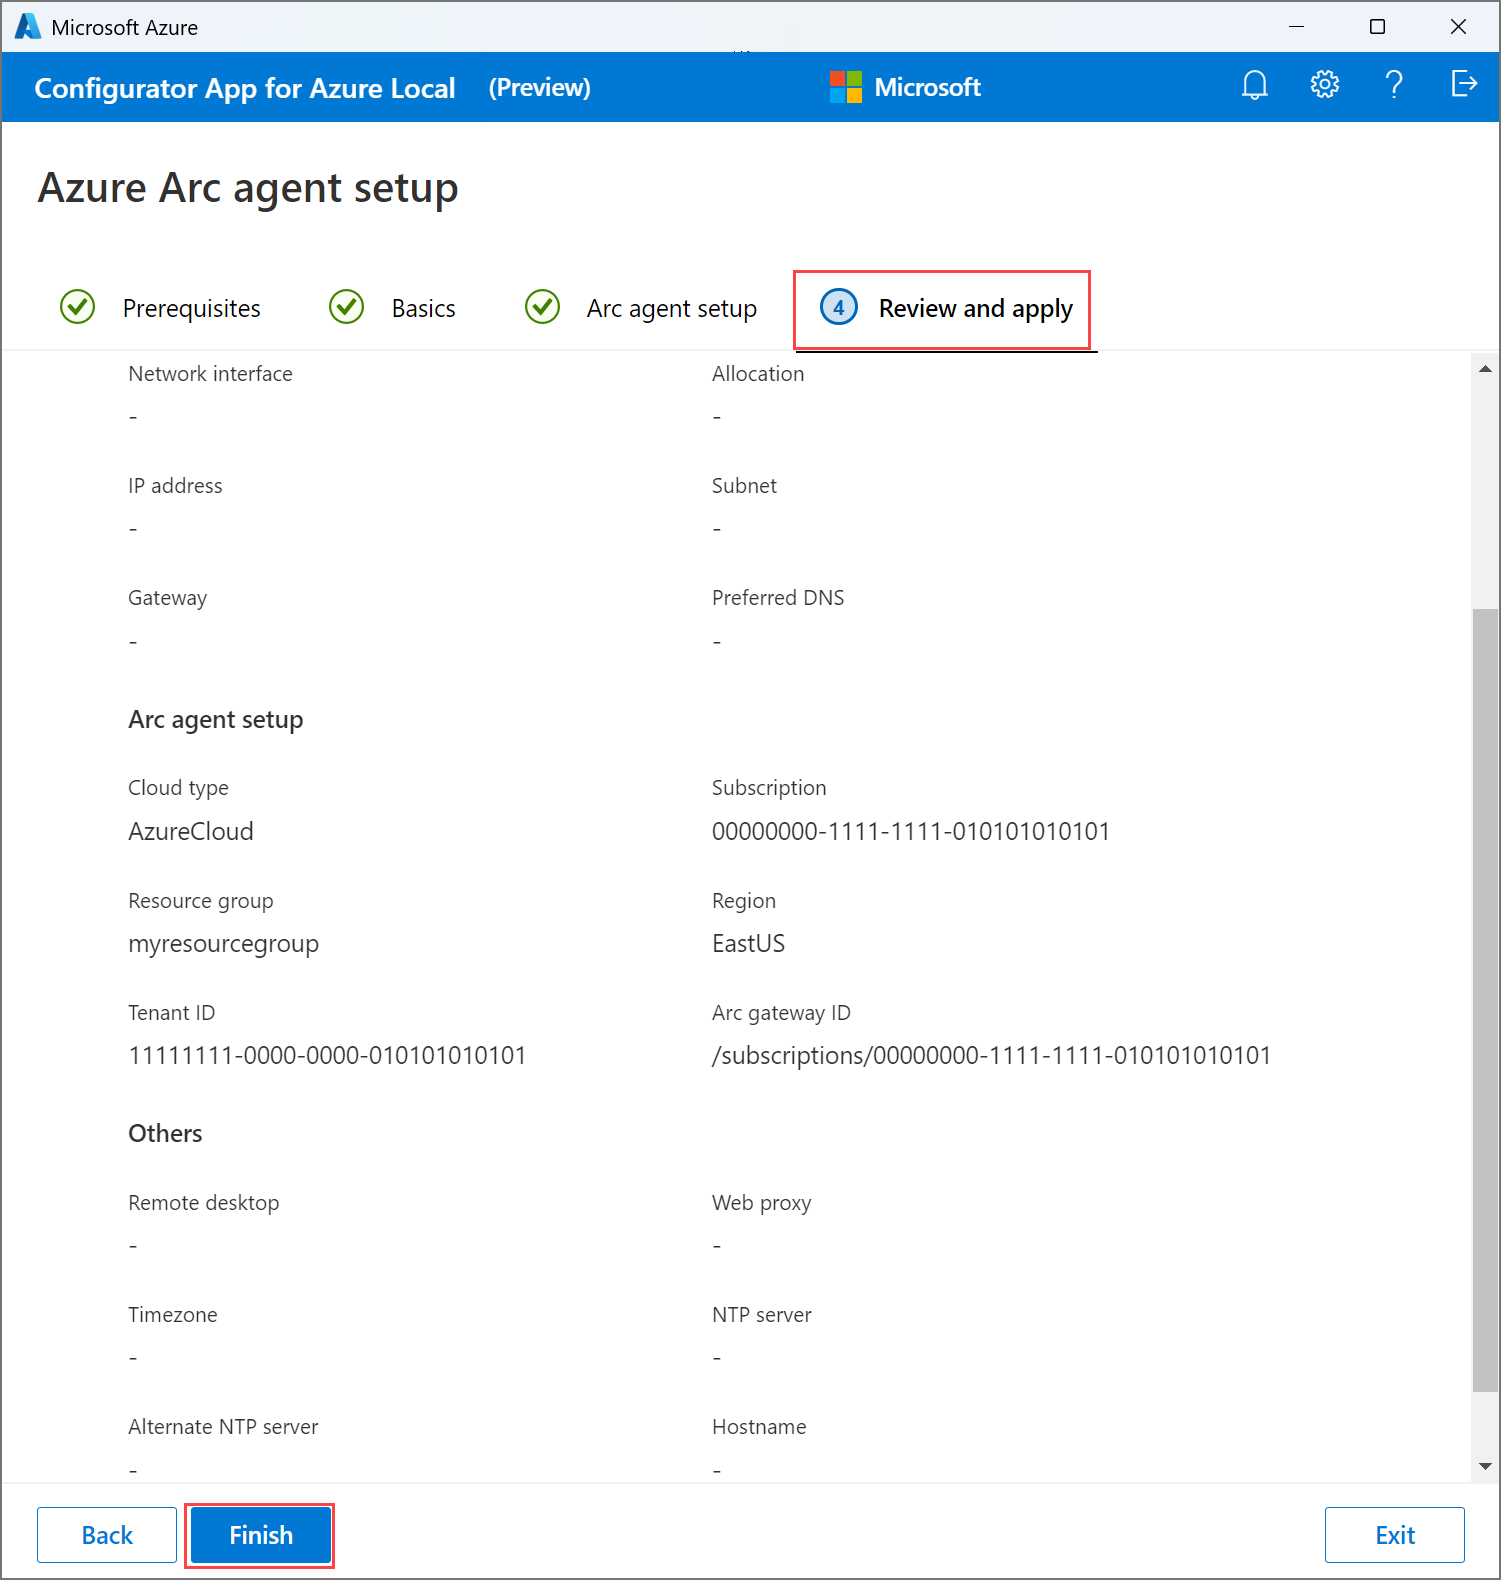
On the Review and apply tab, verify machine details. To modify any settings, go back. If satisfied with the current settings, select Finish. If you changed the hostname, your machines boot up automatically at this point and you must sign in again.


Step 2: Complete registration of machines to Azure
Wait for the configuration to complete. First, machine is configured with the basic details followed by registration of the machines to Azure.
During the Arc registration process, you must authenticate with your Azure account. The app displays a code that you must enter in the URL, displayed in the app, in order to authenticate. Follow the instructions to complete the authentication process.
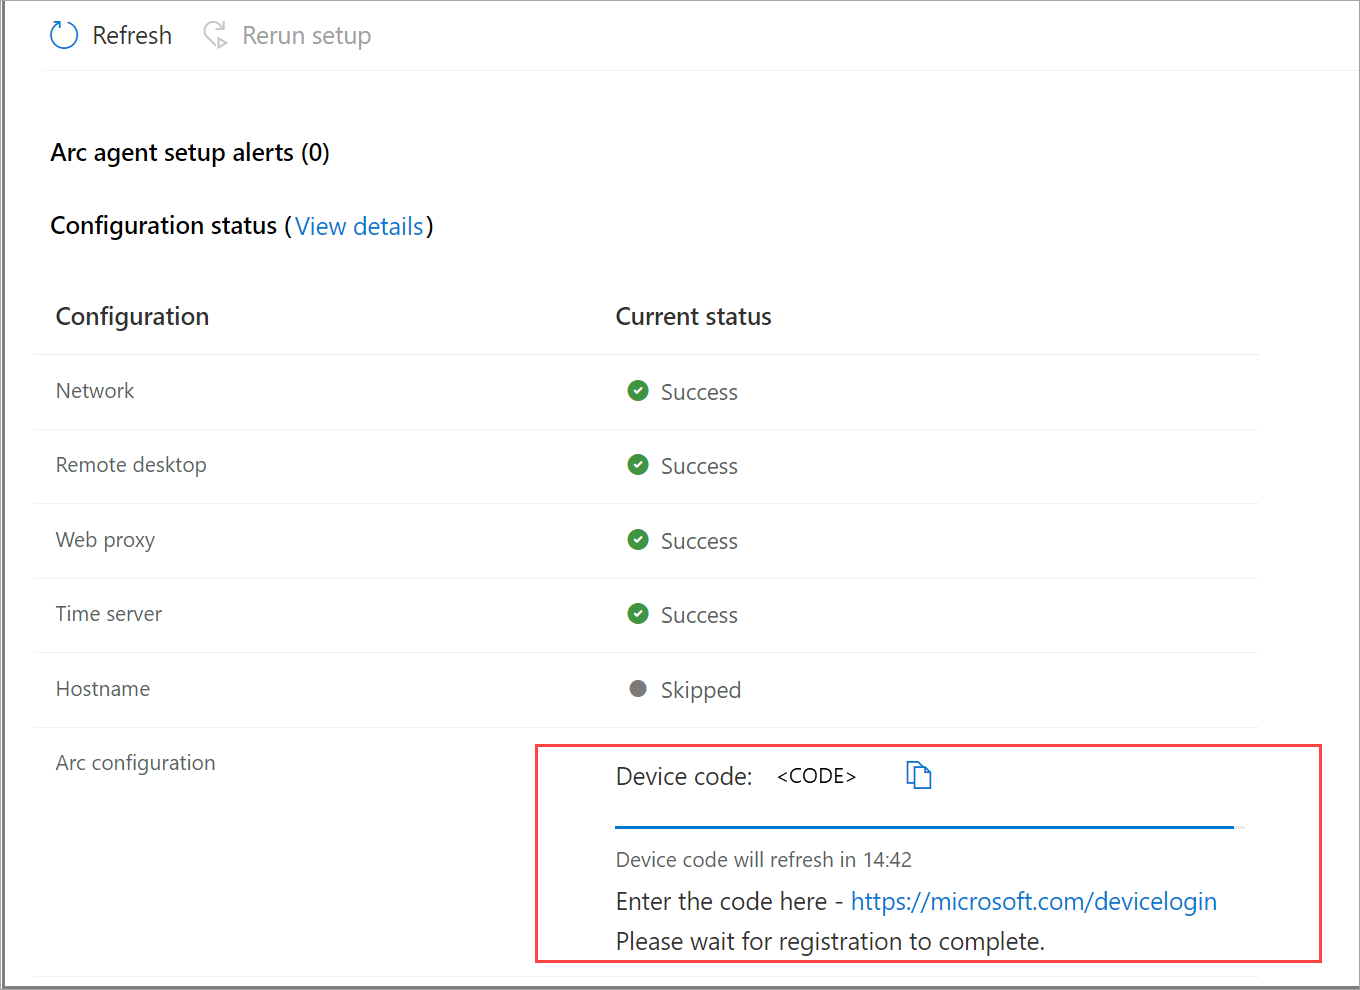
Once the configuration is complete, status for Arc configuration should display Success (Open in Azure portal).
Repeat all steps on the other machines until the Arc configuration succeeds. Select the Open in Azure portal link.

Step 3: Verify machines are connected to Arc
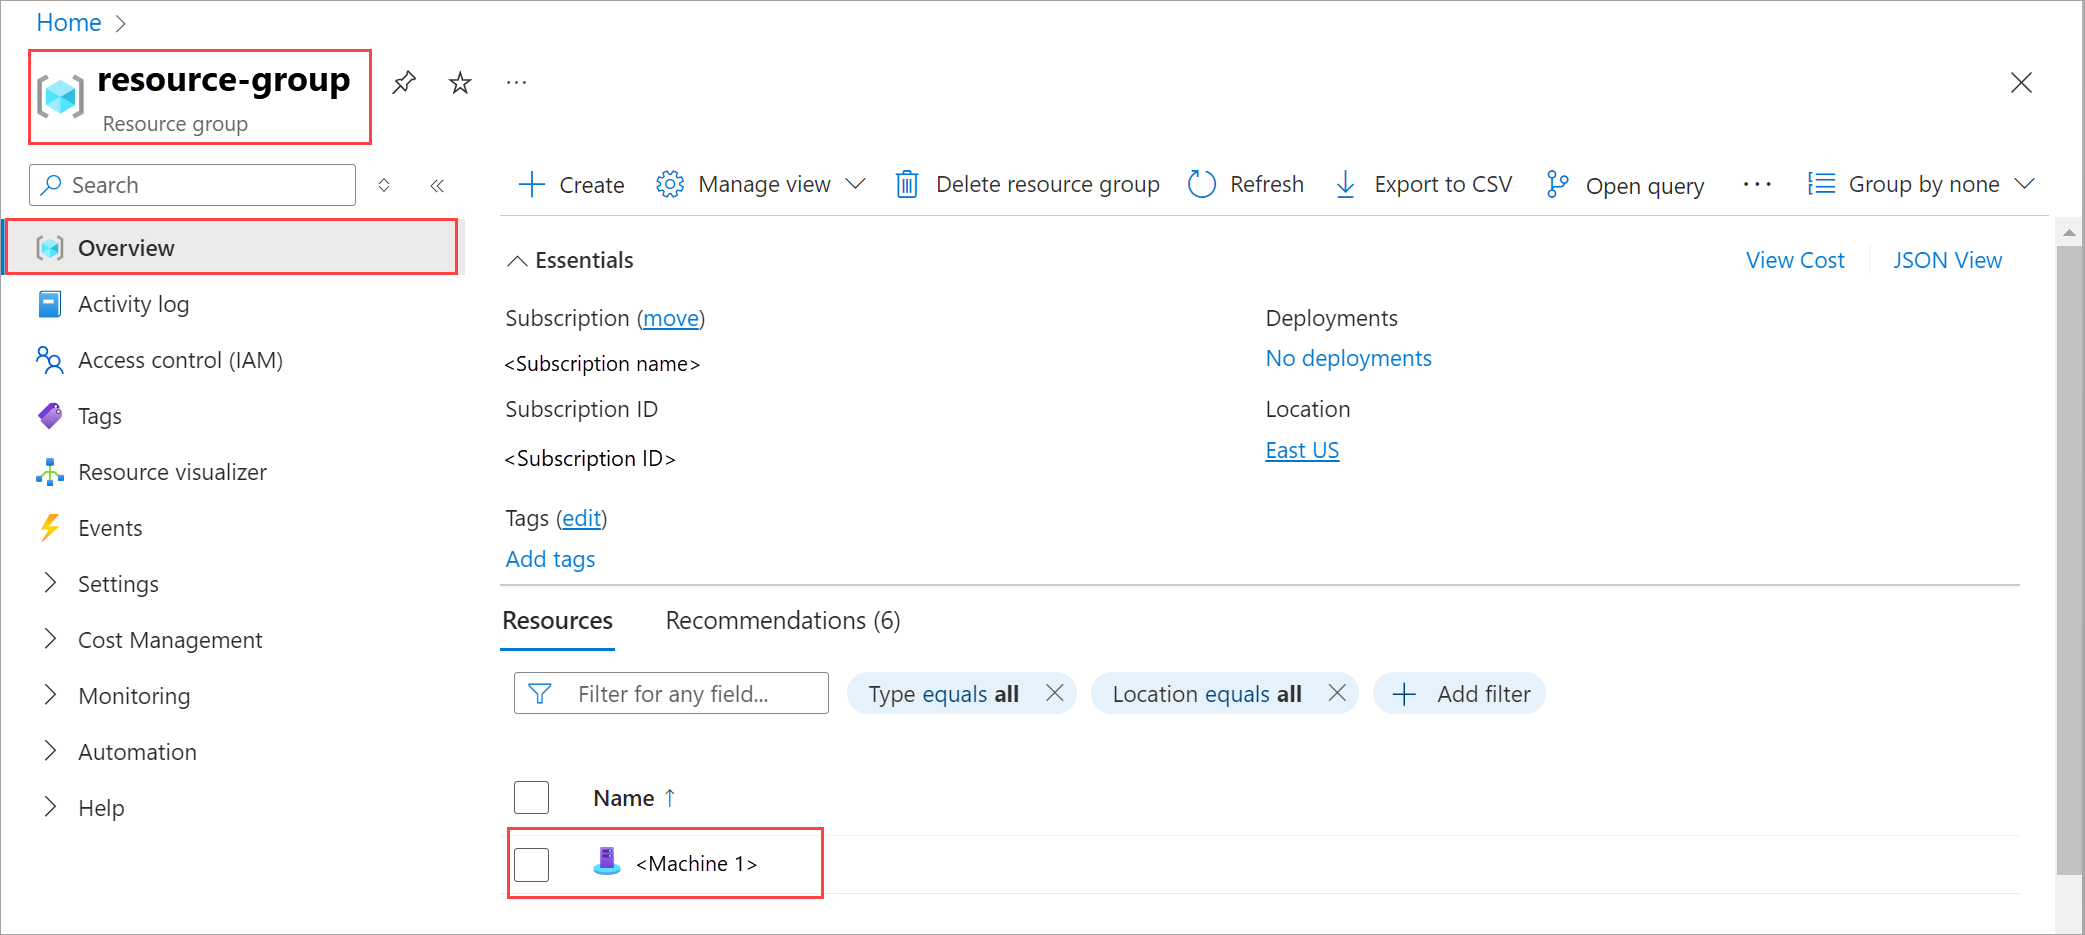
In the Azure portal, go to the resource group that you used for bootstrapping.
On the resource group used to bootstrap, you should see your Arc-enabled machines. In this example, you see a single machine.

Troubleshooting
You might need to collect logs or diagnose problems if you encounter any issues while using the app to configure machines. You can use the following methods to troubleshoot:
- Get logs from a machine.
- Run diagnostic tests.
- Collect a Support package.
- Clean previous installation.
Get logs if the app is inaccessible
If you can't access the app, you can get the logs from a machine. Logs are stored in the following location: C:\Windows\System32\Bootstrap\Logs. You can access the logs by connecting to the machine via Remote Desktop Protocol (RDP).
If you can access the app, follow the instructions in Run diagnostic tests to troubleshoot the issue and if needed, Collect a support package.
Run diagnostic tests from the app
To diagnose and troubleshoot any machine issues related to hardware, time server, and network, you can run the diagnostics tests. Use these steps to run the diagnostic tests from the app:
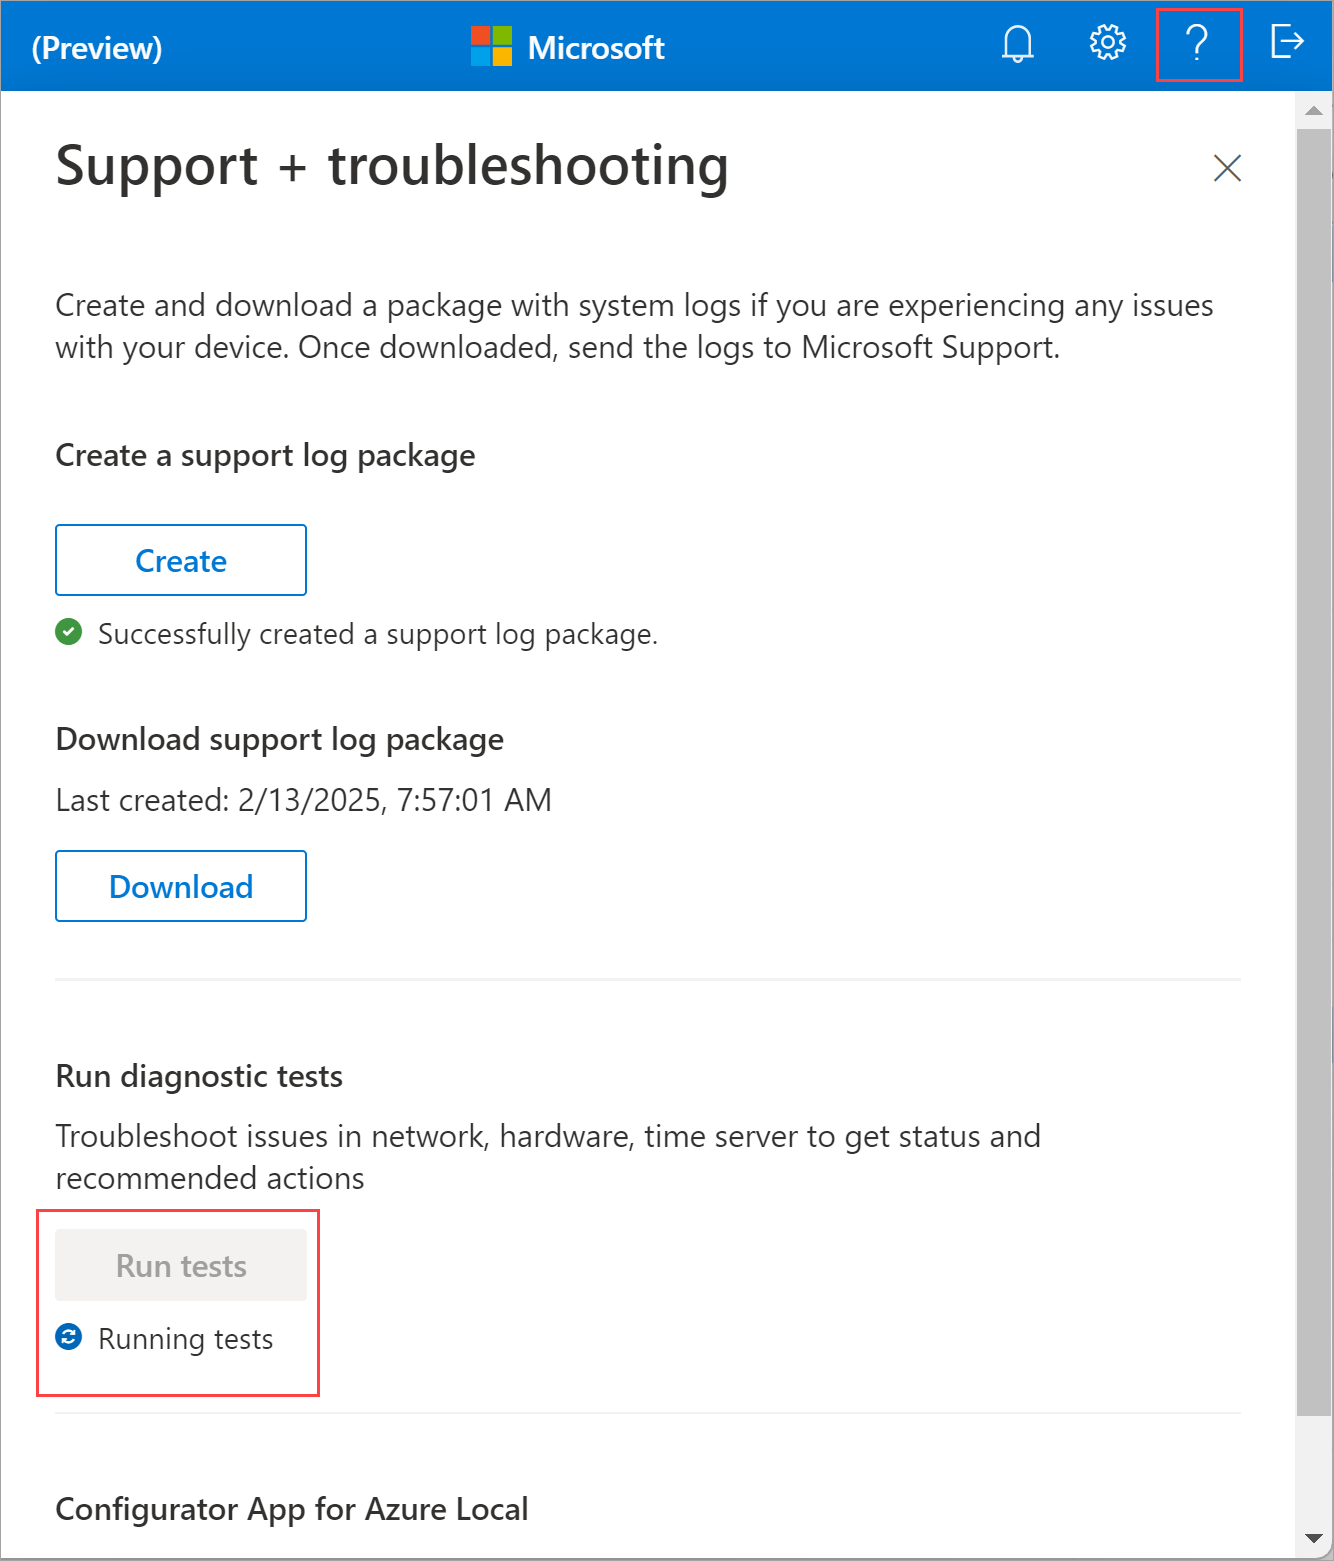
Select the help icon in the top-right corner of the app to open the Support + troubleshooting pane.
Select Run tests. The diagnostic tests check the health of the machine hardware, time server, and the network connectivity. The tests also check the status of the Azure Arc agent.
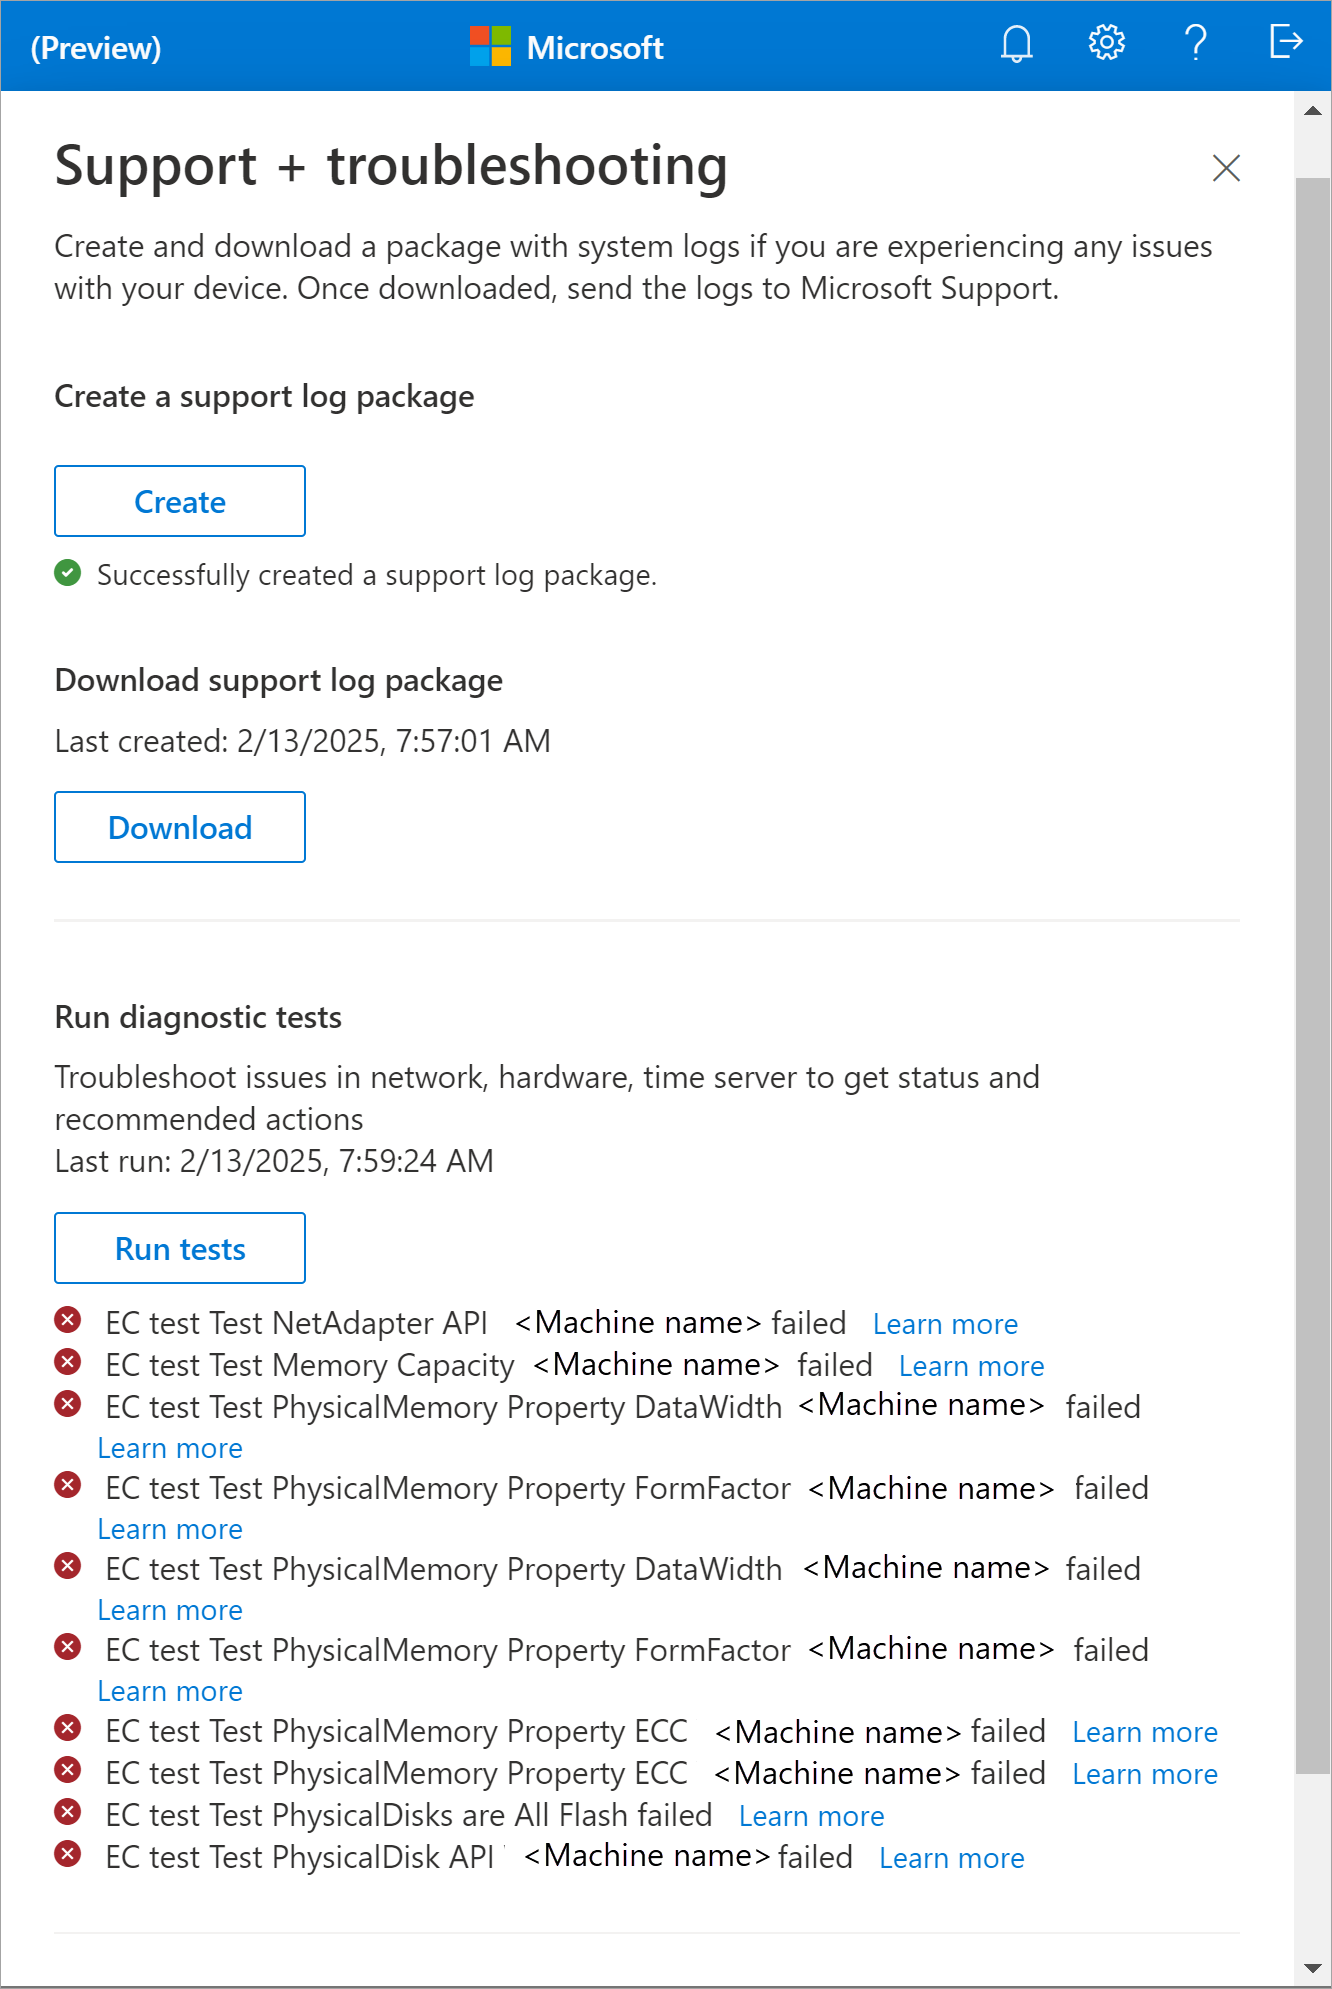
After the tests are completed, the results are displayed. Here's a sample output of the diagnostic tests when there's a machine issue:


Here's a table that describes the diagnostic tests:
| Test Name | Description |
|---|---|
| Internet connectivity | This test validates the internet connectivity of the machine. |
| Web proxy (if configured) | This test validates the web proxy configuration of the machine. |
| Time sync | This test validates the machine time settings and checks that the time server configured on the machine is valid and accessible. |
| Azure Arc agent | This test validates the Azure Arc agent is installed and running on the machine. |
| Environment checker | The Environment Checker tool runs a series of tests to evaluate the deployment readiness of your environment for Azure Local deployment including those for connectivity, hardware, Active Directory, network, and Arc integration. For more information, see Evaluate the deployment readiness of your environment for Azure Local. |
Collect a Support log package from the app
A Support package is composed of all the relevant logs that can help Microsoft Support troubleshoot any machine issues. You can generate a Support package via the app.
Download the Support log package
Follow these steps to collect and download a Support package:
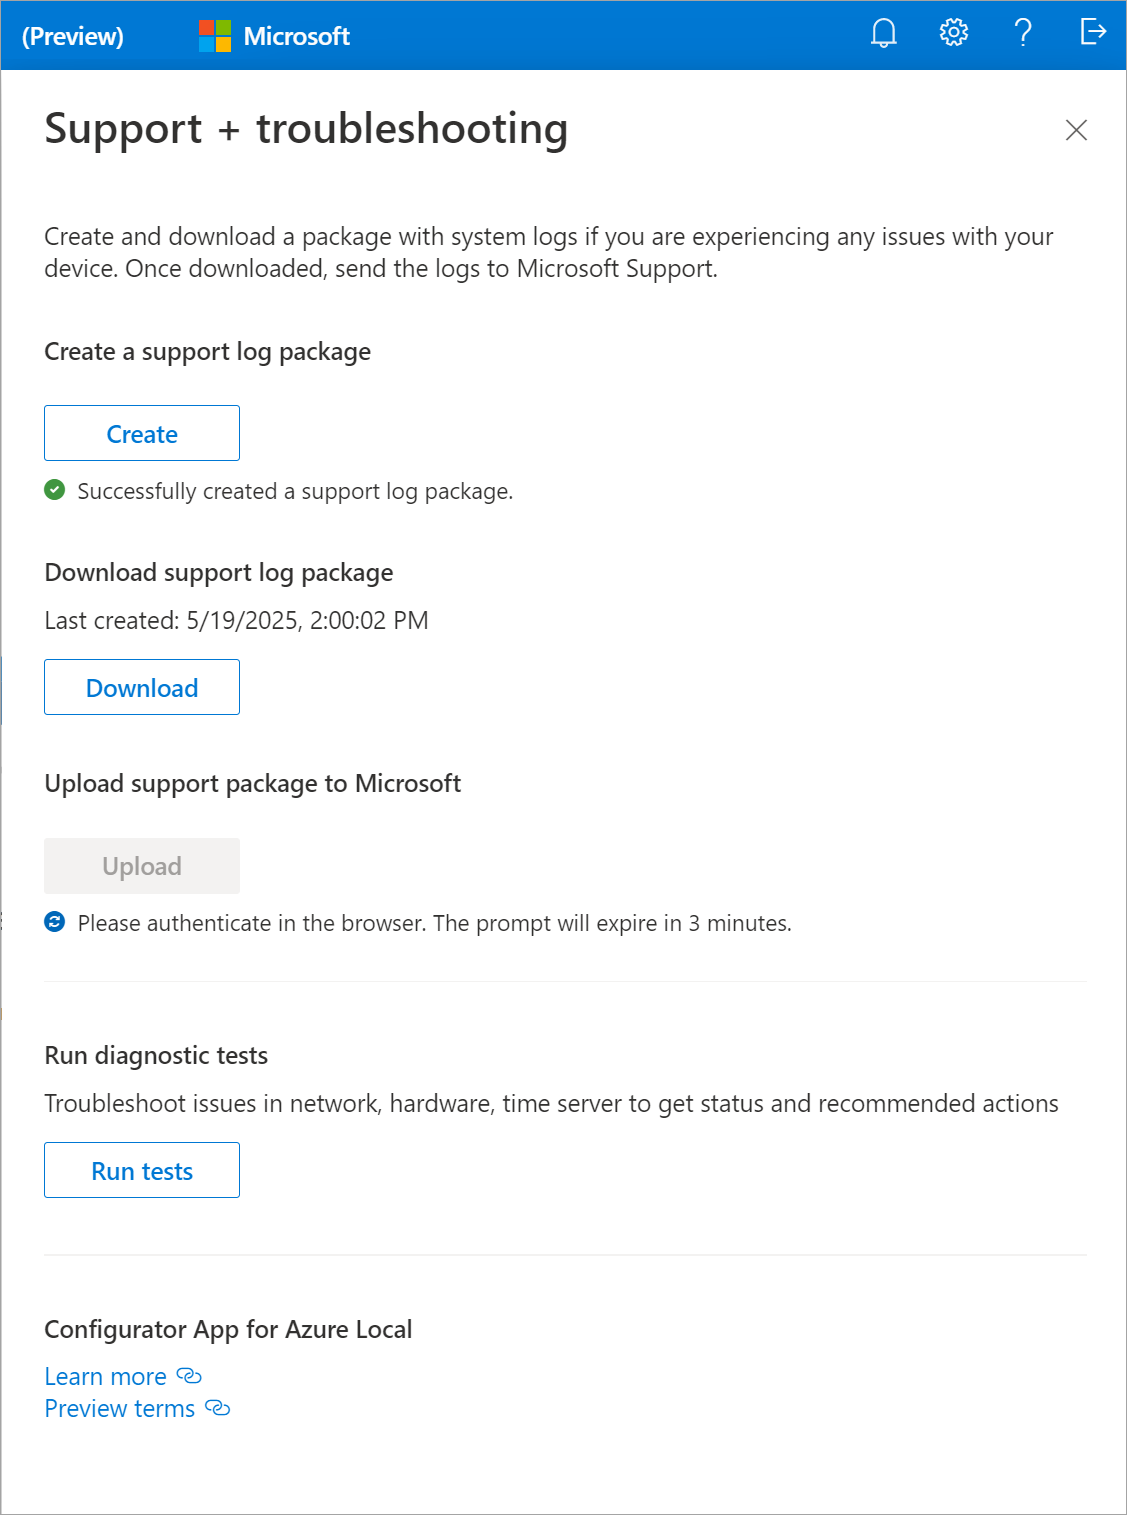
Select the help icon in the top-right corner of the app to open the Support + troubleshooting pane. Select Create to begin support package collection. The package collection could take several minutes.
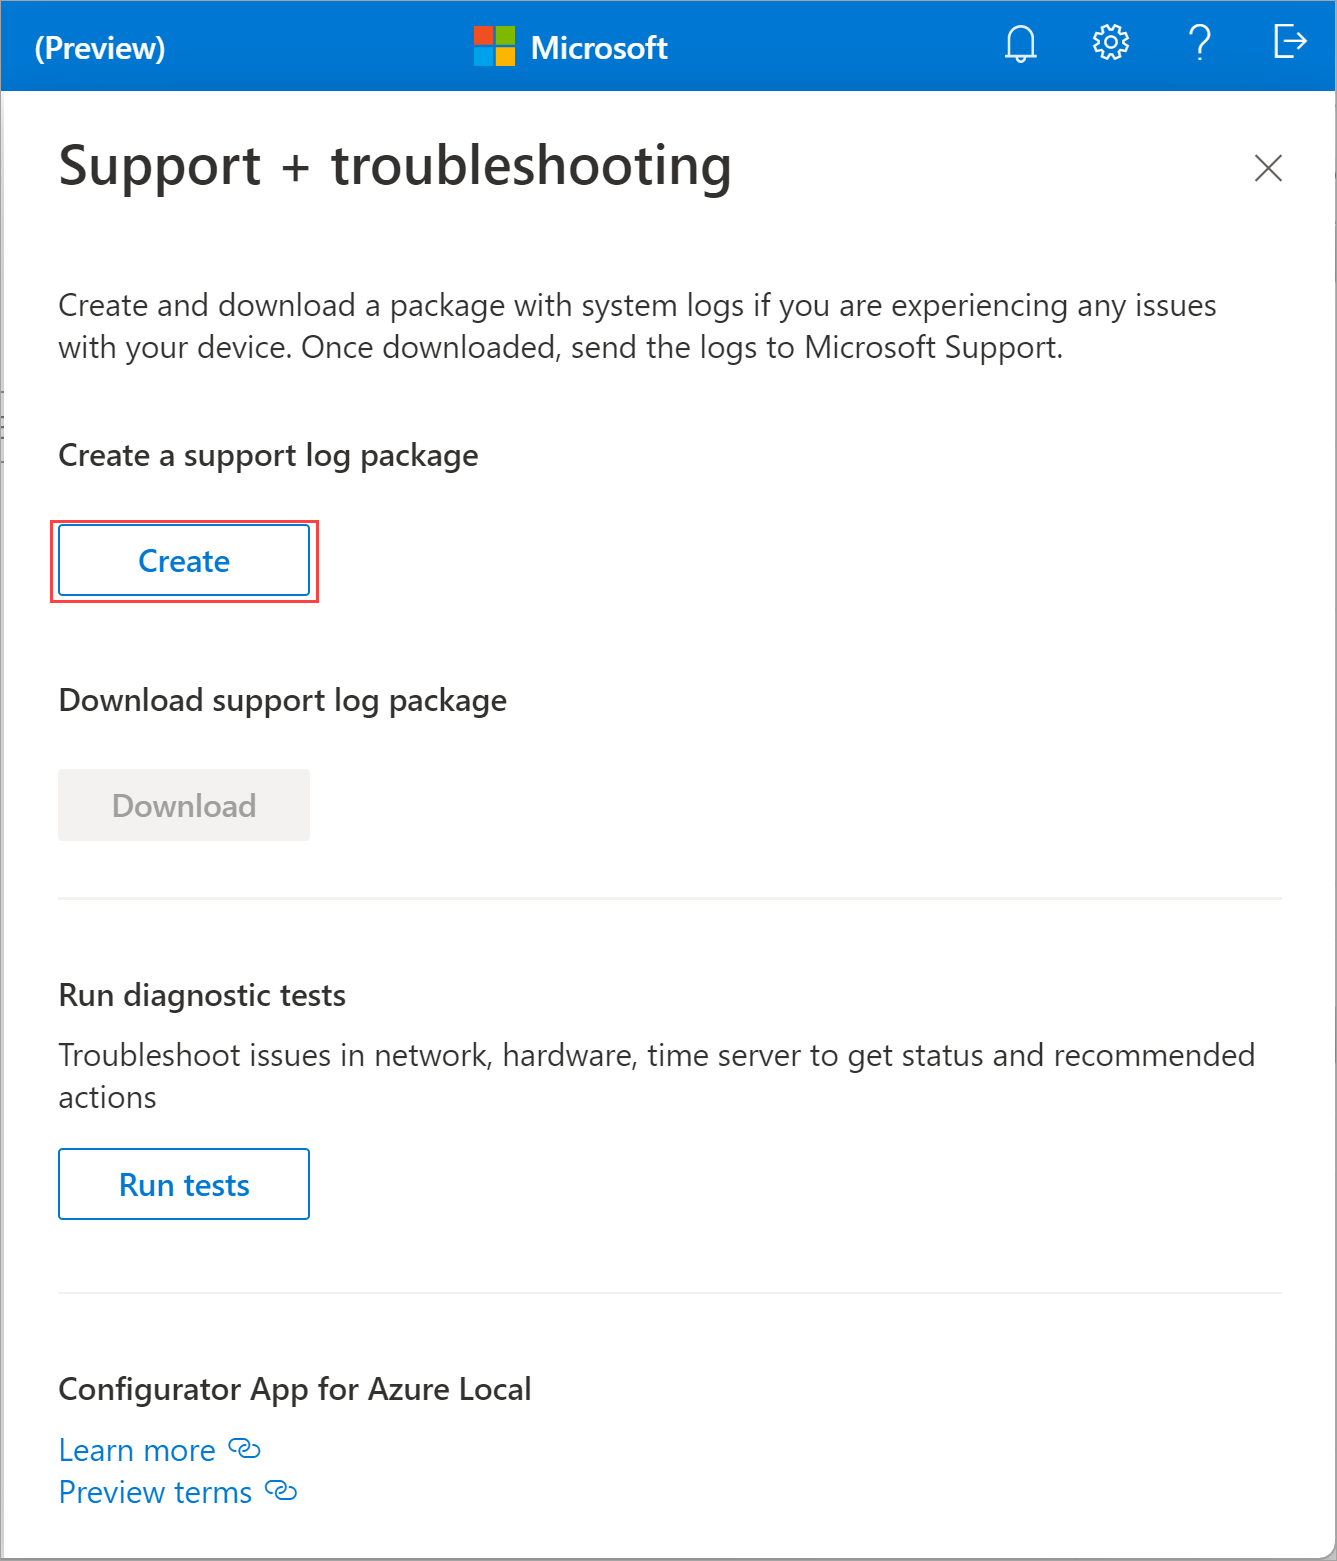
After the Support package is created, select Download. This action downloads two zipped packages corresponding to Support logs and Configurator logs on your local system. You can unzip the package and view the system log files.

Upload the Support log package
Important
- Make sure to run the Configurator app as an administrator to upload the Support log package.
- Uploading the Support log package to Microsoft can take up to 20 minutes. Make sure to leave the app open and running to complete this process.
Follow these steps to upload the Support package to Microsoft:
Select the help icon in the top-right corner of the app to open the Support + troubleshooting pane. Select Upload to upload the Support package to Microsoft.
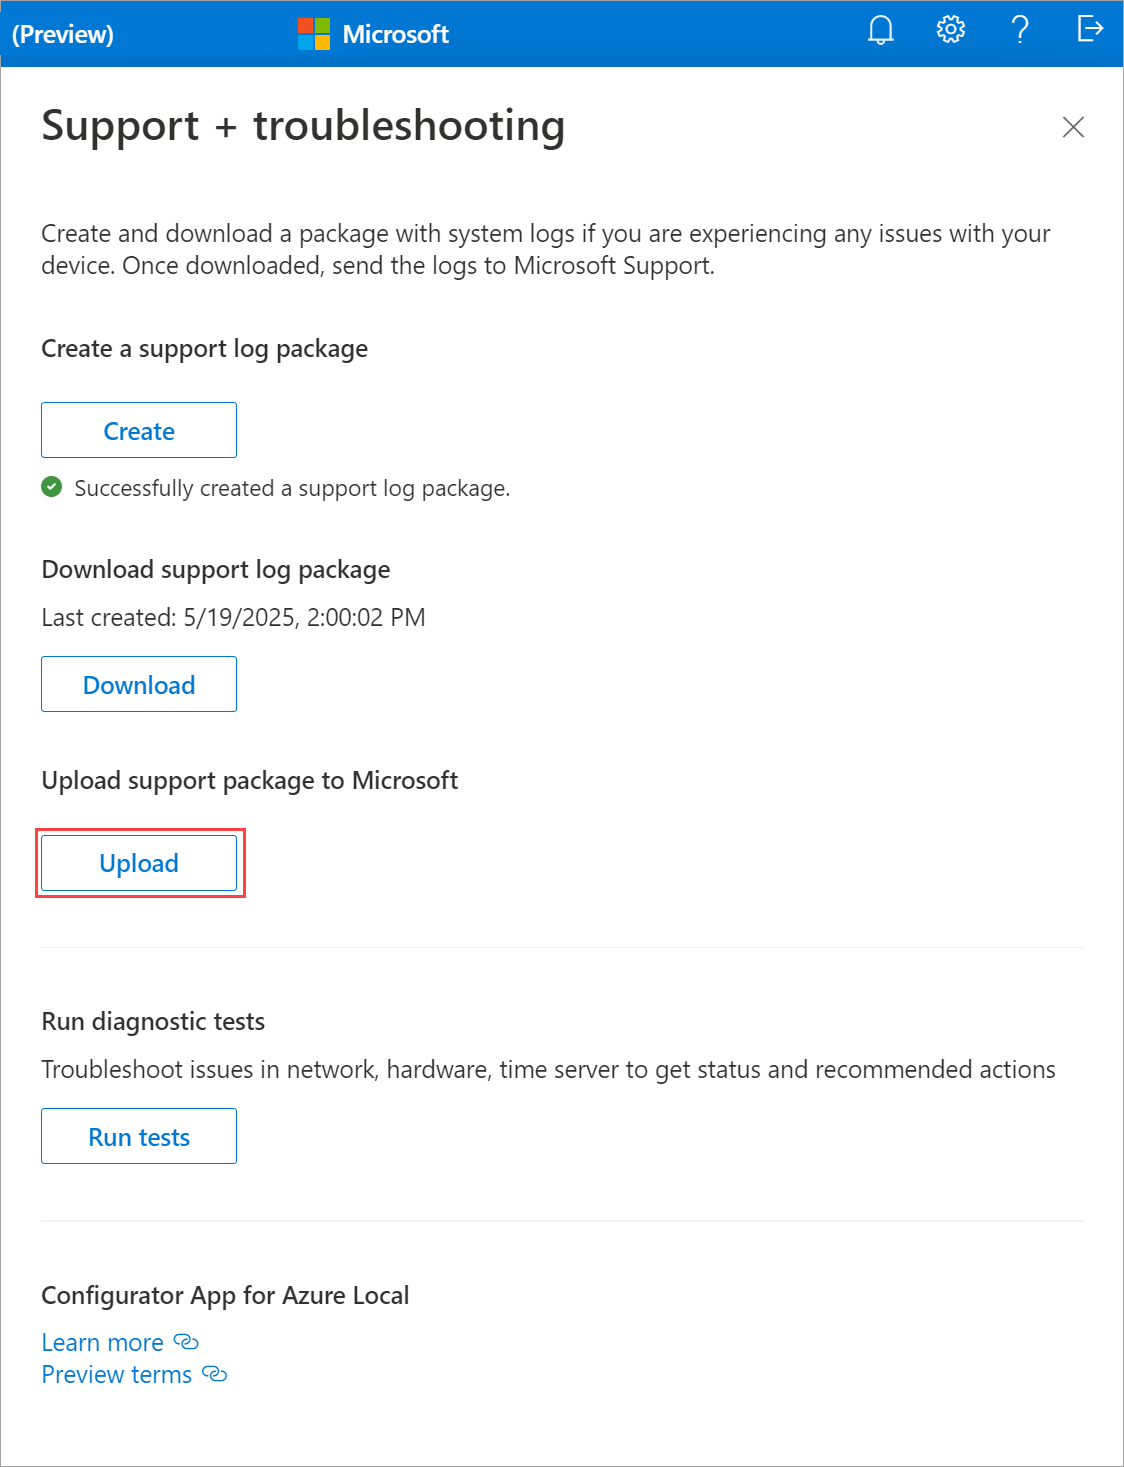
Provide the required information in the Upload Support package to Microsoft dialog:
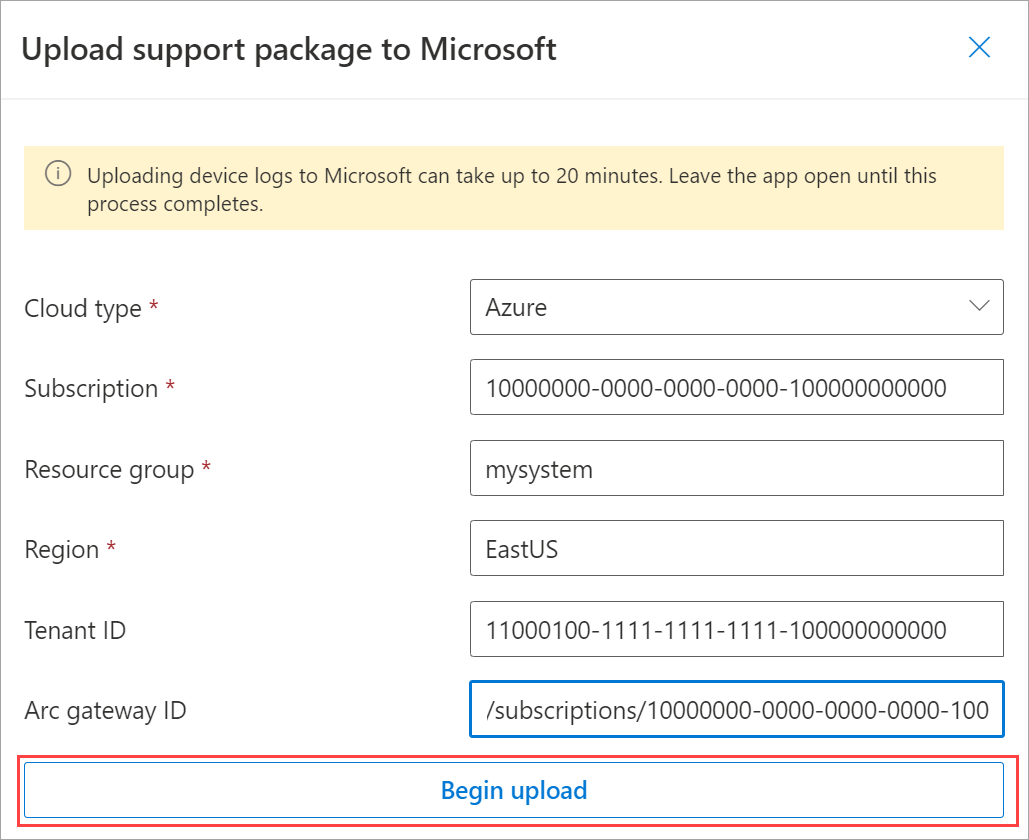
The fields in the dialog are prepopulated with the information you provided during Step 1: Configure the network and connect to Azure. You can modify the fields as needed.
Select Begin upload to upload the Support log package.
Authenticate in the browser with the same account that you used to sign in to register with Azure Arc. The upload process might take several minutes. Leave the app open and running until the upload is complete.
After the upload is complete, you receive a confirmation message. You can also view the upload status in the app.


Clean previous installation
If you have more than one version of the app installed, when you try to open the app, an older version of the app might open. To fix this issue, clean the previous installation. Follow these steps to clean the previous installation:
- Uninstall the Configurator app as you would any other app on the system.
- Delete the
C:\Users\%USERNAME%\AppData\Roaming\microsoft.-azure.-edge.-oobe.-local-uidirectory. - Launch the app again. The app should open without any issues.
Next steps
- After your machines are registered with Azure Arc, proceed to deploy your Azure Local system via one of the following options: