Note
Access to this page requires authorization. You can try signing in or changing directories.
Access to this page requires authorization. You can try changing directories.
The Azure Cache for Redis Enterprise tiers provide fully integrated and managed Redis Enterprise on Azure. The Enterprise tiers are:
- Enterprise, which uses volatile memory (DRAM) on a virtual machine to store data.
- Enterprise Flash, which uses both volatile and nonvolatile memory (NVMe or SSD) to store data.
Both Enterprise and Enterprise Flash tiers support open-source Redis 6 and some new features that aren't available in Basic, Standard, or Premium tiers. The supported features include Redis modules that enable search, bloom filters, and time series.
Prerequisites
- You need an Azure subscription before you begin. If you don't have one, create an account. For more information, see Special considerations for Enterprise tiers.
Important
The following Enterprise settings can be enabled or configured only at cache creation time. Gather the information you need to configure these settings before you create your cache.
- You must enable Enterprise modules at the time you create the cache instance. You can't change modules or enable module configuration after you create a cache.
- Redis Enterprise supports two clustering policies, Enterprise or OSS. Know which policy you need before you create your cache. You can't change the clustering policy of an Enterprise cache after you create it.
- If you're using the cache in a geo-replication group, you can't change eviction policies after the cache is created. Be sure to know the eviction policies of your primary nodes before you create the cache.
Availability by region
Azure Cache for Redis is continually expanding into new regions. To check the availability by region for all tiers, see Products available by region.
Create an Enterprise cache
In the Azure portal, search for and select Azure Cache for Redis.
On the Azure Cache for Redis page, select Create > Redis Enterprise.
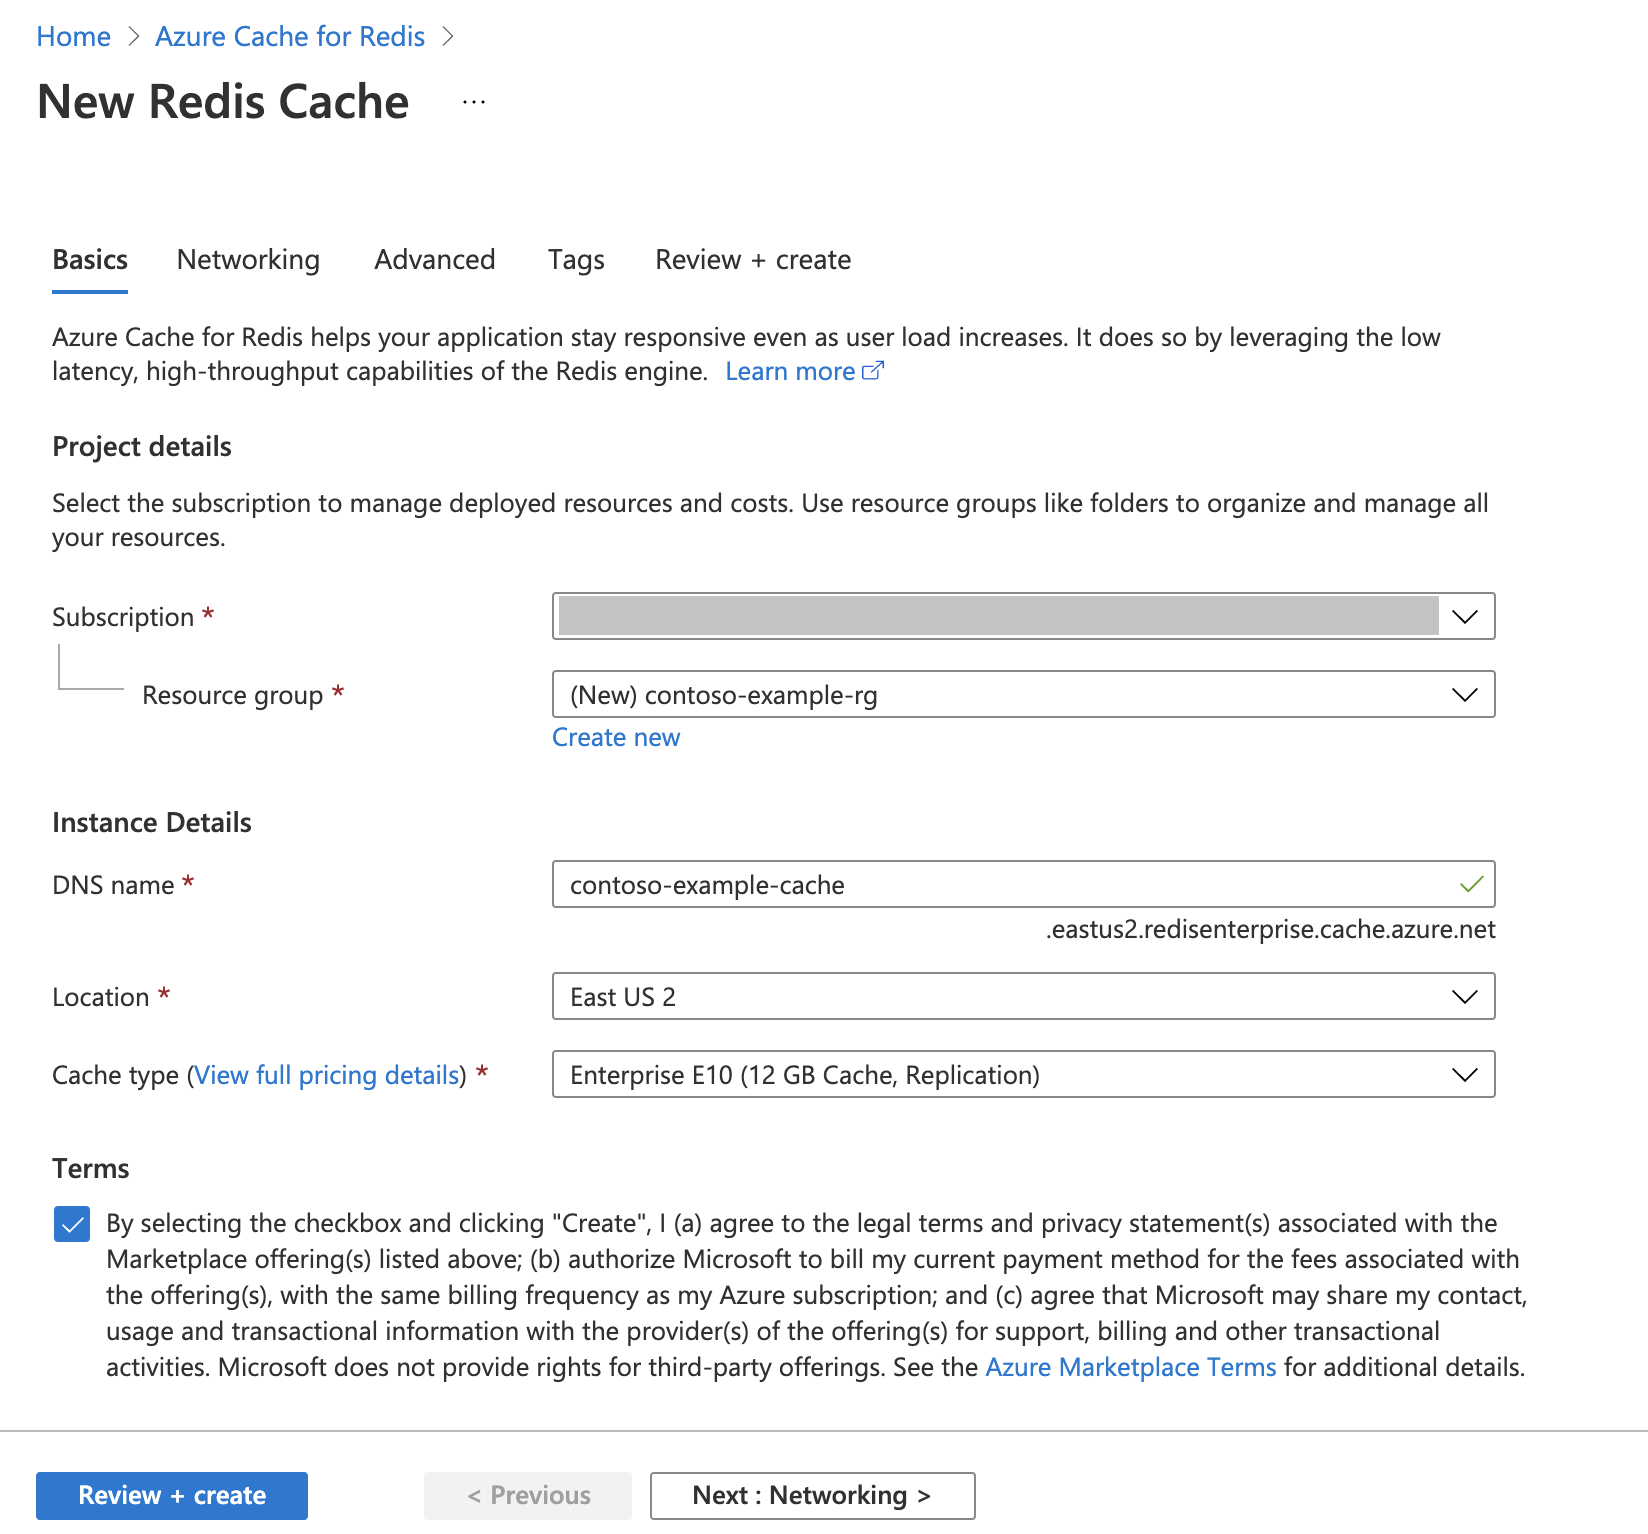
On the Basics tab of the New Redis Cache page, configure the following settings:
- Subscription: Select the subscription to use.
- Resource group: Select a resource group, or select Create new and enter a new resource group name. Putting all your app resources in the same resource group lets you easily manage or delete them together.
- Name: Enter a cache name that's unique in the region. The name must:
- Be a string of 1 to 63 characters when combined with the cache's region name.
- Contain only numbers, letters, and hyphens.
- Start and end with a number or letter.
- Not contain consecutive hyphens.
- Region: Select an Azure region near other services that use your cache. Enterprise tiers are available in selected Azure regions.
- Cache SKU: Select Enterprise or Enterprise Flash SKU to determine the available sizes, performance, and features for your cache.
- Cache size: Select a cache size.
Select the Terms checkbox.
Select the Networking tab, or select Next: Networking.
On the Networking tab, select a connectivity method to use for the cache. Private Endpoint is recommended for security. If you select Private Endpoint, select Add private endpoint and create the private endpoint.
Select the Advanced tab, or select Next: Advanced.
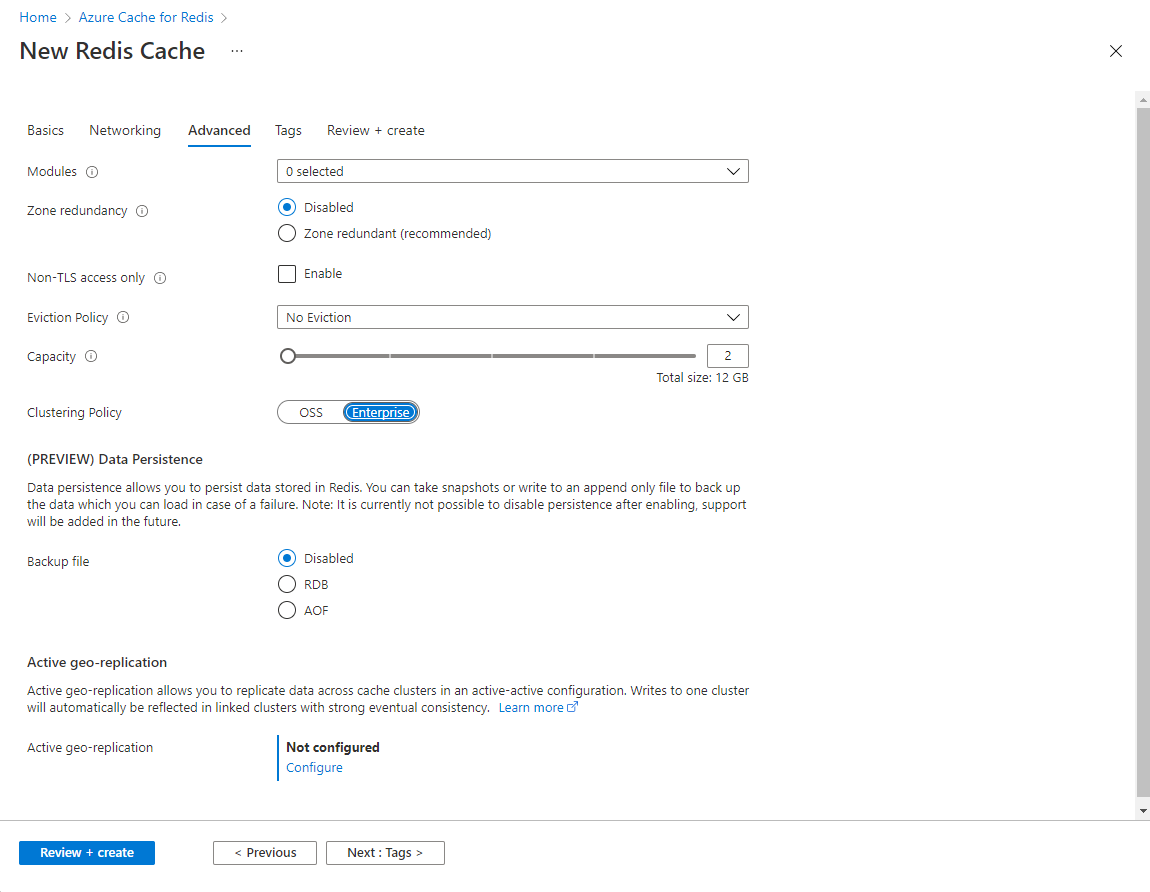
On the Advanced tab, configure the following options:
- Modules: Select the Redis modules you want to use.
- Zone redundancy: Select whether to enable zone redundancy (recommended).
- Non-TLS access only: Choose whether to Enable the non-TLS port and connect to the new cache without using Transport Layer Security (TLS). However, disabling TLS isn't recommended.
- Eviction Policy: Select an eviction policy.
- Capacity: Set the total number of virtual machines running for the cache.
- Clustering Policy: Set to Enterprise to use the Redis API, or to OSS to use the OSS Cluster API.
Under (PREVIEW) Data Persistence, choose whether to enable Redis Database (RDB), Append-only file (AOF), or no data persistence for your cache.
Under Active geo-replication, if your SKU supports it, select Configure to configure active-active geo-replication for your cache.
Under Customer-managed key encryption at rest, choose whether to use your own key to encrypt the disk's data. Otherwise, Microsoft-managed keys are used.
Important
You must enable modules at the time you create the Azure Redis instance. You can't change modules or enable module configuration after you create a cache.
Important
If you're using the RediSearch module, the Enterprise cluster policy is required, and No Eviction is the only eviction policy supported.
Important
Azure Redis Enterprise and Enterprise Flash tiers are inherently clustered, in contrast to Basic, Standard, and Premium tiers. Redis Enterprise supports two clustering policies, Enterprise and OSS. Use Enterprise to access your cache using the Redis API, or OSS to use the OSS Cluster API. You can't change the clustering policy of an Enterprise cache after you create it. For more information, see Clustering.
Important
If you're using this cache in a geo-replication group, you can't change eviction policies after the cache is created. Be sure to know the eviction policies of your primary nodes before you create the cache. For more information on active geo-replication, see Active geo-replication prerequisites.
Optionally, select the Tags tab or select Next: Tags, and enter tag names and values if you want to categorize your cache resources.
Select Review + create, and once validation passes, select Create.
It takes some time for the cache to create. You can monitor deployment progress on the portal Azure Cache for Redis page. When the cache Status displays Running, the cache is ready to use.