Quickstart: Azure AI Translator text client libraries
In this quickstart, get started using the Translator service to translate text using a programming language of your choice. For this project, we recommend using the free pricing tier (F0), while you're learning the technology, and later upgrading to a paid tier for production.
Prerequisites
You need an active Azure subscription. If you don't have an Azure subscription, you can create one for free
Once you have your Azure subscription, create a Translator resource in the Azure portal.
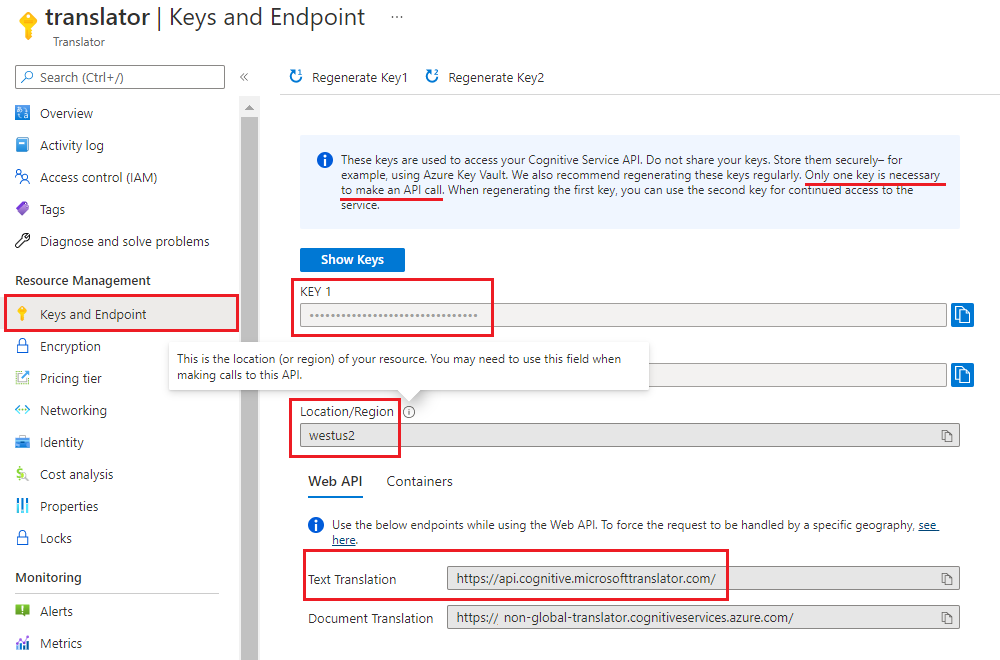
After your resource deploys, select Go to resource and retrieve your key and endpoint.
Get the key, endpoint, and region from the resource and connect your application to the Translator service. Paste these values into the code later in the quickstart. You can find them on the Azure portal Keys and Endpoint page:
Set up your C#/.NET environment
For this quickstart, we use the latest version of Visual Studio IDE to build and run the application.
Start Visual Studio.
On the Get started page, choose Create a new project.

On the Create a new project page, enter console in the search box. Choose the Console Application template, then choose Next.

In the Configure your new project dialog window, enter
text-translation-sdkin the Project name box. Then choose Next.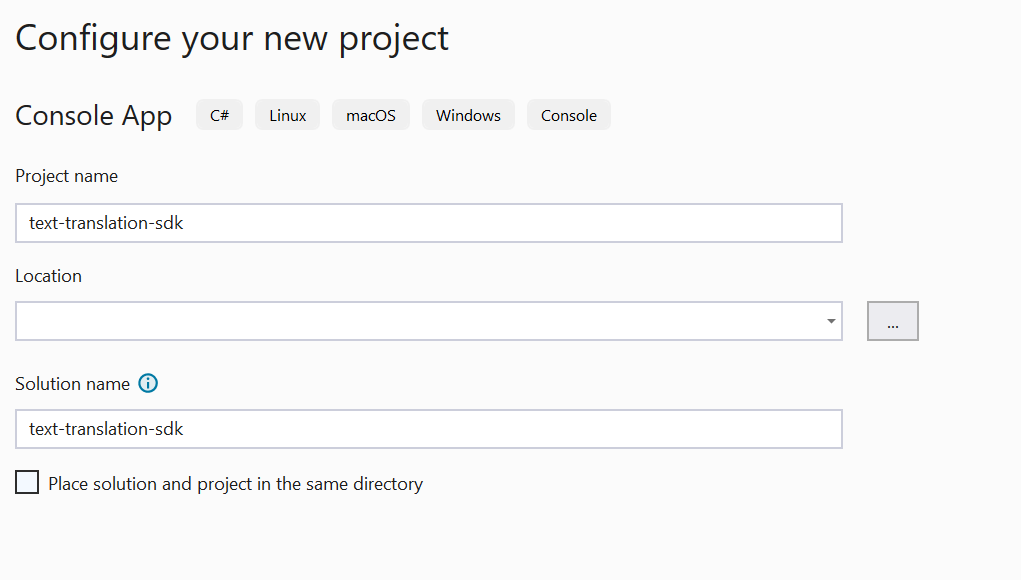
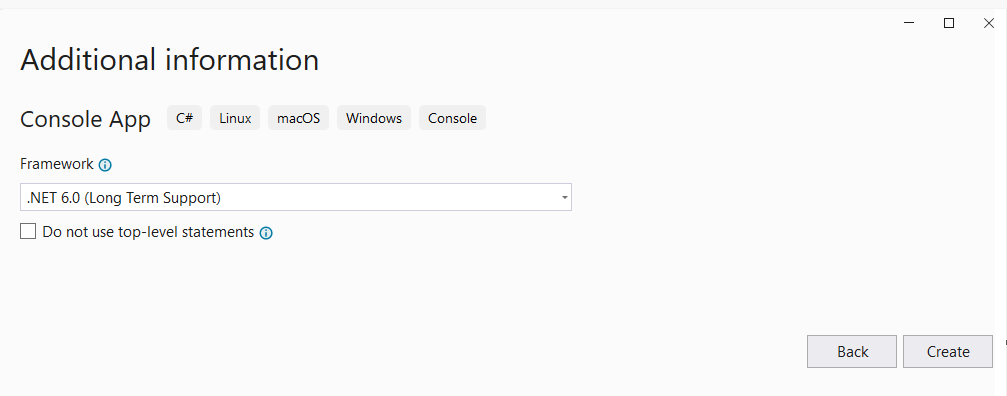
In the Additional information dialog window, select .NET 6.0 (Long-term support), and then select Create.
Install the client library with NuGet
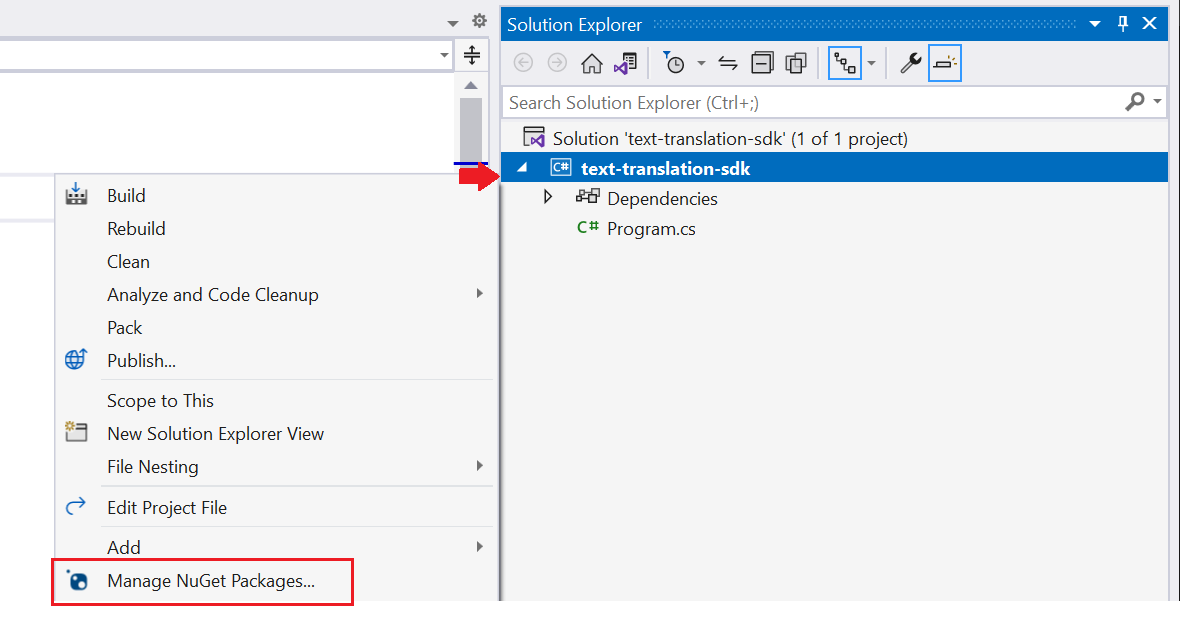
Right-click on your Translator-text-sdk project and select Manage NuGet Packages...
Select the Browse Tab and the Include prerelease checkbox and type Azure.AI.Translation.Text.

Select version
1.0.0-beta.1from the dropdown menu and install the package in your project.
Build your application
To interact with the Translator service using the client library, you need to create an instance of the TextTranslationClientclass. To do so, create an AzureKeyCredential with your key from the Azure portal and a TextTranslationClient instance with the AzureKeyCredential. The authentication varies slightly depending on whether your resource uses the regional or global endpoint. For this project, authenticate using the global endpoint. For more information about using a regional endpoint, see Translator text sdks.
Note
- Starting with .NET 6, new projects using the
consoletemplate generate a new program style that differs from previous versions. - The new output uses recent C# features that simplify the code you need to write.
- When you use the newer version, you only need to write the body of the
Mainmethod. You don't need to include top-level statements, global using directives, or implicit using directives. - For more information, see New C# templates generate top-level statements.
Open the Program.cs file.
Delete the pre-existing code, including the line
Console.WriteLine("Hello World!"), and enter the following code sample into your application's Program.cs file:
Code sample
Important
Remember to remove the key from your code when you're done, and never post it publicly. For production, use a secure way of storing and accessing your credentials like Azure Key Vault. For more information, see Azure AI services security.
Translate text
Note
In this example we are using the global endpoint. If you're using a regional endpoint, see Create a Text Translation client.
using Azure;
using Azure.AI.Translation.Text;


string key = "<your-key>";

AzureKeyCredential credential = new(key);
TextTranslationClient client = new(credential);

try
{
    string targetLanguage = "fr";
    string inputText = "This is a test.";

    Response<IReadOnlyList<TranslatedTextItem>> response = await client.TranslateAsync(targetLanguage, inputText).ConfigureAwait(false);
    IReadOnlyList<TranslatedTextItem> translations = response.Value;
    TranslatedTextItem translation = translations.FirstOrDefault();

    Console.WriteLine($"Detected languages of the input text: {translation?.DetectedLanguage?.Language} with score: {translation?.DetectedLanguage?.Score}.");
    Console.WriteLine($"Text was translated to: '{translation?.Translations?.FirstOrDefault().To}' and the result is: '{translation?.Translations?.FirstOrDefault()?.Text}'.");
}
catch (RequestFailedException exception)
{
    Console.WriteLine($"Error Code: {exception.ErrorCode}");
    Console.WriteLine($"Message: {exception.Message}");
}
Run your application
Once you've added the code sample to your application, choose the green Start button next to formRecognizer_quickstart to build and run your program, or press F5.

Here's a snippet of the expected output:

Set up your Java environment
Note
The Azure Text Translation SDK for Java is tested and supported on Windows, Linux, and macOS platforms. It is not tested on other platforms and doesn't support Android deployments.
For this quickstart, we use the Gradle build automation tool to create and run the application.
You should have the latest version of Visual Studio Code or your preferred IDE. See Java in Visual Studio Code.
Tip
- Visual Studio Code offers a Coding Pack for Java for Windows and macOS.The coding pack is a bundle of VS Code, the Java Development Kit (JDK), and a collection of suggested extensions by Microsoft. The Coding Pack can also be used to fix an existing development environment.
- If you are using VS Code and the Coding Pack For Java, install the Gradle for Java extension.
If you aren't using Visual Studio Code, make sure you have the following installed in your development environment:
A Java Development Kit (OpenJDK) version 8 or later.
Gradle, version 6.8 or later.
Create a new Gradle project
In console window (such as cmd, PowerShell, or Bash), create a new directory for your app called text-translation-app, and navigate to it.
mkdir text-translation-app && text-translation-appmkdir text-translation-app; cd text-translation-appRun the
gradle initcommand from the text-translation-app directory. This command creates essential build files for Gradle, including build.gradle.kts, which is used at runtime to create and configure your application.gradle init --type basicWhen prompted to choose a DSL, select Kotlin.
Accept the default project name (text-translation-app) by selecting Return or Enter.
Note
It may take a few minutes for the entire application to be created, but soon you should see several folders and files including
build-gradle.kts.Update
build.gradle.ktswith the following code. The main class is Translate:plugins { java application } application { mainClass.set("Translate") } repositories { mavenCentral() } dependencies { implementation("com.azure:azure-ai-translation-text:1.0.0-beta.1") }
Create your Java application
From the text-translation-app directory, run the following command:
mkdir -p src/main/javaThe command creates the following directory structure:
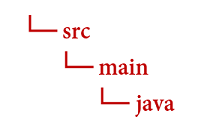
Navigate to the
javadirectory and create a file namedTranslate.java.Tip
You can create a new file using PowerShell.
Open a PowerShell window in your project directory by holding down the Shift key and right-clicking the folder.
Enter the following command New-Item Translate.java.
You can also create a new file in your IDE named
Translate.javaand save it to thejavadirectory.
Copy and paste the following text translation code sample into your Translate.java file.
- Update
"<your-key>","<your-endpoint>"and"<region>"with values from your Azure portal Translator instance.
- Update
Code sample
Translate text
Important
Remember to remove the key from your code when you're done, and never post it publicly. For production, use a secure way of storing and accessing your credentials like Azure Key Vault. For more information, see Azure AI services security.
To interact with the Translator service using the client library, you need to create an instance of the TextTranslationClientclass. To do so, create an AzureKeyCredential with your key from the Azure portal and a TextTranslationClient instance with the AzureKeyCredential. The authentication varies slightly depending on whether your resource uses the regional or global endpoint. For this project, authenticate using the global endpoint. For more information about using a regional endpoint, see Translator text sdks.
Note
In this example we are using the global endpoint. If you're using a regional endpoint, see Create a Text Translation client.
import java.util.List;
import java.util.ArrayList;
import com.azure.ai.translation.text.models.*;
import com.azure.ai.translation.text.TextTranslationClientBuilder;
import com.azure.ai.translation.text.TextTranslationClient;

import com.azure.core.credential.AzureKeyCredential;
/**
 * Translate text from known source language to target language.
 */
public class Translate {

    public static void main(String[] args) {
        String apiKey = "<your-key>";
        AzureKeyCredential credential = new AzureKeyCredential(apiKey);

        TextTranslationClient client = new TextTranslationClientBuilder()
                .credential(credential)
                .buildClient();

        String from = "en";
        List<String> targetLanguages = new ArrayList<>();
        targetLanguages.add("es");
        List<InputTextItem> content = new ArrayList<>();
        content.add(new InputTextItem("This is a test."));

        List<TranslatedTextItem> translations = client.translate(targetLanguages, content, null, from, TextType.PLAIN, null, null, null, false, false, null, null, null, false);

        for (TranslatedTextItem translation : translations) {
            for (Translation textTranslation : translation.getTranslations()) {
                System.out.println("Text was translated to: '" + textTranslation.getTo() + "' and the result is: '" + textTranslation.getText() + "'.");
            }
        }
    }
}
Build and run the application**
Once you've added the code sample to your application, navigate back to your main project directory—text-translation-app.
Build your application with the
buildcommand (you should receive a BUILD SUCCESSFUL message):gradle buildRun your application with the
runcommand (you should receive a BUILD SUCCESSFUL message):gradle run
Here's a snippet of the expected output:

Set up your Node.js environment
For this quickstart, we use the Node.js JavaScript runtime environment to create and run the application.
If you haven't done so already, install the latest version of Node.js. Node Package Manager (npm) is included with the Node.js installation.
Tip
If you're new to Node.js, try the Introduction to Node.js Learn module.
In a console window (such as cmd, PowerShell, or Bash), create and navigate to a new directory for your app named
text-translation-app.mkdir text-translation-app && cd text-translation-appmkdir text-translation-app; cd text-translation-appRun the npm init command to initialize the application and scaffold your project.
npm initSpecify your project's attributes by accepting the prompts presented in the terminal.
- The most important attributes are name, version number, and entry point.
- We recommend keeping
index.jsfor the entry point name. The description, test command, GitHub repository, keywords, author, and license information are optional attributes—they can be skipped for this project. - Accept the suggestions in parentheses by selecting Return or Enter.
- After you've completed the prompts, a
package.jsonfile will be created in your text-translation-app directory.
Install the client library
Open a terminal window and install the Azure Text Translation client library for JavaScript with npm:
npm i @azure-rest/[email protected]
Build your application
To interact with the Translator service using the client library, you need to create an instance of the TextTranslationClientclass. To do so, create a TranslateCredential with your key and <region> from the Azure portal and a TextTranslationClient instance. For more information, see Translator text sdks.
Create the
index.jsfile in the app directory.Tip
You can create a new file using PowerShell.
Open a PowerShell window in your project directory by holding down the Shift key and right-clicking the folder.
Enter the following command New-Item index.js.
You can also create a new file named
index.jsin your IDE and save it to thetext-translation-appdirectory.
Copy and paste the following text translation code sample into your
index.jsfile. Update<your-endpoint>and<your-key>with values from your Azure portal Translator instance.
Code sample
Important
Remember to remove the key from your code when you're done, and never post it publicly. For production, use a secure way of storing and accessing your credentials like Azure Key Vault. For more information, see Azure AI services security.
Translate text
Note
In this example we are using a regional endpoint. If you're using the global endpoint, see Create a Text Translation client.
const TextTranslationClient = require("@azure-rest/ai-translation-text").default

const apiKey = "<your-key>";
const endpoint = "<your-endpoint>";
const region = "<region>";

async function main() {

  console.log("== Text translation sample ==");

  const translateCredential = {
    key: apiKey,
    region,
  };
  const translationClient = new TextTranslationClient(endpoint,translateCredential);

  const inputText = [{ text: "This is a test." }];
  const translateResponse = await translationClient.path("/translate").post({
    body: inputText,
    queryParameters: {
      to: "fr",
      from: "en",
    },
  });

  const translations = translateResponse.body;
  for (const translation of translations) {
    console.log(
      `Text was translated to: '${translation?.translations[0]?.to}' and the result is: '${translation?.translations[0]?.text}'.`
    );
  }
}

main().catch((err) => {
    console.error("An error occurred:", err);
    process.exit(1);
  });

  module.exports = { main };
Run your application
Once you've added the code sample to your application, run your program:
Navigate to the folder where you have your text translation application (text-translation-app).
Type the following command in your terminal:
node index.js
Here's a snippet of the expected output:

Set up your Python project
If you haven't done so already, install the latest version of Python 3.x. The Python installer package (pip) is included with the Python installation.
Tip
If you're new to Python, try the Introduction to Python Learn module.
Open a terminal window and install the
Azure Text Translationclient library for Python withpip:pip install azure-ai-translation-text==1.0.0b1
Build your application
To interact with the Translator service using the client library, you need to create an instance of the TextTranslationClientclass. To do so, create a TranslatorCredential with your key from the Azure portal and a TextTranslationClient instance. For more information, see Translator text sdks.
Create a new Python file called text-translation-app.py in your preferred editor or IDE.
Copy and paste the following text translation code sample code-sample into the text-translation-app.py file. Update
<your-key>,<your-endpoint>, and<region>with values from your Azure portal Translator instance.
Code sample
Important
Remember to remove the key from your code when you're done, and never post it publicly. For production, use a secure way of storing and accessing your credentials like Azure Key Vault. For more information, see Azure AI services security.
Translate text
Note
In this example we are using a regional endpoint. If you're using the global endpoint, see Create a Text Translation client.
from azure.ai.translation.text import TextTranslationClient, TranslatorCredential
from azure.ai.translation.text.models import InputTextItem
from azure.core.exceptions import HttpResponseError

# set `<your-key>`, `<your-endpoint>`, and  `<region>` variables with the values from the Azure portal
key = "<your-key>"
endpoint = "<your-endpoint>"
region = "<region>"

credential = TranslatorCredential(key, region)
text_translator = TextTranslationClient(endpoint=endpoint, credential=credential)

try:
    source_language = "en"
    target_languages = ["es", "it"]
    input_text_elements = [ InputTextItem(text = "This is a test") ]

    response = text_translator.translate(content = input_text_elements, to = target_languages, from_parameter = source_language)
    translation = response[0] if response else None

    if translation:
        for translated_text in translation.translations:
            print(f"Text was translated to: '{translated_text.to}' and the result is: '{translated_text.text}'.")

except HttpResponseError as exception:
    print(f"Error Code: {exception.error.code}")
    print(f"Message: {exception.error.message}")
Run the application
Once you've added the code sample to your application, build and run your program:
Navigate to the folder where you have your text-translation-app.py file.
Type the following command in your terminal:
python text-translation-app.py
Here's a snippet of the expected output:

That's it, congratulations! In this quickstart, you used a Text Translation SDK to translate text.
Next steps
Learn more about Text Translation development options: