Note
Access to this page requires authorization. You can try signing in or changing directories.
Access to this page requires authorization. You can try changing directories.
Question
Thursday, January 3, 2019 5:12 AM
Dear Concern,
I need help for configure VHD to azure VM
I have convert VMWare VM to VHD and uploaded in to Azure Storage.
I need guide step by step how to configure VHD to Azure VM.
All replies (4)
Thursday, January 3, 2019 5:17 AM
Hello,
- Convert the vhdx file to vhd
- Upload the vhd file to Azure
- Attach this uploaded vhd disk to a VM
Use the Azure Portal and Windows PowerShell to perform these tasks.
Please note that this guide can be used to import a simple VHD disk containing data, or to import a Virtual Machine image. In both cases, you must upload the VHD disk to Azure and then:
- Attach the disk to an existing VM
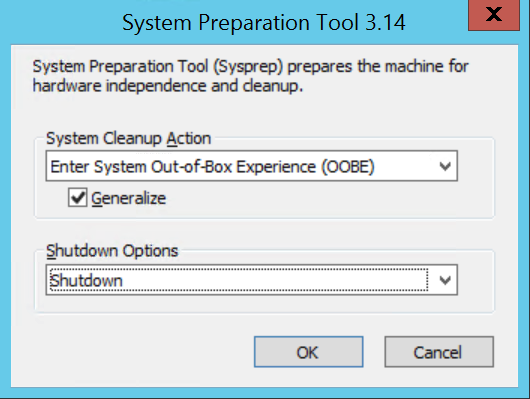
- or create an Azure Image based on the uploaded VHD disk. Then, you can create a new Virtual Machine using this image. If you want to upload a VM to Azure, you must sysprep the OS as a prerequisite. Once you have finished the customization, navigate to c:\windows\system32\sysprep and run sysprep.exe. Run the system preparation with the following settings:
Creating the VHD disk
Let’s start by creating a VHD disk. In this example, I will create a local VHD file using the disk management utility. Click “Action” and select “Create VHD”:
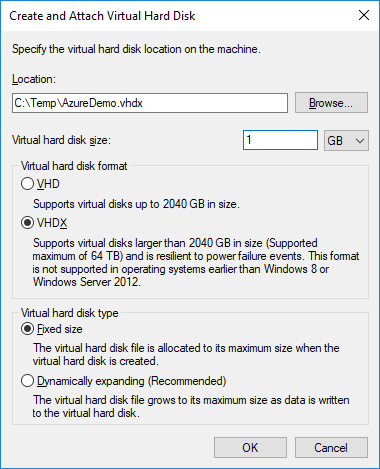
I selected VHDX to describe how to convert a VHDX disk to VHD format. Wait until the VHDX disk is successfully created.

Next, you can initialize the disk and format the partition. Open the Windows Explorer and confirm that you can create an item on the disk.

In my case, I will copy and paste the SCCM executable.

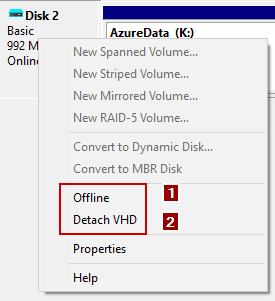
When you are ready to import you VHDX to Azure, you can detach the disk. First, select “Offline” and then “Detach VHD”:
Converting the VHD disk
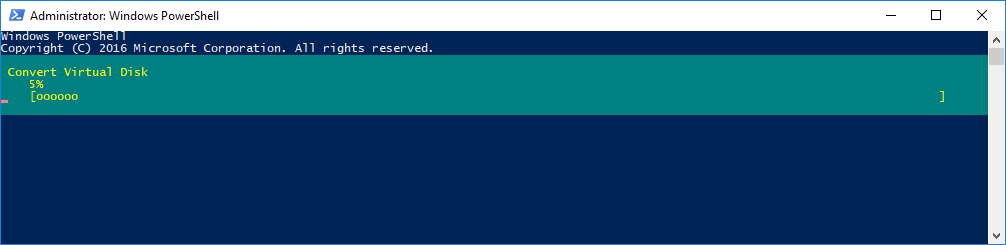
Before uploading the VHDX to Azure, you must convert the disk to the VHD format. Azure does not support VHDX disks, so you must run the following PowerShell command to perform this task:

Note:
- Open the PowerShell console as “Administrator”
- The Hyper-V Virtual Machine Management Windows Service must be running.

I can confirm that the VHD file has been successfully created:

| StarWind Virtual SAN eliminates any need for physical shared storage just by mirroring internal flash and storage resources between hypervisor servers. Furthermore, the solution can be run on the off-the-shelf hardware. Such design allows StarWind Virtual SAN to not only achieve high performance and efficient hardware utilization but also reduce operational and capital expenses. | |
| Learn more about ➡ StarWind Virtual SAN. |
Uploading the VHD disk
For the next steps, you must have Azure-RM PowerShell module installed on your workstation because we will use the Add-AzureRmVhd cmdlet. This cmdlet uploads a virtual hard disk from an on-premises virtual machine to a blob in a cloud storage account in Azure. Open the PowerShell console, and connect to your Azure subscription:

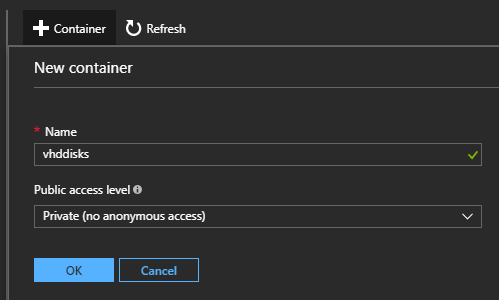
Now, we need to create a container and grab the URL needed to upload our VHD disk. Open your Storage Account, and navigate to “Containers” and click “+ Container” to create the container:
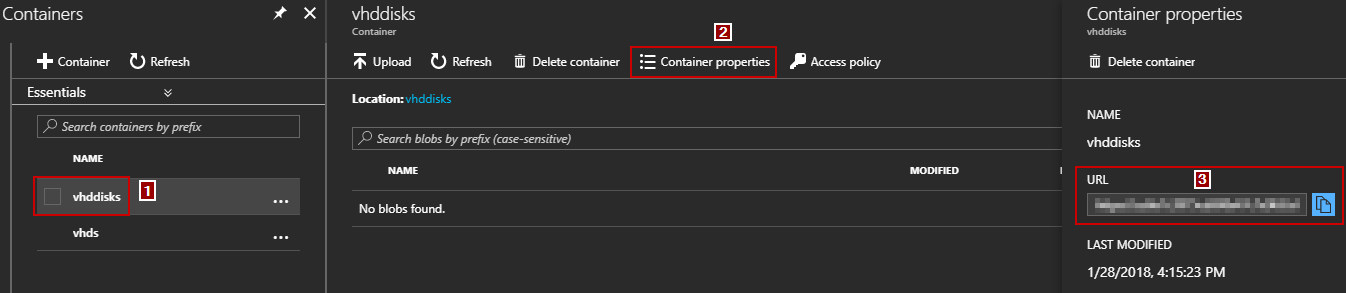
You can get the URL from the Azure portal when you go into the Storage Account:
- Blobs
- Container
- Containers Properties
I did this through the Azure Resource Manager (ARM) Portal but you also can retrieve this information with PowerShell by creating an Azure Storage Context:

Now, you can easily build the URL properties:

OK, we are ready to import the VHD file to Azure. Use the following commands:

Depending on the size of your VHD disk, you must wait a moment…

Once the upload is done, I can confirm that the VHD file exists in my Azure storage.

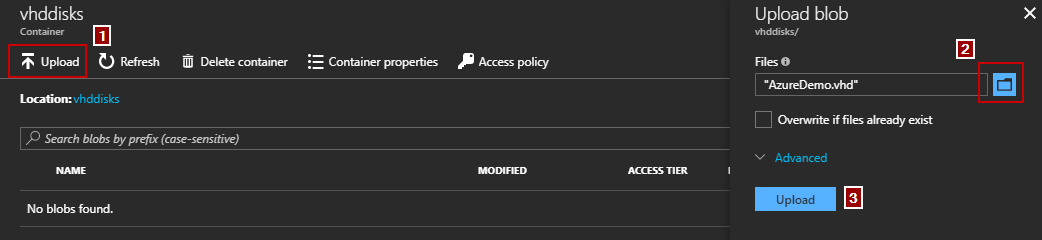
For those of you who prefer to use the Azure portal, you can upload the VHD disk by clicking “Upload”:
Attaching the VHD disk or Creating a new VM
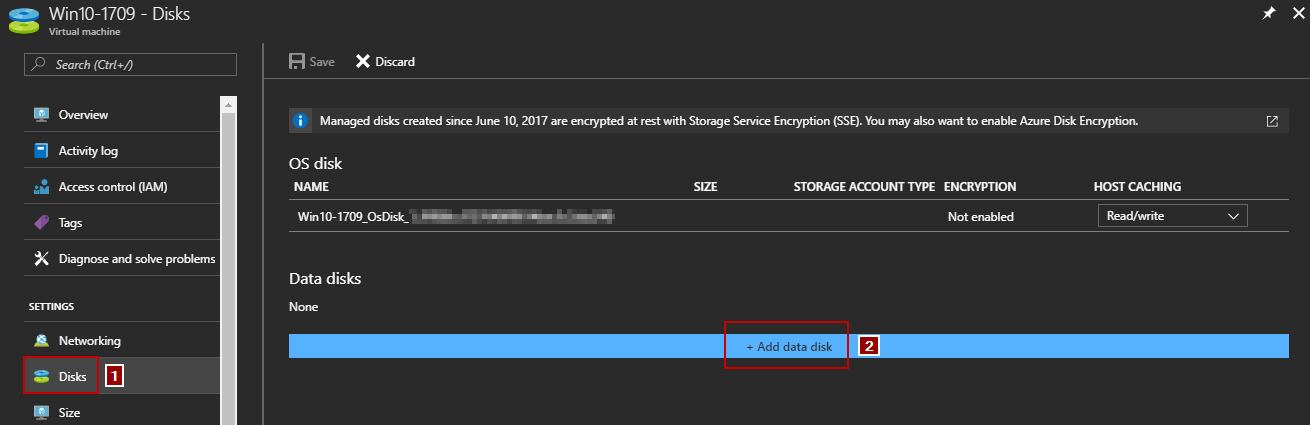
To finish, open the Virtual Machine blade, and select “Disks” to attach the uploaded disk:
If you want to create a new VM based on the uploaded VHD disk, you will need first, to create an Azure Image:
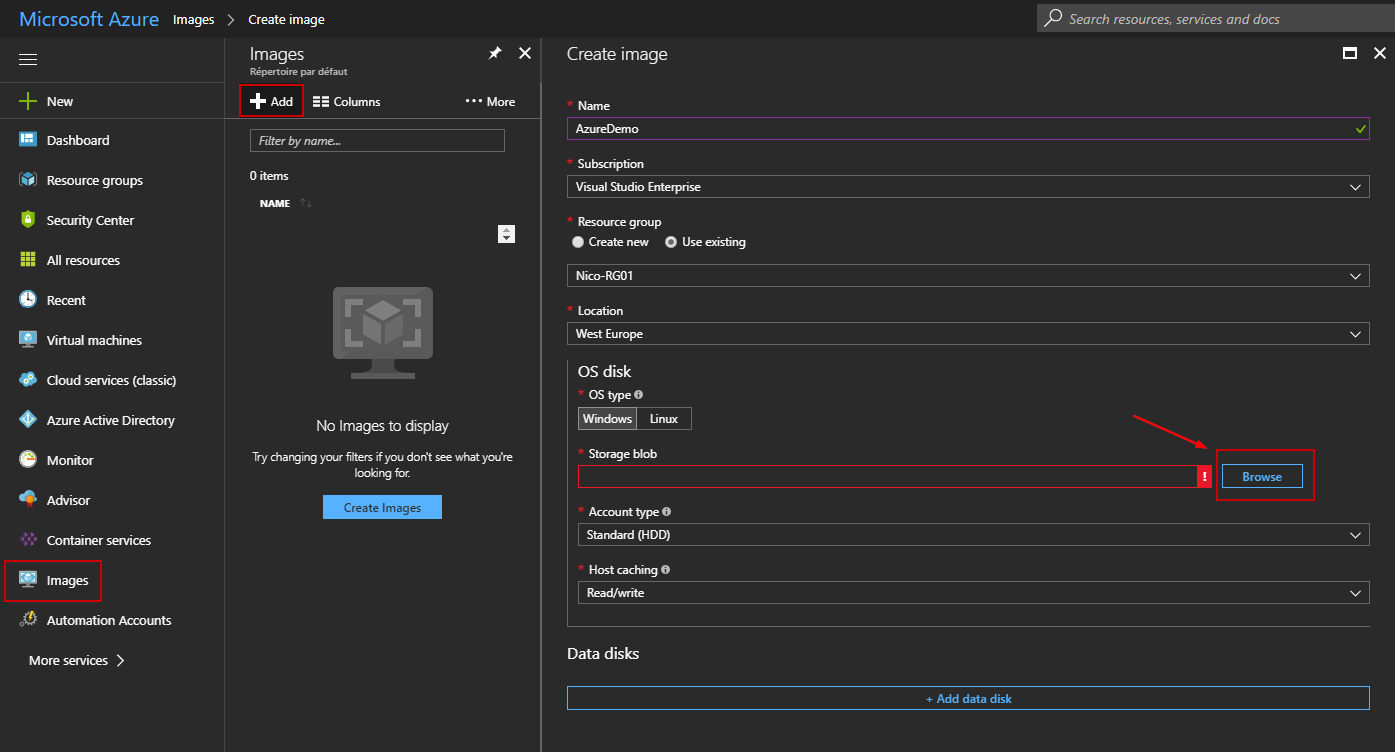
Do not be mistaken by clicking “Add data disk”. Here, we want to create the OS disk, not the data disk!
To finish, set the VM image as a source image for the new VM. So set the source image using the ID of the managed VM image:
$vm = Set-AzureRmVMSourceImage -VM $vm -Id $image.Id
If you need more information, you can read the following documentation: /en-us/azure/virtual-machines/windows/upload-generalized-managed
Thursday, January 3, 2019 5:42 AM
Thanks shubhamagarwal
I have trying but error is when create image, see below image

Thursday, January 3, 2019 5:55 AM
Hello ,
Thanks for your reply. I would recommend you to create a new Technical Support Request with our Virtual machine team who will directly get in touch with you and assist you further.
Regards,
Shubham Agarwal
Thursday, January 3, 2019 6:12 PM
Can you please look into deployment operations and see which resource deployment failed? You will also see the deployment failure error message. Please share the error message here so that we can troubleshoot better. Thanks.
Karishma Tiwari - MSFT